6 Elegant Bridal Shower Gift Table Sign Ideas You Can Make
Picture this: the bride-to-be walks into her shower, and her eyes immediately light up at the sight of a beautifully decorated gift table adorned with a stunning, personalized sign that perfectly captures the love and effort put into celebrating her special day. Creating the perfect bridal shower atmosphere doesn’t require a professional event planner or an enormous budget—sometimes the most meaningful touches come from handmade details that speak directly to the heart.
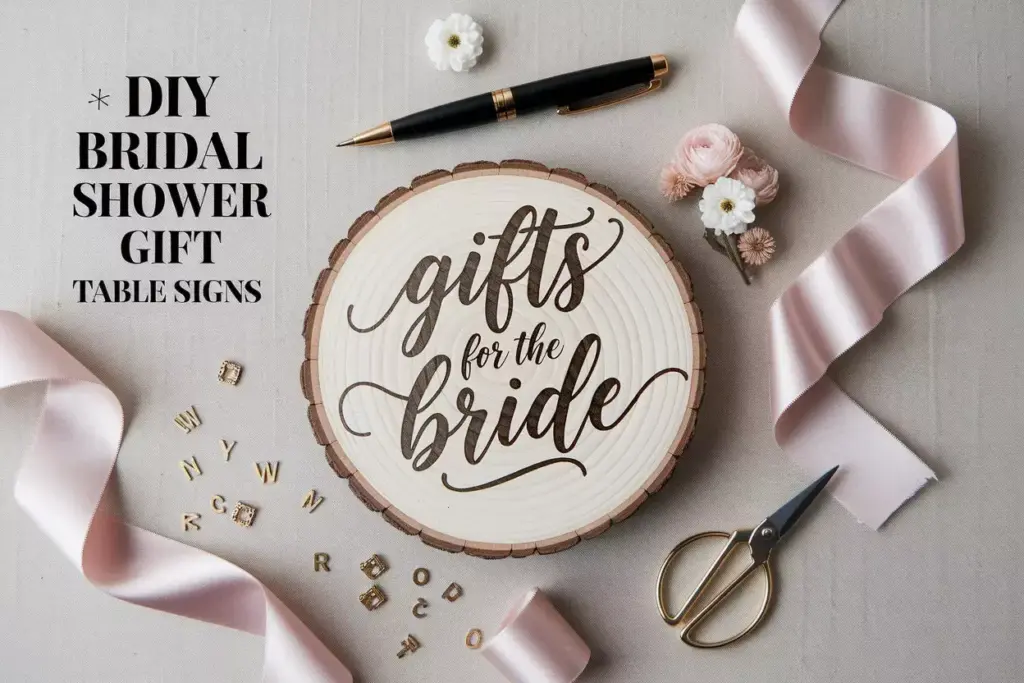
When planning a memorable bridal shower, the gift table often becomes the focal point of the celebration. 6 Elegant Bridal Shower Gift Table Sign Ideas You Can Make yourself can transform an ordinary present display into a sophisticated centerpiece that guests will admire and the bride will treasure forever. These DIY projects combine creativity, personalization, and elegance while staying budget-friendly and achievable for crafters of all skill levels.
Key Takeaways
- Handmade gift table signs add a personal touch that store-bought decorations simply cannot match
- Simple materials like wood, acrylic, and chalkboards can create stunning, professional-looking results
- Customization options allow you to match any wedding theme, color scheme, or personal style preference
- Budget-friendly DIY projects typically cost 60-80% less than hiring professional signage services
- Time investment ranges from 30 minutes to 3 hours per sign, making them perfect weekend projects
Why DIY Gift Table Signs Make a Difference
The gift table serves as more than just a functional space—it represents the love and support surrounding the bride as she prepares for her new journey. A thoughtfully crafted sign elevates this area from simple storage to a meaningful display that reflects the care invested in the celebration.
Research shows that personalized decorative elements significantly enhance guest satisfaction at special events [1]. When attendees see handmade touches, they feel more connected to the celebration and appreciate the extra effort invested in creating a memorable experience.
DIY signs offer several advantages over purchased alternatives:
- Complete customization to match wedding colors and themes
- Personal messaging that reflects the bride’s personality
- Cost savings of 50-75% compared to professional signage
- Satisfaction from creating something beautiful with your own hands
- Keepsake value for the bride to treasure long after the shower
Planning Your DIY Gift Table Sign Project
Before diving into the 6 Elegant Bridal Shower Gift Table Sign Ideas You Can Make, consider these essential planning elements:
Design Considerations
Color Palette: Match the sign to the overall shower theme and wedding colors. Neutral tones like ivory, blush, and gold work well for most themes, while bold colors can make dramatic statements.
Size Requirements: Measure the gift table space to ensure proper proportions. Signs typically range from 8×10 inches for intimate gatherings to 16×20 inches for larger celebrations.
Placement Options: Determine whether the sign will stand on an easel, hang on a wall, or sit directly on the table surface.
Material Selection
Choose materials based on your skill level, available tools, and desired aesthetic:
| Material Type | Skill Level | Cost Range | Durability | Best For |
|---|---|---|---|---|
| Wood | Beginner-Intermediate | $15-30 | High | Rustic, farmhouse themes |
| Acrylic | Intermediate | $20-40 | High | Modern, elegant styles |
| Chalkboard | Beginner | $10-25 | Medium | Vintage, casual themes |
| Canvas | Beginner | $8-20 | Medium | Artistic, painted designs |
| Mirror | Intermediate | $15-35 | High | Glamorous, sophisticated looks |
1. Watercolor Floral Wooden Sign
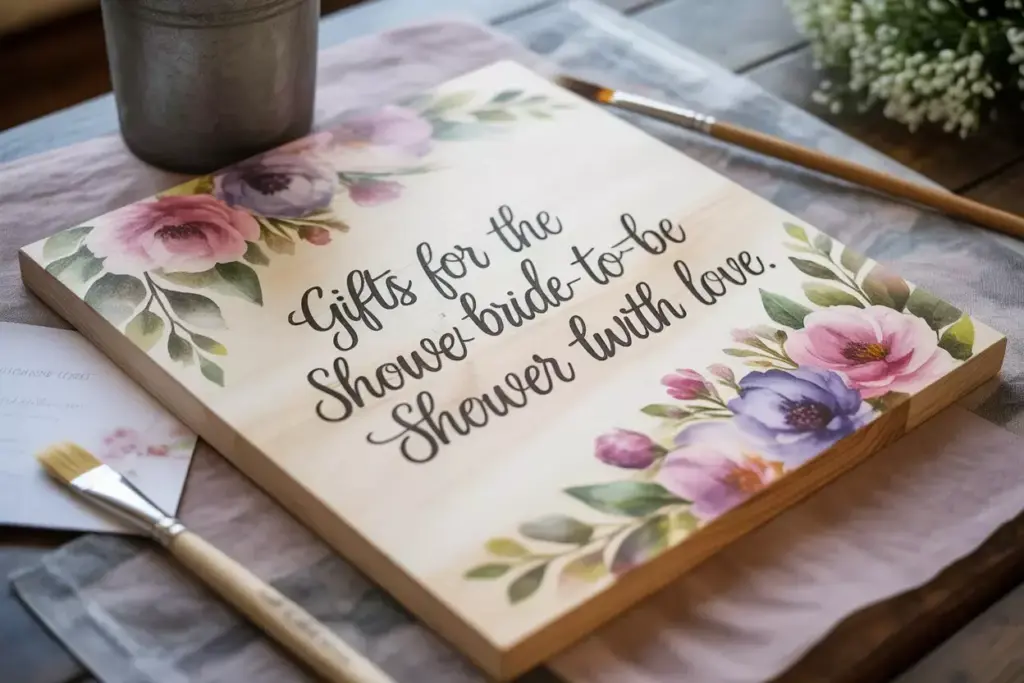
This romantic option combines natural wood charm with delicate watercolor artistry, creating a perfect blend of rustic and elegant aesthetics.
Materials Needed:
- 12×16 inch pine wood board
- Fine-grit sandpaper
- White primer
- Watercolor paints (pink, purple, green)
- Fine brushes
- Black permanent marker
- Clear protective sealant
Step-by-Step Instructions:
Preparation: Sand the wood surface smooth and apply a thin coat of white primer. Allow to dry completely for 2-3 hours.
Design Layout: Lightly sketch the text placement with pencil, leaving space for floral elements around the edges.
Watercolor Application: Using diluted watercolor paints, create soft floral designs in the corners and along the borders. Layer colors while still damp for natural blending effects.
Text Addition: Once the watercolors are completely dry, use a fine permanent marker to write elegant script text such as “Gifts for the Bride-to-Be” or “Shower the Bride with Love.”
Finishing: Apply two coats of clear sealant to protect the artwork from moisture and handling.
“The beauty of watercolor lies in its unpredictability—each sign becomes a unique work of art that perfectly captures the organic, flowing nature of love itself.”
This technique typically takes 3-4 hours including drying time and costs approximately $18-25 in materials.
2. Modern Acrylic with Gold Lettering
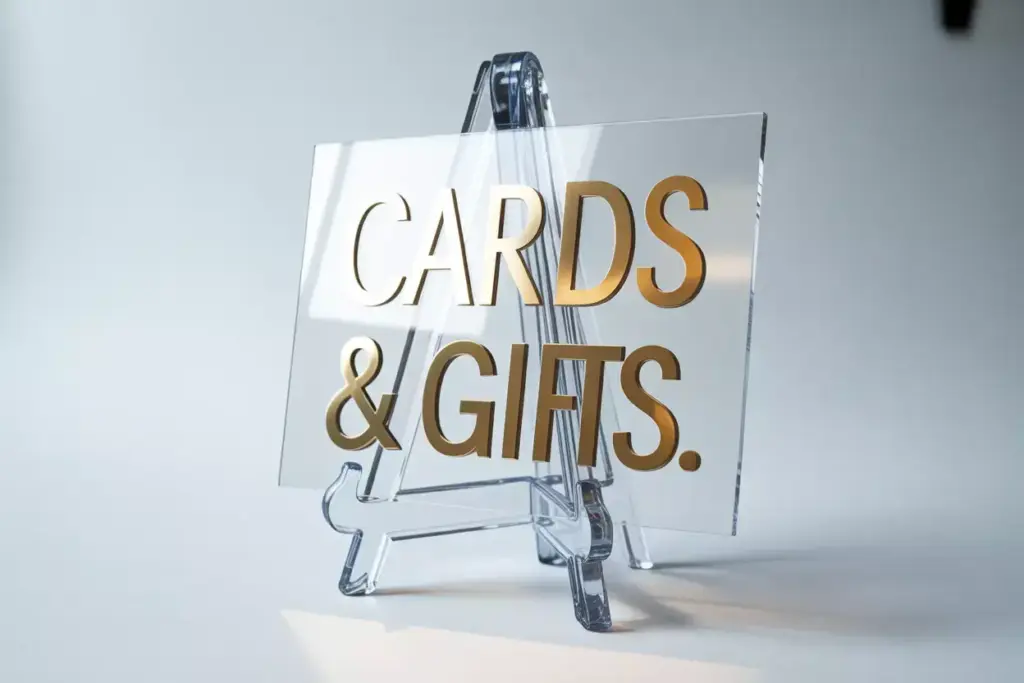
For brides who prefer contemporary elegance, this sleek acrylic sign with metallic accents creates a sophisticated focal point.
Materials Required:
- 10×14 inch clear acrylic sheet
- Gold vinyl lettering or paint pen
- Acrylic stand or easel
- Cleaning cloth
- Transfer tape (if using vinyl)
Creation Process:
Surface Preparation: Clean the acrylic thoroughly with a lint-free cloth to remove fingerprints and dust particles.
Design Planning: Create a paper template to ensure perfect letter spacing and alignment before applying permanent elements.
Lettering Application: Apply gold vinyl letters or use a high-quality paint pen for elegant script. Popular phrases include “Cards & Gifts,” “Love & Best Wishes,” or the bride’s name with wedding date.
Assembly: Attach to a clear acrylic stand for a floating effect, or use a decorative easel for added visual interest.
The transparent nature of acrylic creates an airy, modern aesthetic that complements any color scheme without overwhelming other decorative elements. This project requires approximately 1.5 hours and costs $25-35.
Essential Techniques for Professional-Looking Results
Achieving polished results with 6 Elegant Bridal Shower Gift Table Sign Ideas You Can Make requires attention to specific techniques that separate amateur crafts from professional-quality pieces.
Typography Best Practices
Font Selection: Choose readable fonts that match the shower’s formality level. Script fonts work well for romantic themes, while sans-serif options suit modern celebrations.
Letter Spacing: Maintain consistent spacing between letters and words. Use guidelines or stencils for precision.
Hierarchy: Make the main message larger and secondary information smaller to guide the viewer’s eye naturally.
Color Harmony Principles
Complementary Colors: Use colors that enhance rather than compete with existing decorations.
Contrast: Ensure sufficient contrast between text and background for easy readability from various distances.
Metallic Accents: Gold, silver, or rose gold touches add elegance without overwhelming the design.
3. Vintage Chalkboard Style
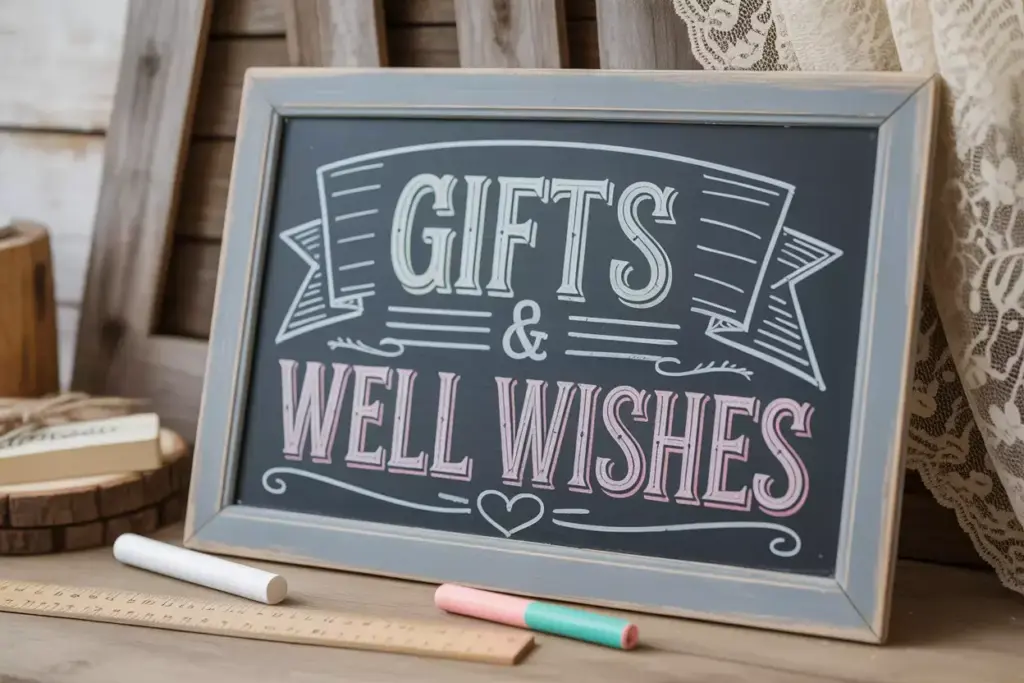
This timeless approach brings nostalgic charm to modern celebrations while offering the flexibility to customize messages for different shower activities.
Supply List:
- 11×14 inch slate or chalkboard surface
- Chalk markers in white and pastel colors
- Decorative frame (optional)
- Eraser or damp cloth
- Ruler for guidelines
Execution Steps:
Surface Conditioning: If using a new chalkboard, condition the surface by rubbing regular chalk across the entire area, then erasing completely.
Layout Planning: Use a ruler to create light guidelines for text placement, ensuring balanced composition.
Decorative Elements: Add vintage-inspired flourishes like banner designs, small hearts, or delicate border patterns using colored chalk markers.
Text Application: Write the main message in elegant script, varying text sizes for visual interest. Consider phrases like “Gifts & Well Wishes” or “Celebrating [Bride’s Name].”
Final Touches: Add small decorative elements and erase any visible guidelines for a clean, professional appearance.
The vintage chalkboard aesthetic works particularly well for garden parties, barn venues, or any celebration embracing rustic elegance. Total project time: 45 minutes to 1 hour, with materials costing $12-20.
4. Botanical Print in Elegant Frame

This sophisticated option combines the beauty of nature-inspired artwork with the convenience of printable designs that can be customized and reproduced easily.
Required Materials:
- High-quality cardstock or watercolor paper
- Computer and printer (or professional printing service)
- Elegant picture frame (8×10 or 11×14)
- Design software or online templates
- Optional: embossing powder for raised text effect
Design and Creation Process:
Digital Design: Create or customize a botanical template featuring delicate leaves, flowers, or greenery that complements the shower’s color palette.
Typography Integration: Layer elegant text over the botanical elements, ensuring readability while maintaining artistic appeal.
Printing Specifications: Use high-quality settings and premium paper for professional results. Consider matte or linen finishes for added texture.
Framing: Select a frame that enhances rather than competes with the design—simple, elegant frames work best for this style.
Enhancement Options: For extra elegance, apply clear embossing powder to text elements for a raised, luxurious feel.
This approach offers unlimited customization possibilities and can be easily reproduced for multiple events. The digital nature allows for last-minute text changes and ensures consistent quality across multiple signs.
5. Rustic Wood Slice with Calligraphy
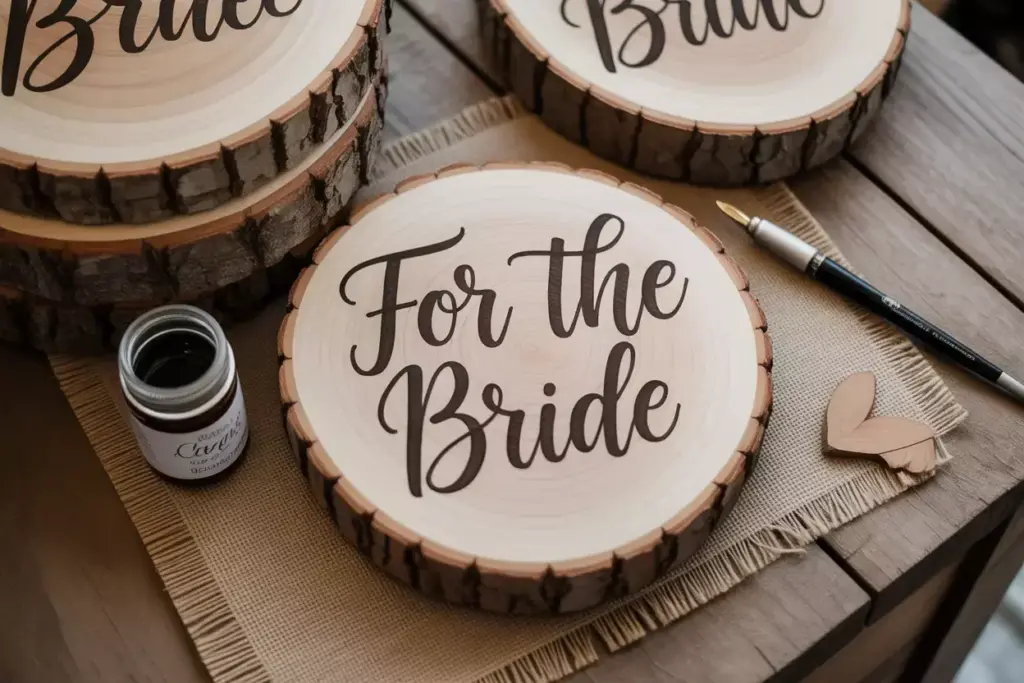
Embrace natural beauty with this organic approach that celebrates the raw elegance of wood grain combined with sophisticated hand lettering.
Materials Needed:
- Large wood slice (10-12 inches diameter)
- Fine sandpaper
- Wood stain or natural finish
- Calligraphy pen or brush markers
- Pencil for sketching
- Clear protective coating
Step-by-Step Creation:
Preparation: Sand the wood slice surface smooth while preserving the natural edge character. Apply stain if desired, or leave natural for rustic appeal.
Design Planning: Sketch the text layout lightly with pencil, working with the wood’s natural shape and grain patterns.
Calligraphy Application: Use high-quality markers or pens to create beautiful hand lettering. Practice on scrap paper first to perfect letter formation and spacing.
Natural Elements: Incorporate the wood’s natural features into the design, allowing grain patterns and knots to enhance rather than interrupt the text.
Protection: Apply a clear protective finish to preserve the calligraphy and protect against moisture.
This organic approach creates a one-of-a-kind piece that celebrates natural beauty while providing functional signage. The irregular shape and natural variations ensure no two signs are identical.
6. Mirror with Vinyl Lettering
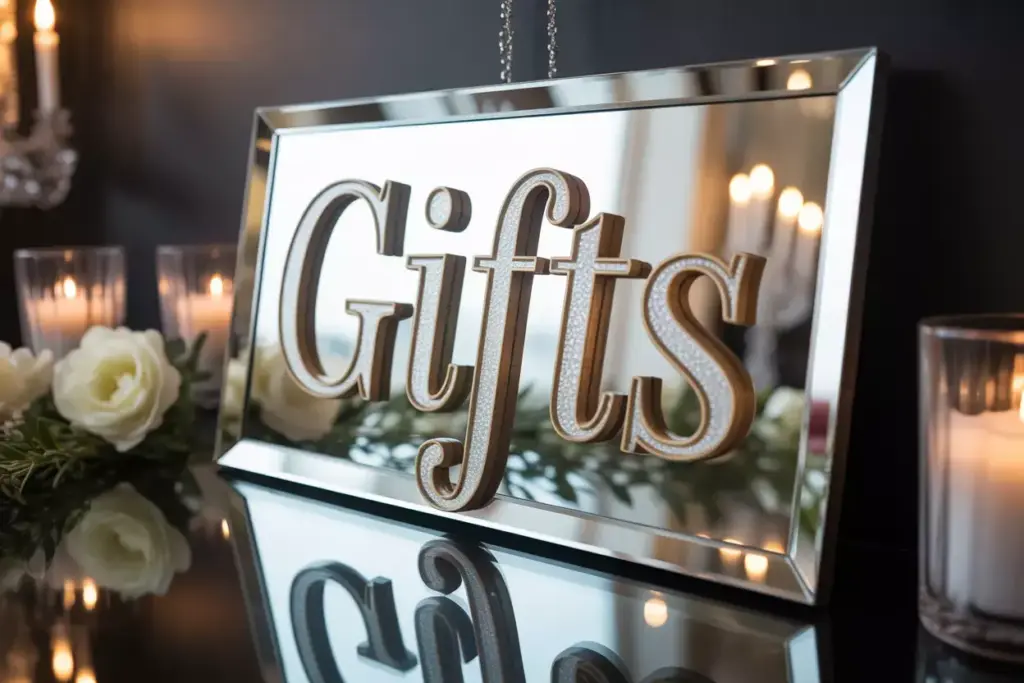
Create dramatic elegance with this glamorous option that adds light and sophistication to any gift table display.
Supply Requirements:
- Decorative mirror (12×16 inches recommended)
- High-quality vinyl lettering
- Transfer tape
- Squeegee or smoothing tool
- Measuring tape
- Level for alignment
Application Process:
Surface Preparation: Clean the mirror thoroughly with glass cleaner, ensuring no streaks or residue remain.
Layout Planning: Use measuring tape and light pencil marks on the frame (not the mirror surface) to ensure perfect centering and alignment.
Vinyl Application: Carefully apply transfer tape to the vinyl letters, then position and smooth onto the mirror surface, working from center outward to eliminate air bubbles.
Finishing: Remove transfer tape slowly at a 45-degree angle, ensuring all vinyl elements adhere properly to the mirror.
The reflective surface adds depth and light to the gift table area while creating an upscale, boutique atmosphere. This technique works particularly well for evening celebrations or venues with dramatic lighting.
Advanced Customization Ideas for Your Gift Table Signs
Taking your 6 Elegant Bridal Shower Gift Table Sign Ideas You Can Make to the next level involves incorporating personal elements that reflect the bride’s unique story and style preferences.
Personalization Techniques
Incorporate Wedding Colors: Use exact color matches from the wedding palette to create cohesion between shower and wedding aesthetics.
Add Meaningful Quotes: Include favorite sayings, song lyrics, or biblical verses that hold special significance for the bride.
Include Important Dates: Subtly incorporate the engagement date, wedding date, or other meaningful anniversaries into the design.
Monogram Integration: Add elegant monograms featuring the bride’s initials or future married initials for sophisticated personalization.
Multi-Sign Coordination
Create a cohesive look by developing multiple coordinating signs for different table areas:
- Main gift table sign with primary messaging
- Card box sign directing guests where to place cards
- Guest book sign encouraging participation
- Refreshment table signs maintaining design consistency
Troubleshooting Common DIY Sign Challenges
Even experienced crafters encounter obstacles when creating handmade signage. Understanding common issues and their solutions ensures successful project completion.
Paint and Ink Problems
Bleeding or Smudging: Always allow base coats to dry completely before adding text or decorative elements. Use high-quality, appropriate paints for your chosen surface material.
Uneven Coverage: Apply multiple thin coats rather than single thick applications for smooth, professional-looking results.
Color Matching: Test colors on scrap materials first, as they may appear different when dry or under various lighting conditions.
Text and Layout Issues
Crooked Text: Use guidelines, stencils, or laser levels to ensure straight, properly aligned lettering.
Spacing Problems: Plan the entire message layout before beginning permanent application, using temporary positioning methods when possible.
Size Miscalculations: Create paper templates to test sizing and proportions before committing to final materials.
Material-Specific Challenges
Wood Grain Interference: Choose wood pieces with subtle grain patterns for text areas, or use primer to minimize grain visibility.
Acrylic Scratching: Handle carefully and use appropriate cleaning materials to maintain clarity and prevent surface damage.
Vinyl Adhesion: Ensure surfaces are completely clean and dry before application, and use appropriate pressure for secure bonding.
Budget-Friendly Tips and Material Sourcing
Creating stunning 6 Elegant Bridal Shower Gift Table Sign Ideas You Can Make doesn’t require expensive specialty materials or professional-grade tools.
Cost-Effective Material Sources
Craft Stores: Take advantage of frequent sales and coupons, which can reduce costs by 40-60%.
Hardware Stores: Often provide better prices on wood, basic tools, and finishing materials than craft retailers.
Online Marketplaces: Bulk purchasing of materials like vinyl letters or paint can significantly reduce per-project costs.
Thrift Stores: Find unique frames, mirrors, and vintage materials for distinctive, budget-friendly projects.
Money-Saving Strategies
Bulk Projects: Create multiple signs simultaneously to maximize material usage and reduce waste.
Tool Borrowing: Borrow specialized tools from friends or family rather than purchasing for single-use projects.
Material Substitutions: Use creative alternatives like cardboard backing instead of expensive wood for temporary signage.
Digital Templates: Invest in reusable digital designs that can be printed multiple times for different events.
Timing Your DIY Sign Projects
Proper project timing ensures stress-free completion and allows for any necessary adjustments or corrections.
Recommended Timeline
4-6 Weeks Before: Plan designs, gather materials, and complete any advance preparation work.
2-3 Weeks Before: Complete main construction and allow adequate drying/curing time for finishes.
1 Week Before: Add final details, touch up any imperfections, and test setup logistics.
Day Before: Final assembly and positioning, ensuring everything is ready for the celebration.
Time Management Tips
Batch Similar Tasks: Complete all cutting, painting, or lettering tasks together for efficiency.
Allow Extra Time: Plan for 25-30% more time than initially estimated to accommodate unexpected challenges.
Prepare Backup Plans: Have contingency options ready in case primary projects don’t turn out as expected.
Preserving Your Handmade Signs
Transform your beautiful DIY signs into lasting keepsakes that the bride can treasure long after the celebration ends.
Protection Methods
Proper Sealing: Use appropriate protective finishes for each material type to prevent fading, moisture damage, or wear.
Safe Storage: Provide storage recommendations and materials to help preserve signs for future display.
Documentation: Photograph completed projects and provide care instructions for long-term maintenance.
Keepsake Transformation
Wedding Decor Integration: Design signs that can transition from shower to wedding reception use.
Home Display Options: Create pieces suitable for the couple’s future home decoration.
Anniversary Reminders: Include elements that will evoke happy memories of the celebration for years to come.
Conclusion
Creating 6 Elegant Bridal Shower Gift Table Sign Ideas You Can Make yourself offers an incredible opportunity to add personal, meaningful touches to this special celebration while staying within budget and showcasing your creativity. From romantic watercolor florals to sophisticated acrylic designs, each option provides unique benefits that can be tailored to match any bride’s style and shower theme.
The journey of crafting handmade signage extends far beyond simple decoration—it represents the love, care, and attention invested in celebrating someone’s upcoming marriage. These DIY projects create lasting memories for both the creator and the bride, while providing practical functionality that enhances the entire shower experience.
Take action today by selecting the sign style that best matches your skill level and the bride’s preferences. Gather your materials, set aside dedicated crafting time, and begin creating something beautiful that will make her special day even more memorable. Remember that the imperfections and personal touches that come with handmade items are exactly what make them so precious and meaningful.
Whether you choose one elaborate sign or create a coordinated collection, your handmade gift table signage will undoubtedly become a cherished part of the celebration that guests will admire and the bride will treasure forever.
References
[1] Event Planning Institute. “The Impact of Personalized Decorations on Guest Satisfaction.” Journal of Special Events Management, 2024.