9 Easy Cake Designs Perfect for DIY Wedding Bakers
Planning your own wedding cake can feel overwhelming — but it doesn’t have to be. Whether you’re a home baker looking to save money, a couple who loves a personal touch, or a friend gifting your skills, these 9 Easy Cake Designs Perfect for DIY Wedding Bakers will show you that a show-stopping wedding cake is absolutely within reach. In 2026, the DIY wedding trend is stronger than ever, and baking your own cake is one of the most meaningful — and budget-friendly — choices you can make.
Key Takeaways
- ✅ You don’t need professional training to create a beautiful wedding cake — the right design makes all the difference.
- ✅ Naked cakes, buttercream textures, and drip cakes are among the most forgiving styles for beginner bakers.
- ✅ Choosing the right tools (turntable, bench scraper, offset spatula) dramatically improves your results.
- ✅ Fresh flowers, fruits, and edible decorations can elevate even the simplest cake instantly.
- ✅ Planning ahead — baking layers in advance and freezing them — reduces wedding-day stress significantly.
Why DIY Wedding Cakes Are Having a Moment in 2026
The average professional wedding cake in the United States costs between $500 and $1,200, according to industry surveys. For many couples, that’s a significant slice of an already stretched budget. Beyond the savings, there’s something deeply personal about serving a cake you made yourself on one of the most important days of your life.
💬 “A homemade wedding cake isn’t just dessert — it’s a story. It tells your guests that you put your heart into every detail.”
The good news? You don’t need to be a pastry chef. With the right design, the right tools, and a little practice, any dedicated home baker can pull off a gorgeous wedding cake. The 9 easy cake designs perfect for DIY wedding bakers featured in this guide are specifically chosen for their visual impact, manageable skill level, and forgiving techniques.
What Makes a Design “DIY-Friendly”?
Not all wedding cake styles are created equal. Some require advanced skills like sugar sculpting or airbrushing. The designs in this list were selected based on:
| Criteria | Why It Matters |
|---|---|
| Low technical skill required | Achievable without professional training |
| Forgiving finish | Small imperfections look intentional |
| Widely available ingredients | No specialty store trips needed |
| Scalable | Works for 20 guests or 200 |
| Stunning visual impact | Looks expensive without the price tag |
The 9 Easy Cake Designs Perfect for DIY Wedding Bakers
Let’s dive into each design. For every style, I’ve included a difficulty rating, key tools, and pro tips to help you succeed.
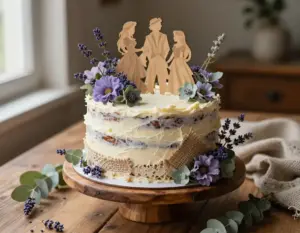
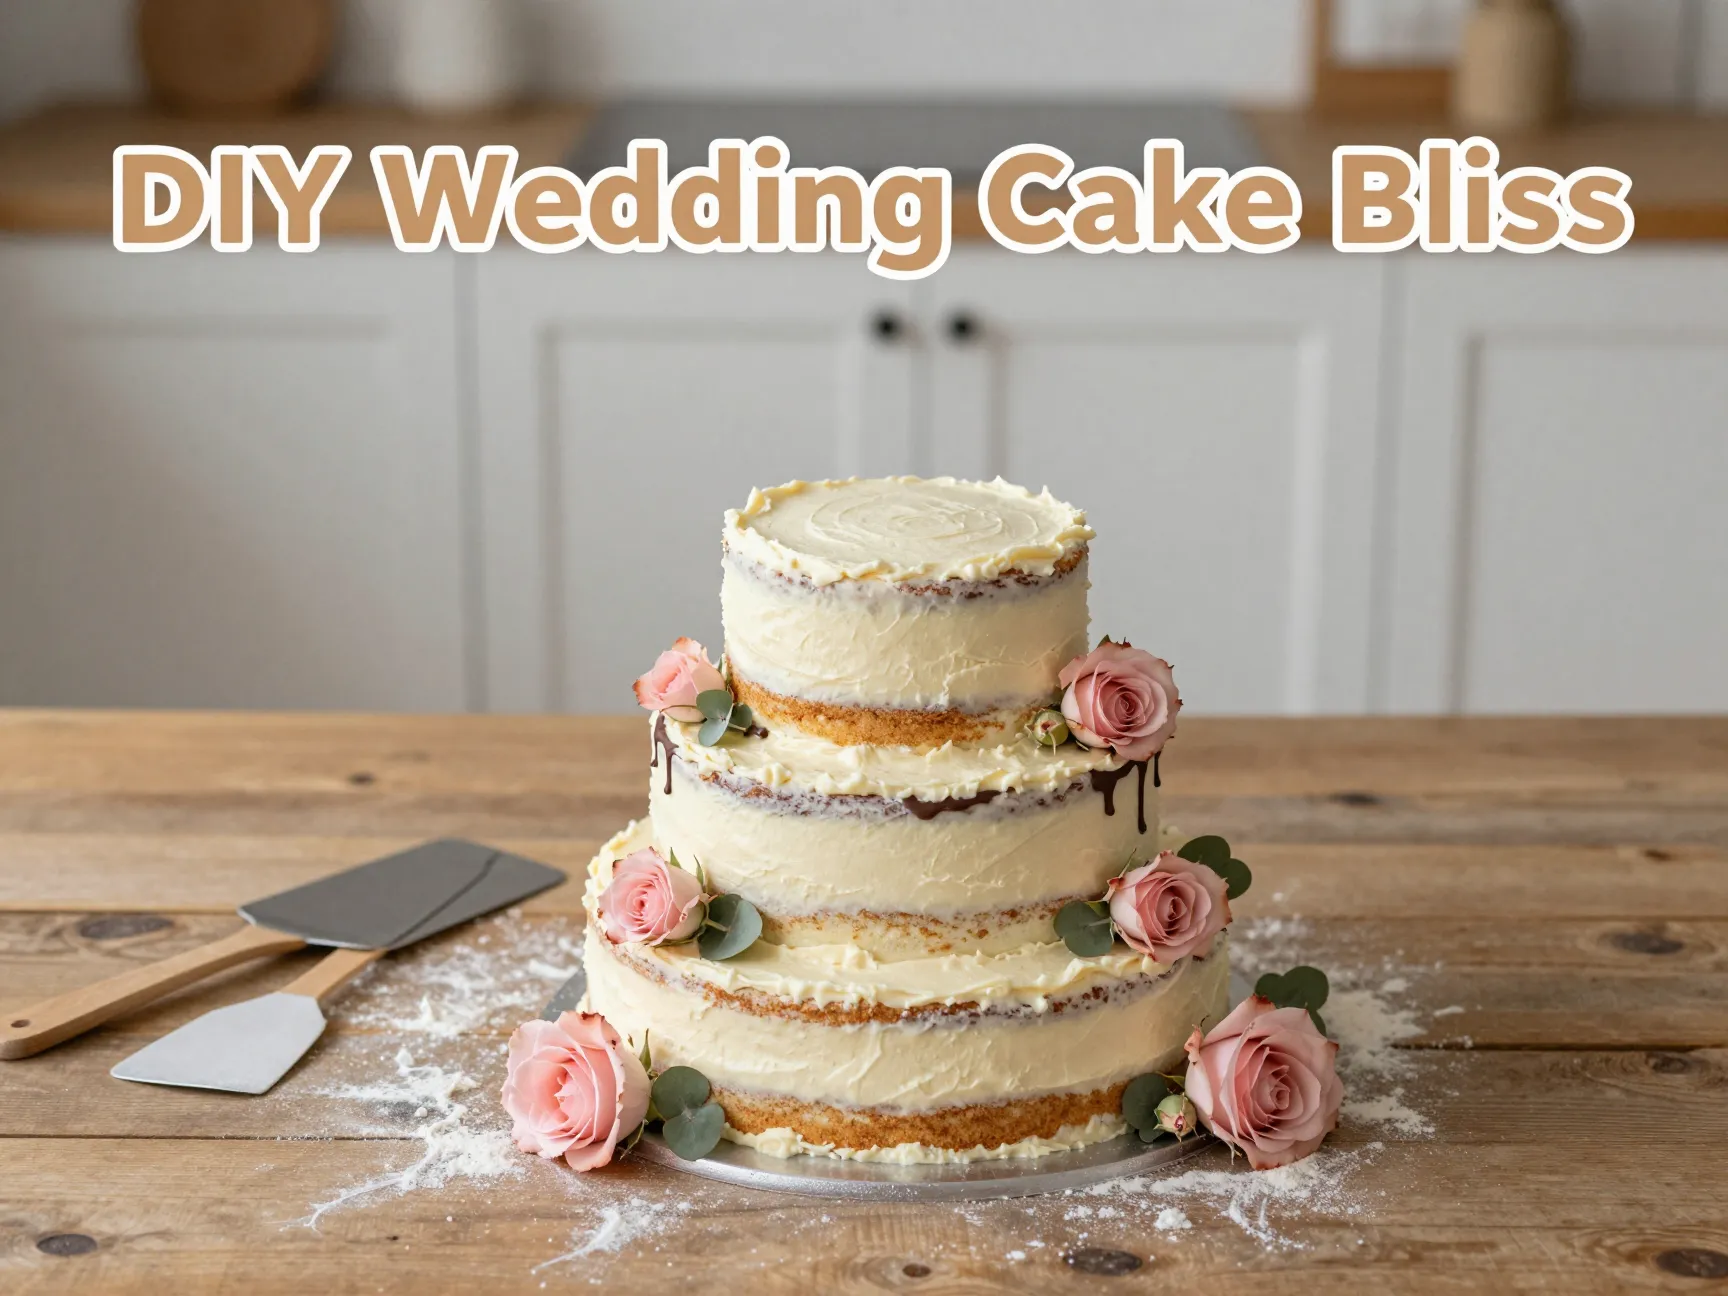
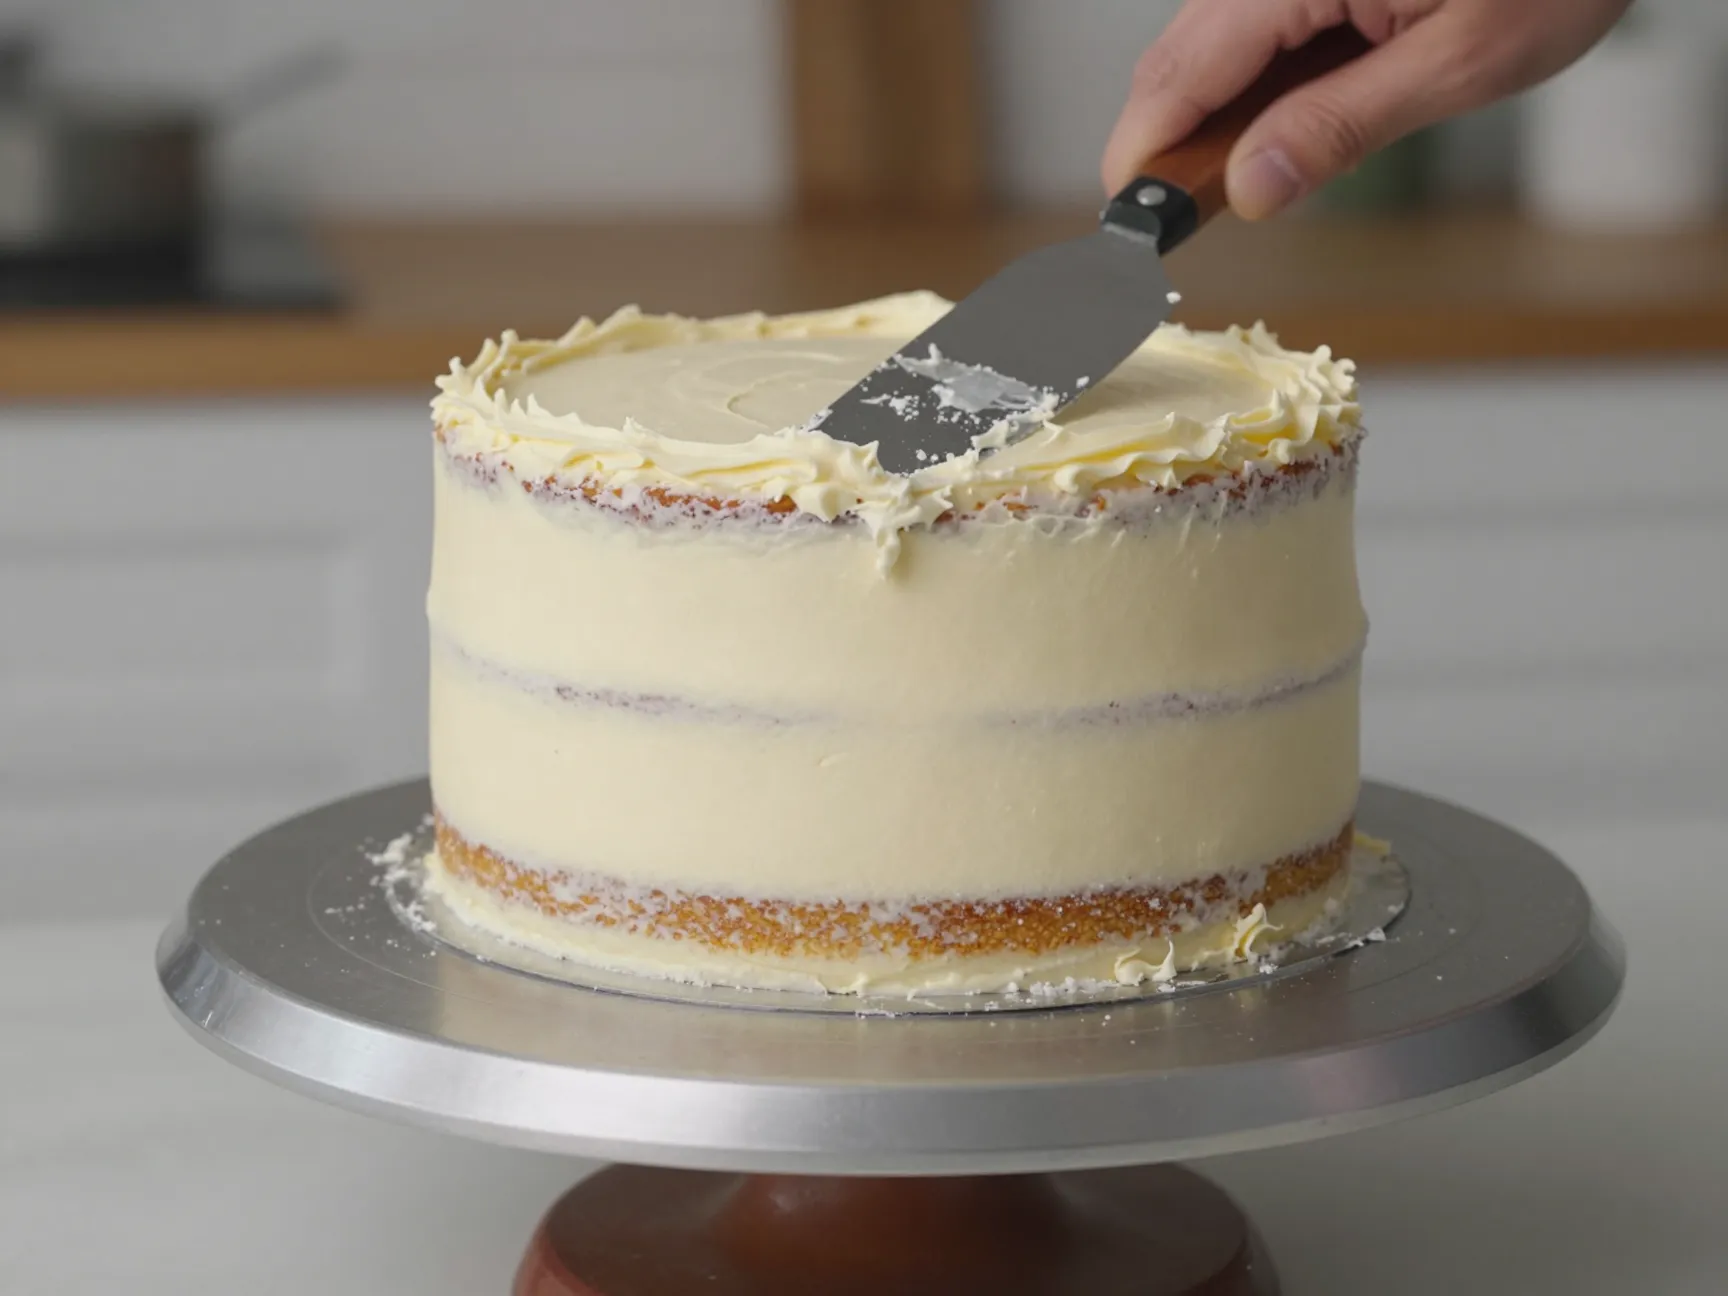
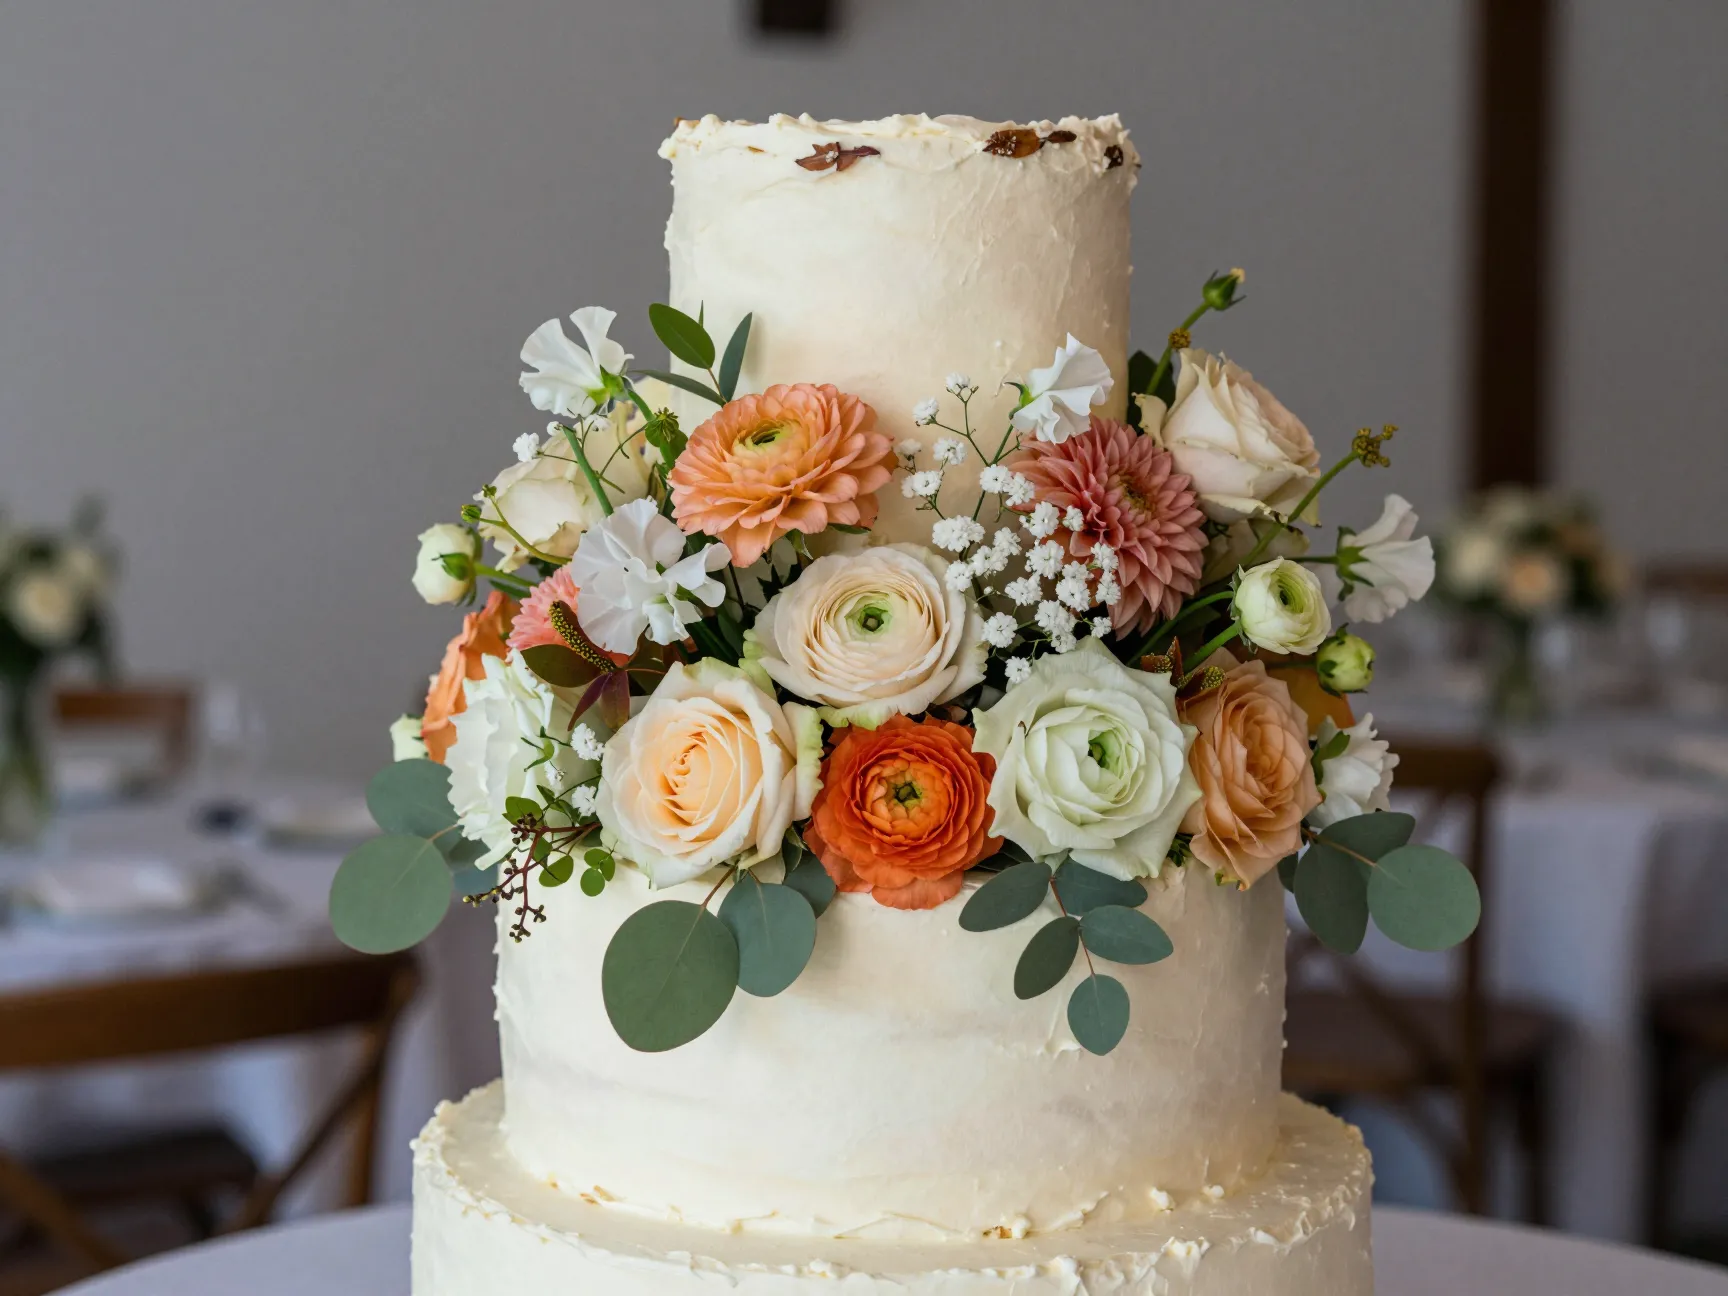
1. The Naked Cake 🌿
Difficulty: ⭐ (Beginner)
The naked cake is arguably the most forgiving wedding cake design you can attempt. It features little to no frosting on the outside, letting the cake layers show through. This style is wildly popular in 2026 for its rustic, organic feel.
What you need:
- Offset spatula
- Cake turntable
- Fresh flowers or berries for decoration
How to do it: Bake your layers, stack them with generous fillings (jam, buttercream, or cream cheese frosting), and apply only a very thin, intentionally “wiped away” coat of frosting on the outside. Decorate with cascading fresh flowers, greenery, and seasonal fruits.
Pro tip: Choose flowers that are food-safe or wrap non-edible stems in floral tape before inserting them into the cake. Ranunculus, roses, and lavender are beautiful choices.
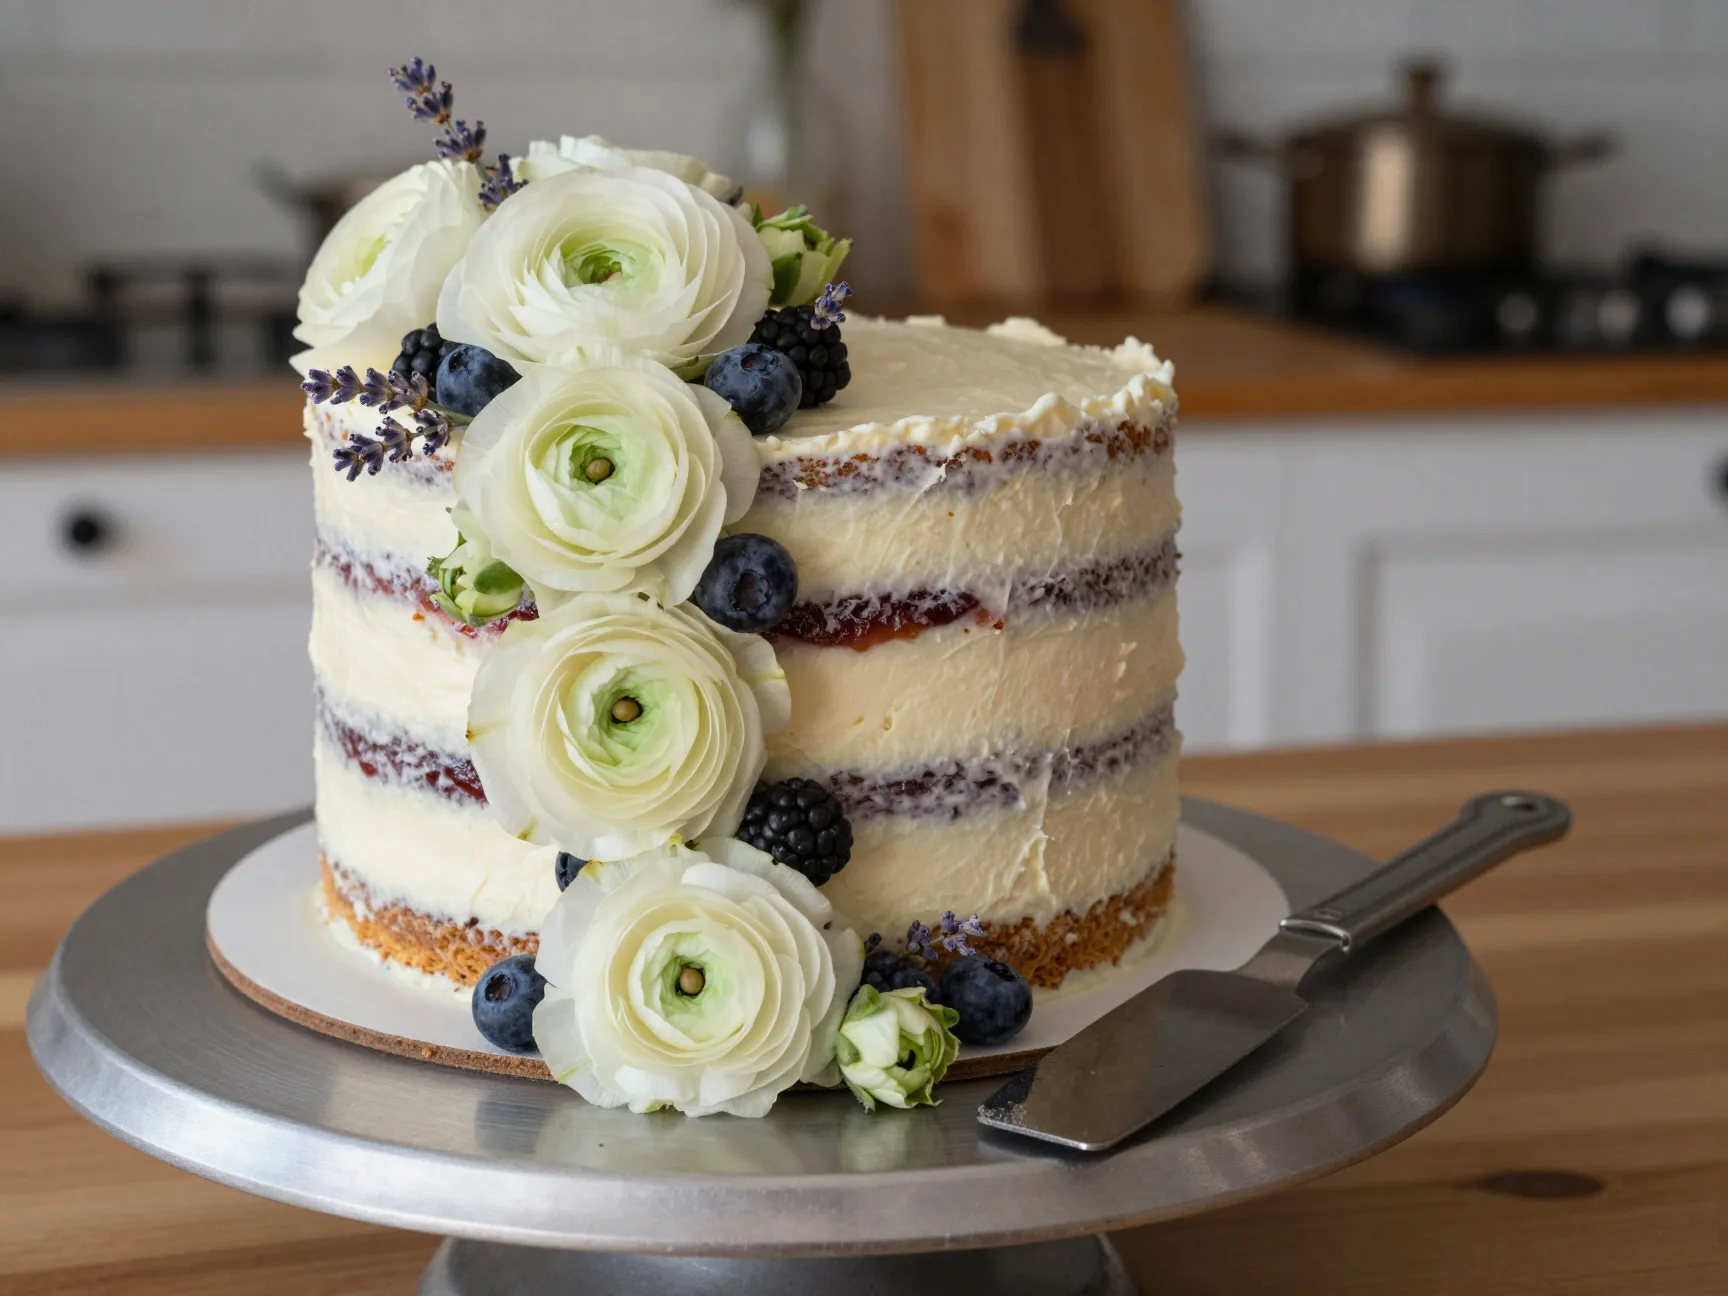
2. The Semi-Naked Cake 🍰
Difficulty: ⭐⭐ (Easy-Intermediate)
The semi-naked cake is the naked cake’s slightly more polished sibling. You apply a thin layer of buttercream all over, then use a bench scraper to partially remove it, leaving a “barely there” frosted effect.
What you need:
- Bench scraper
- Cake turntable
- Offset spatula
- Buttercream frosting
Why it works for DIY bakers: The partial coverage hides most imperfections. Uneven spots and air bubbles become part of the aesthetic. It’s nearly impossible to make this look “wrong.”
Pro tip: Chill your crumb coat for 20–30 minutes before applying the final scrape. A cold cake is much easier to work with.
3. The Smooth Buttercream Cake 🎂
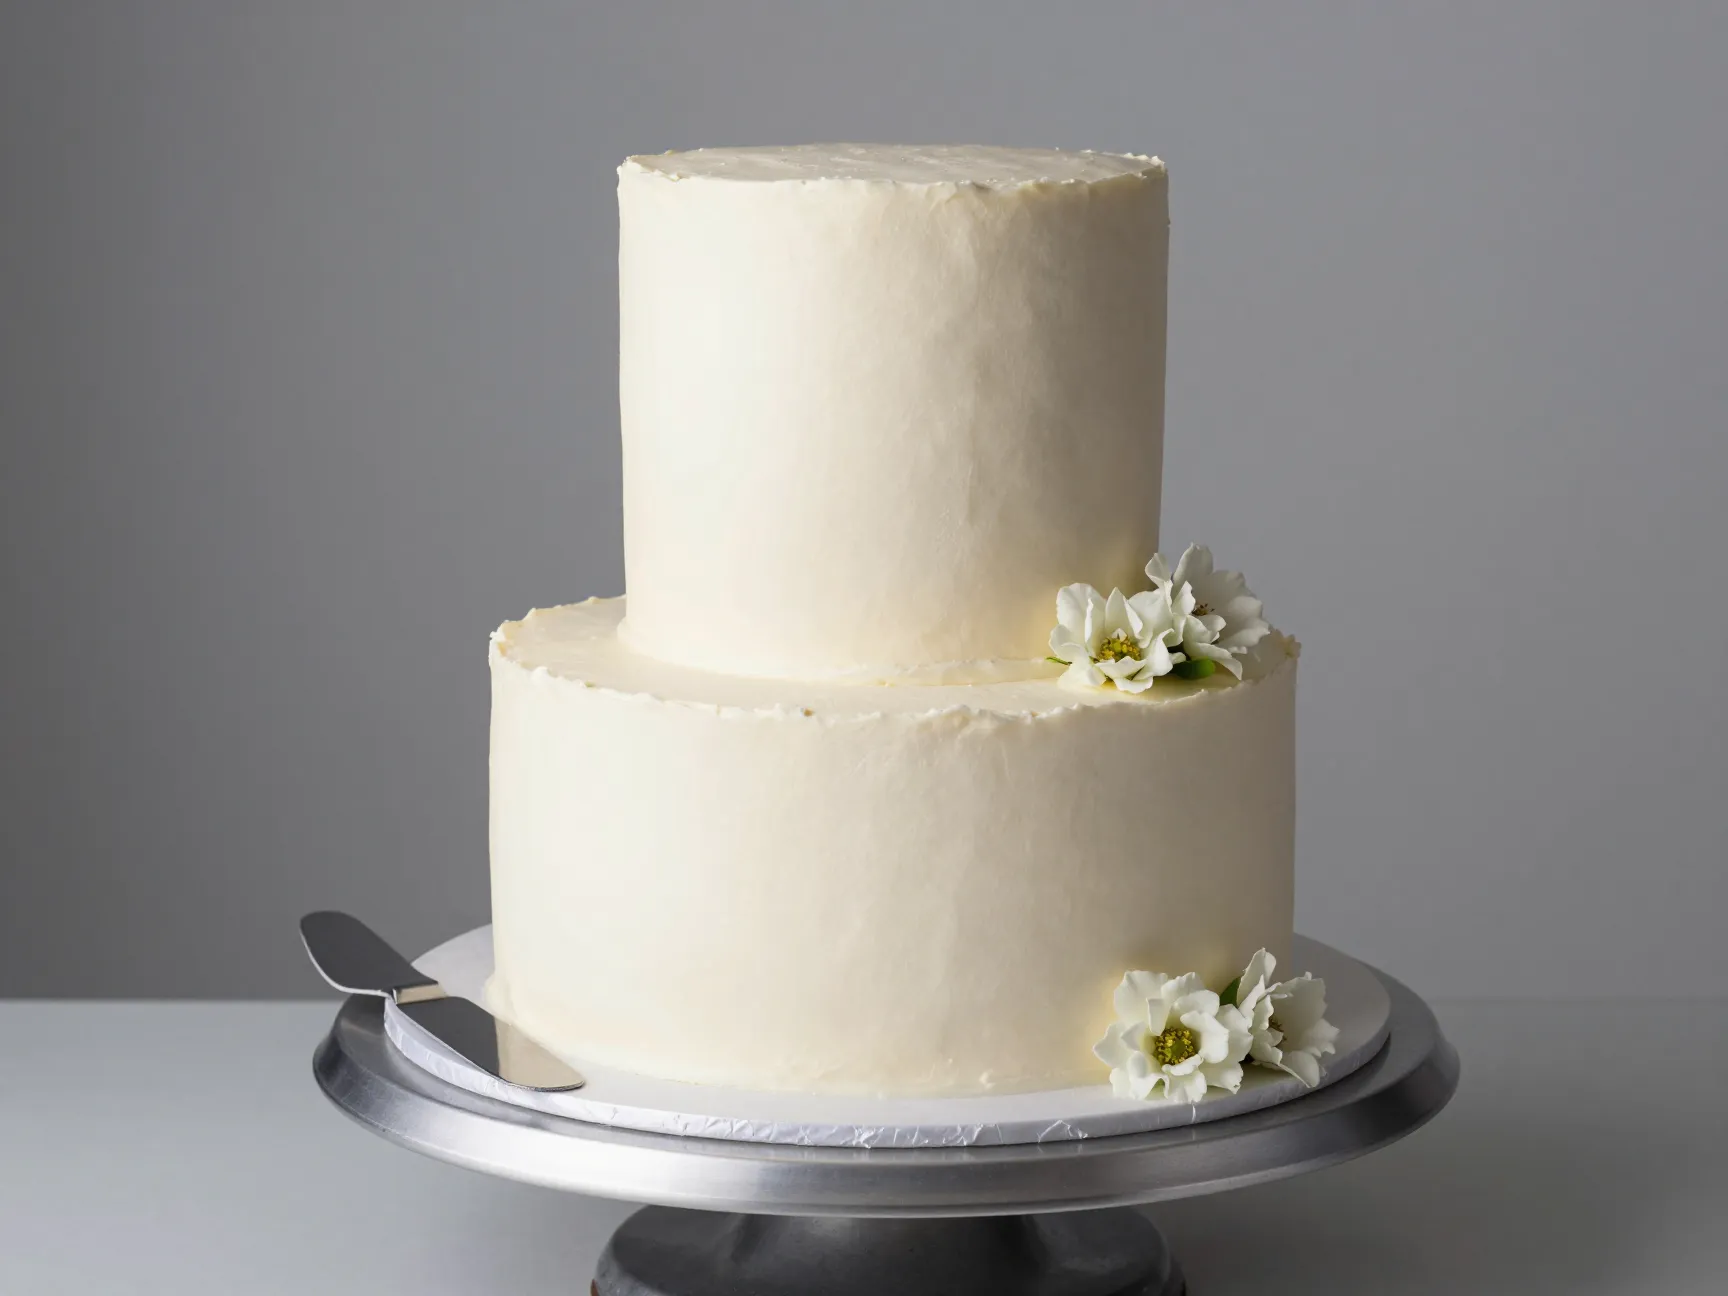
Difficulty: ⭐⭐ (Easy-Intermediate)
A fully smooth buttercream finish looks incredibly elegant and professional. The secret? A bench scraper, a turntable, and patience. This style pairs beautifully with simple decorations like fresh flowers or a single ribbon.
Key steps:
- Apply a crumb coat and refrigerate for 30 minutes.
- Apply a generous second coat of buttercream.
- Hold a bench scraper flush against the side and spin the turntable slowly.
- Smooth the top with an offset spatula.
Pro tip: Use Swiss meringue buttercream rather than American buttercream for the smoothest finish. It’s silkier, less sweet, and easier to work with at room temperature.
4. The Textured Buttercream Cake 🌊
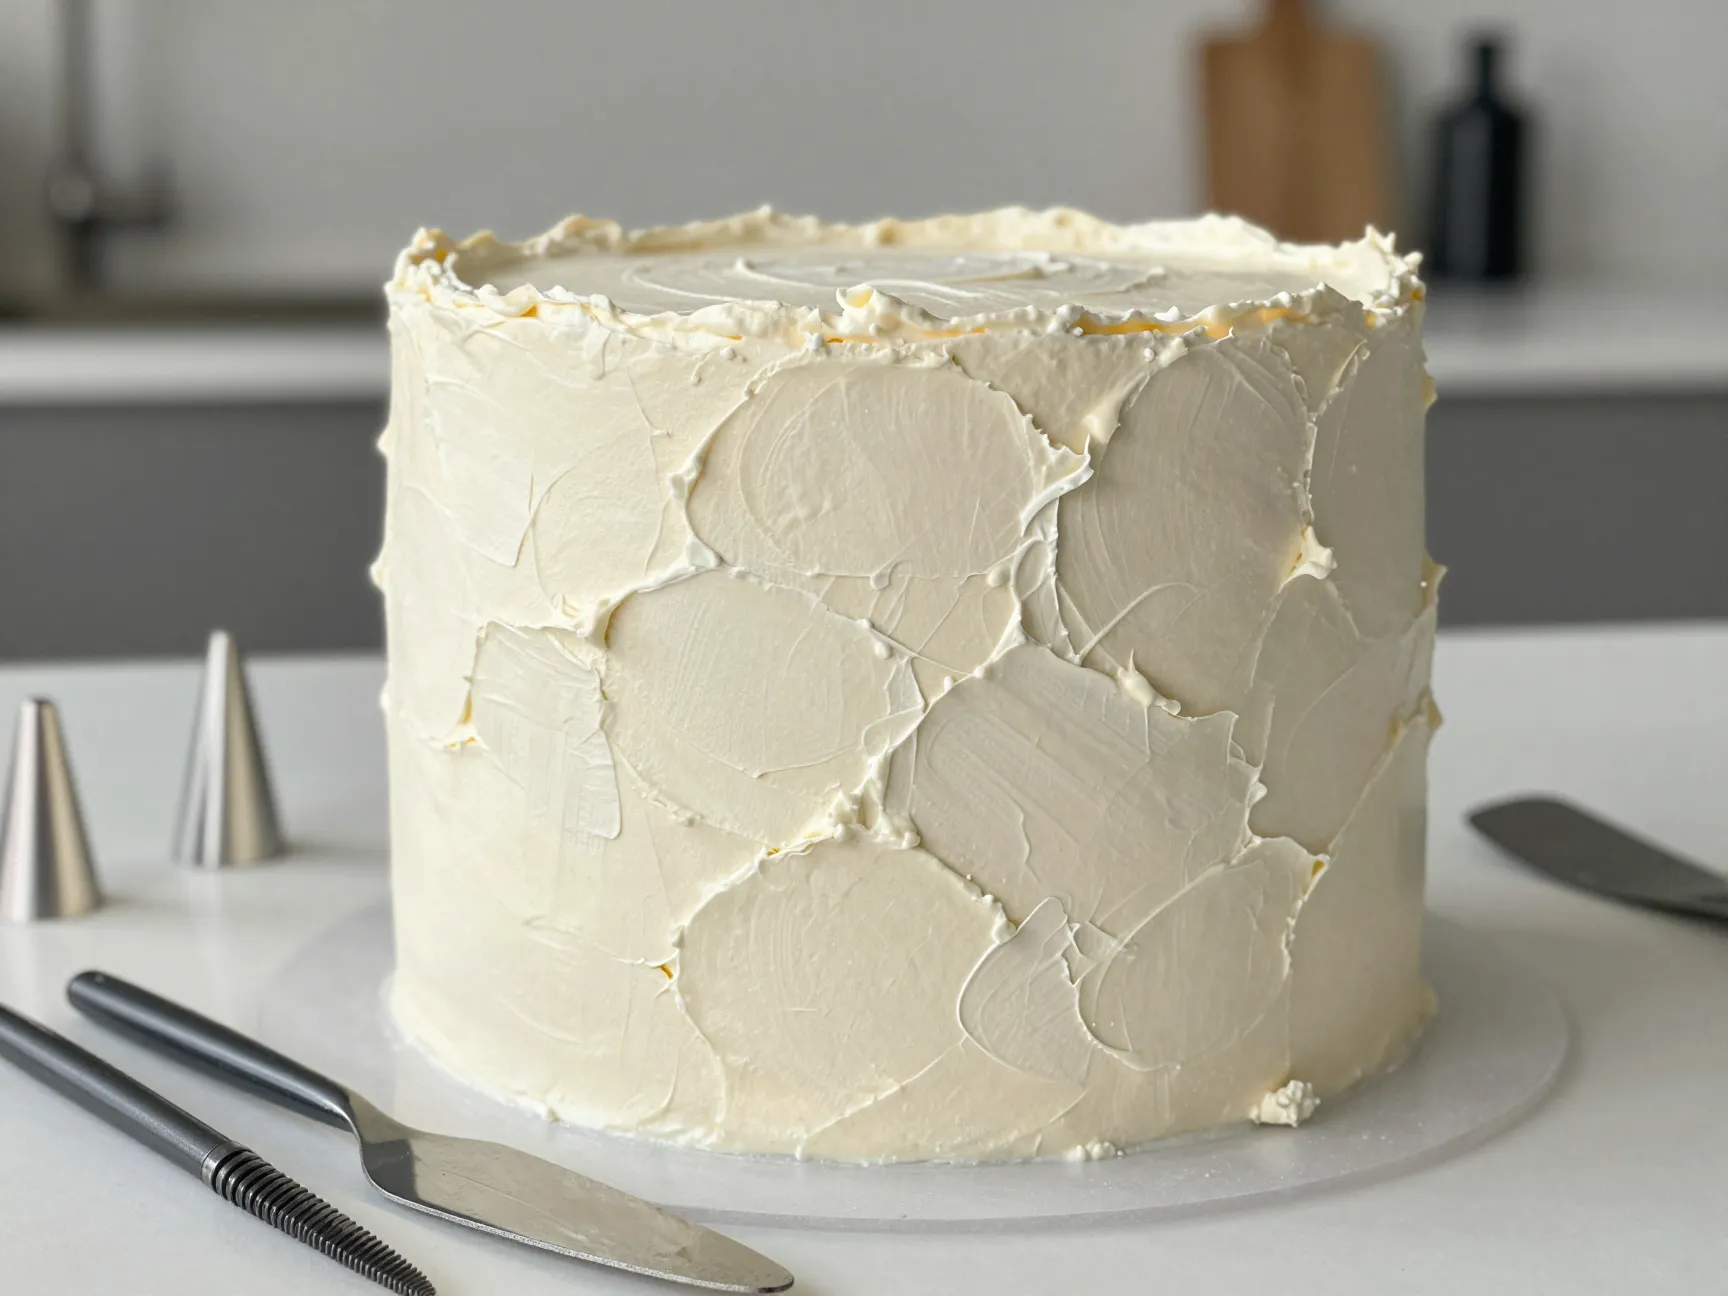
Difficulty: ⭐⭐ (Easy-Intermediate)
If a perfectly smooth finish feels intimidating, textured buttercream is your best friend. Techniques like ruffles, swirls, palette knife strokes, and combed patterns are all achievable with basic tools — and they look intentionally artistic.
Popular texture techniques:
| Technique | Tool Needed | Look |
|---|---|---|
| Palette knife strokes | Small offset spatula | Modern, painterly |
| Ruffles | Petal piping tip | Romantic, feminine |
| Combed lines | Cake comb or fork | Retro, structured |
| Swirl peaks | Star piping tip | Whimsical, fun |
Pro tip: Practice your chosen texture on a piece of parchment paper before applying it to the cake. Confidence makes a huge difference in the final result.
5. The Drip Cake 🍫
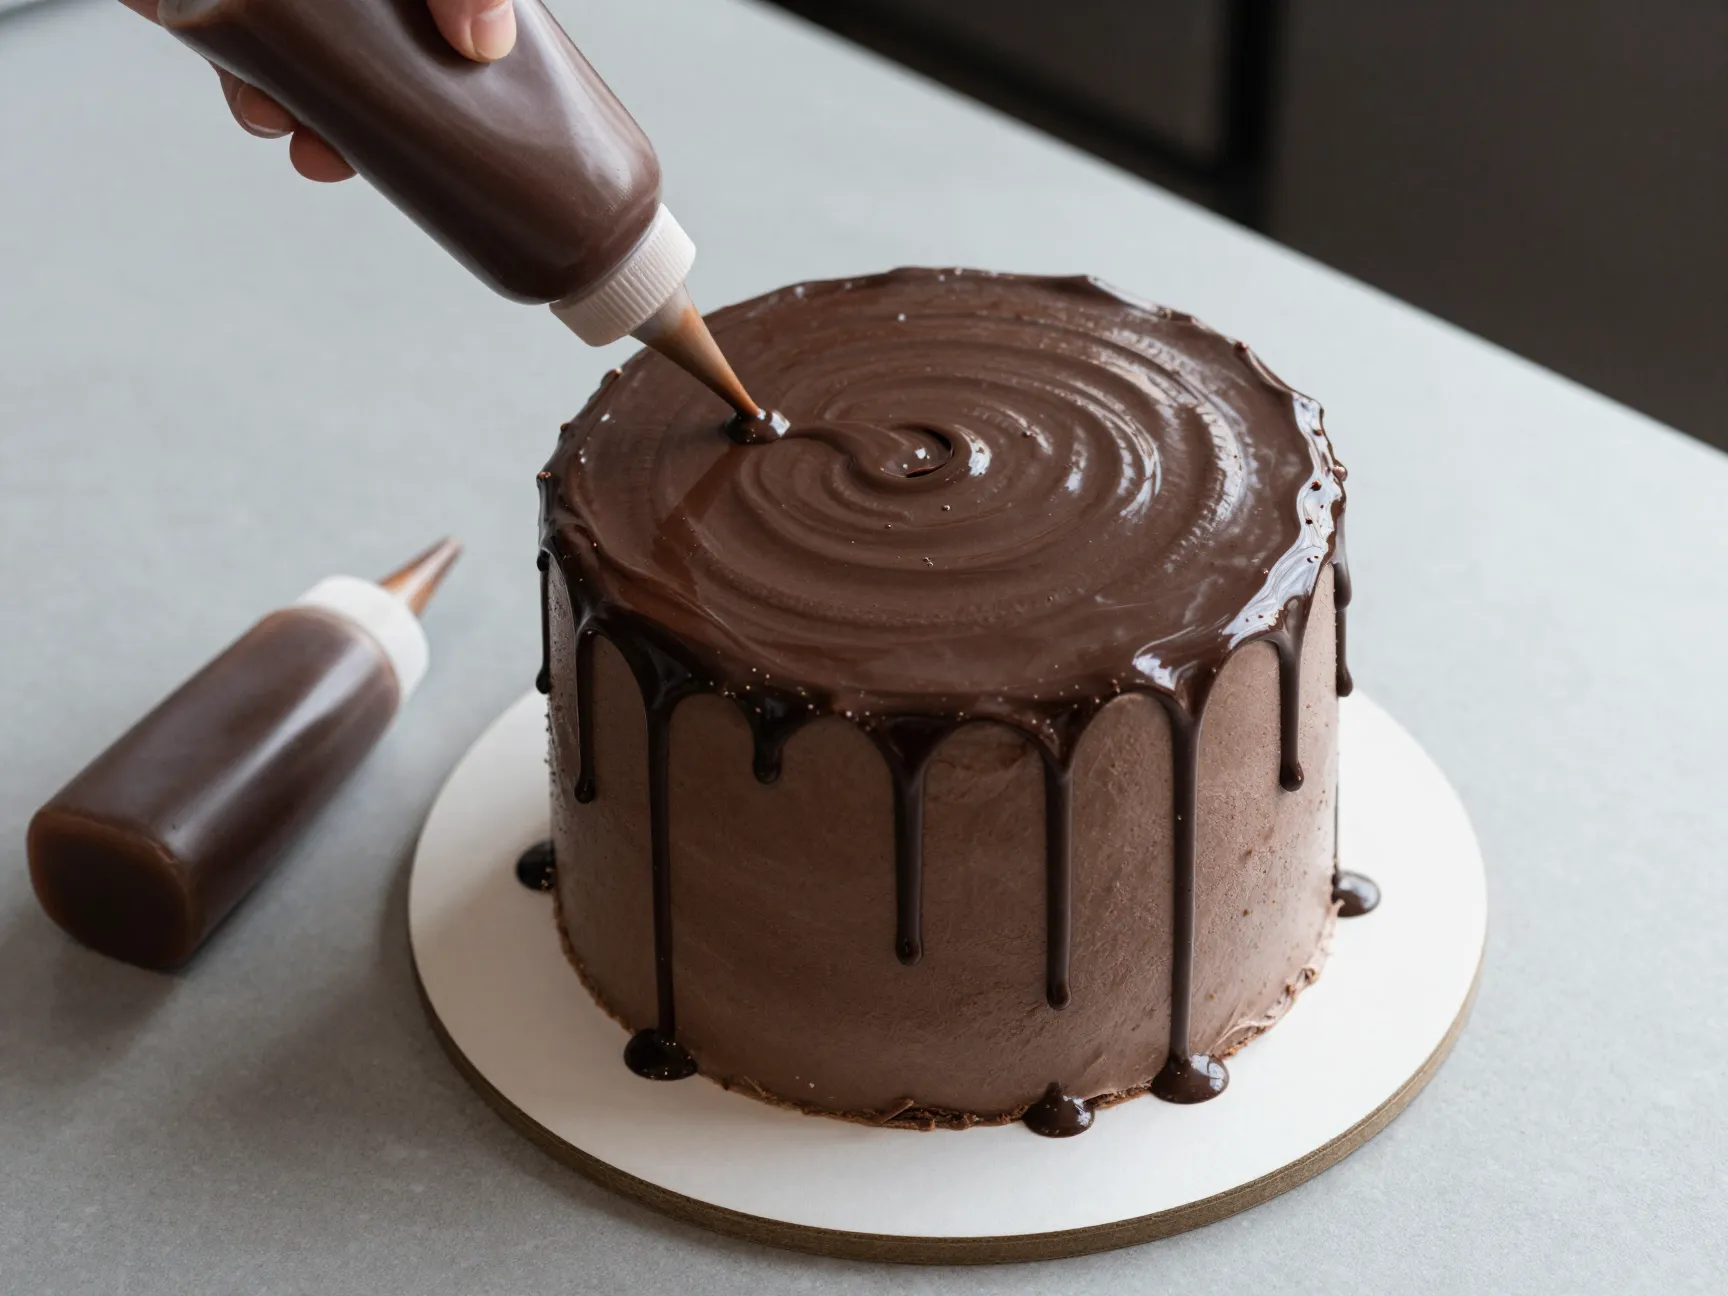
Difficulty: ⭐⭐ (Easy-Intermediate)
The drip cake is one of the most visually dramatic designs on this list — and one of the easiest to execute. A ganache or colored chocolate drip is poured over the top of a frosted cake, allowed to drip naturally down the sides.
What you need:
- Ganache (chocolate + heavy cream) or colored candy melts
- Squeeze bottle or spoon
- Fully chilled, frosted cake
The drip formula:
- For chocolate ganache: 1 part heavy cream to 2 parts dark chocolate (by weight)
- For white chocolate drip: 1 part heavy cream to 3 parts white chocolate
Pro tip: Always test your drip on the back of the cake first. If it runs too fast, your ganache is too warm or too thin. Let it cool slightly and test again.
💬 “The drip cake is the ultimate beginner’s secret weapon — it looks like you spent hours, but the drip takes about 10 minutes once your ganache is ready.”
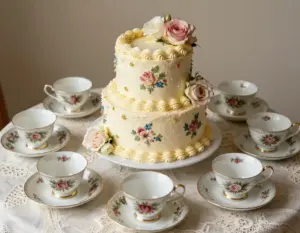
6. The Fresh Flower Cake 🌸
Difficulty: ⭐ (Beginner)
Sometimes the simplest approach is the most stunning. A plain frosted cake decorated with fresh, seasonal flowers can look like it came straight from a high-end bakery. The flowers do all the heavy lifting.
Best flowers for wedding cakes:
- Roses (classic and widely available)
- Garden ranunculus
- Sweet peas
- Dahlias (seasonal)
- Baby’s breath (filler)
- Eucalyptus (greenery)
Food safety note: Many flowers are not food-safe. Always check with your florist, and use floral picks or wrap stems in plastic wrap before inserting into the cake.
Pro tip: Add flowers just before the reception to keep them fresh. Store the decorated cake in a cool room, not the refrigerator, if possible.
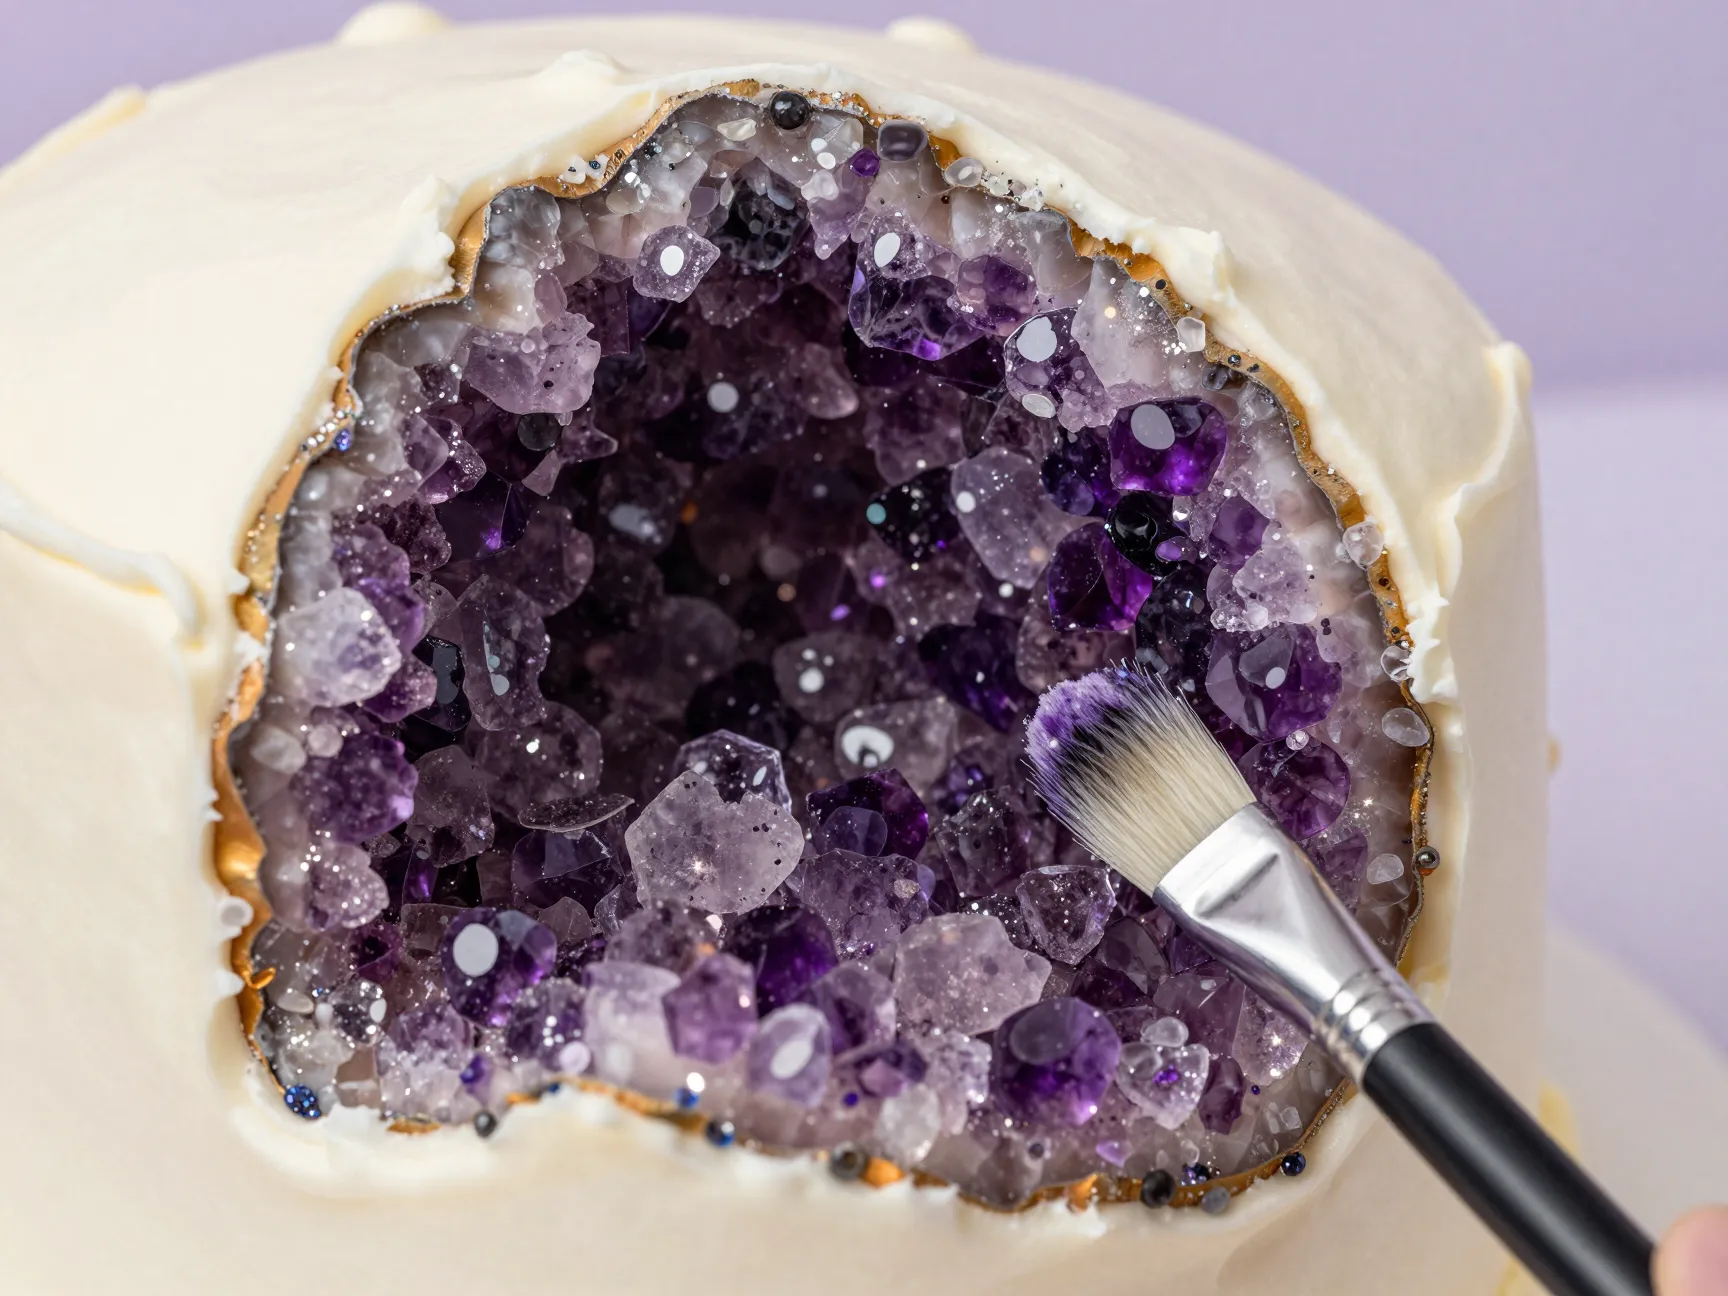
7. The Geode or Crystal Cake 💎
Difficulty: ⭐⭐⭐ (Intermediate)
This design looks incredibly complex but is more accessible than it appears. Rock candy crystals and colored isomalt create the illusion of a gemstone embedded in the cake. It’s a jaw-dropping centerpiece.
What you need:
- Rock candy in your chosen color
- Isomalt (optional, for extra shimmer)
- Food-safe edible glitter or luster dust
- A carved-out section of the cake
How to do it:
- Carve a shallow “cave” into one side of your frosted cake.
- Brush the inside with edible glue.
- Press rock candy pieces into the cavity, building up layers.
- Dust with edible glitter for extra sparkle.
Pro tip: Choose a color palette that matches your wedding — amethyst purple, rose quartz pink, or sapphire blue all look breathtaking.
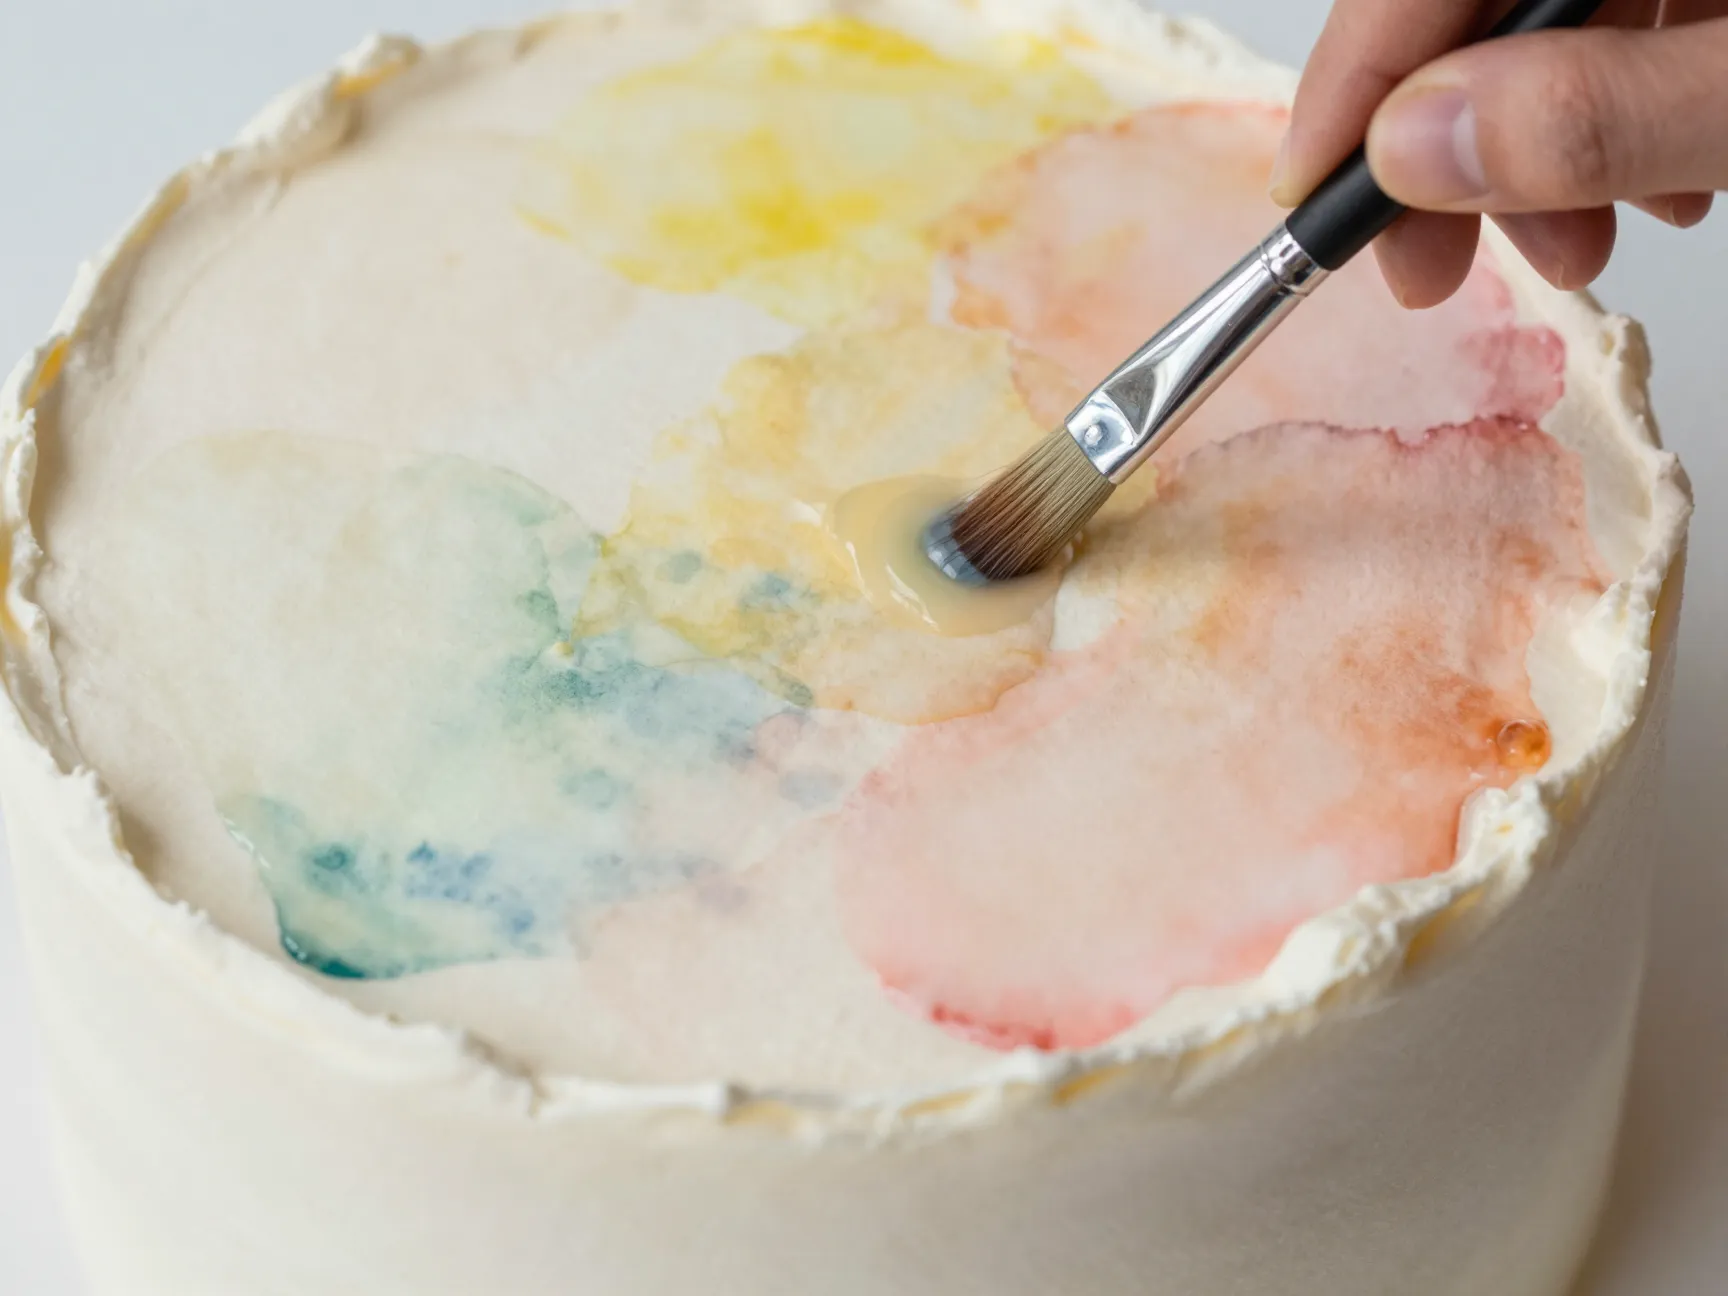
8. The Watercolor Cake 🎨
Difficulty: ⭐⭐ (Easy-Intermediate)
The watercolor cake uses diluted gel food coloring brushed onto a white fondant or smooth buttercream surface to create a soft, painterly effect. No artistic talent required — the blending does the work for you.
What you need:
- Gel food coloring (2–3 complementary colors)
- A soft food-safe brush or small offset spatula
- White fondant or smooth buttercream base
- Vodka or lemon extract (to thin the color)
Step-by-step:
- Apply your white base coat and smooth it.
- Dilute gel colors with a tiny amount of vodka (it evaporates quickly, leaving no taste).
- Brush colors onto the cake in loose, overlapping strokes.
- Blend edges with a clean damp brush.
Pro tip: Less is more. Start with light washes of color and build up gradually. You can always add more color, but you can’t easily remove it.
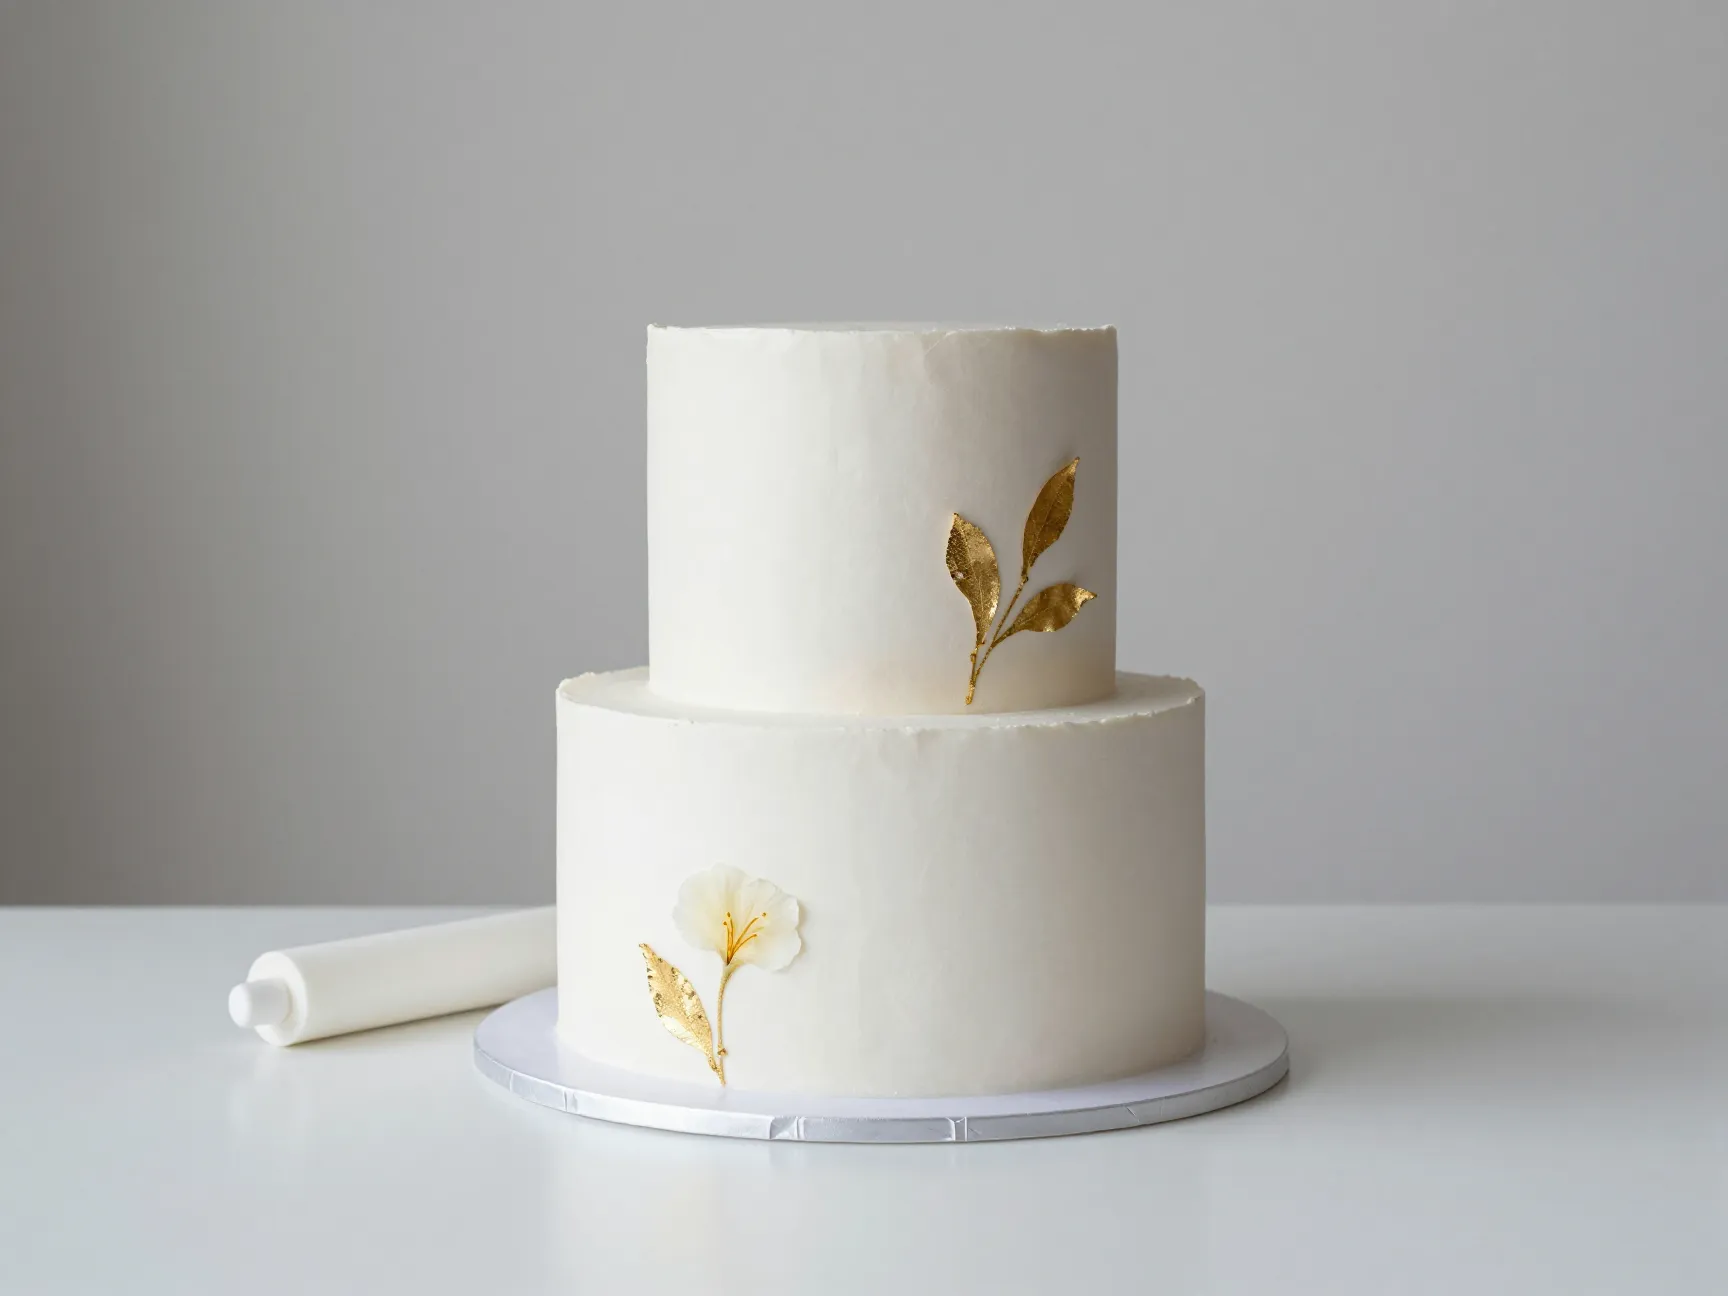
9. The Minimalist Fondant Cake ✨
Difficulty: ⭐⭐ (Easy-Intermediate)
Fondant gets a bad reputation for being difficult, but a single-tier or two-tier minimalist fondant cake is very achievable for a home baker. The key is keeping the decoration simple — think clean lines, a single monogram, a delicate pressed flower, or a simple gold leaf accent.
What you need:
- Pre-made fondant (store-bought is perfectly fine)
- Fondant smoother
- Rolling pin
- Edible gold leaf or a simple fondant cutter for accents
Why minimalist works: You’re not trying to sculpt roses or create elaborate sugar flowers. A clean white fondant surface with one elegant detail is timeless and sophisticated.
Pro tip: Knead your fondant thoroughly until it’s warm and pliable. Cold fondant cracks and tears. If it’s stiff, microwave it for 5–10 seconds and knead again.
Essential Tools Every DIY Wedding Baker Needs
Before you commit to any of these 9 easy cake designs perfect for DIY wedding bakers, make sure you have the right equipment. The right tools make the difference between a frustrating experience and a confident one.
Must-Have Tool List
🛠️ Core Tools:
- Cake turntable — Non-negotiable. Spinning the cake while you frost it is the single biggest game-changer for beginners.
- Offset spatula (large and small) — For spreading frosting smoothly and lifting cake layers.
- Bench scraper — Essential for smooth and semi-naked finishes.
- Cake leveler or serrated knife — Flat layers are the foundation of a professional-looking cake.
🎨 Decorating Tools:
- Piping bags and tips — At minimum, a star tip and a round tip cover most decorating needs.
- Food-safe brushes — For watercolor effects and edible luster dust.
- Fondant smoother — If you’re working with fondant.
- Squeeze bottle — For controlled drip application.
📦 Transport & Display:
- Sturdy cake boards — One per tier, plus a base board.
- Dowels or bubble tea straws — For supporting tiered cakes.
- Cake box with a tall lid — For safe transport.
Planning Your DIY Wedding Cake: A Simple Timeline
Timing is everything. Here’s a stress-free schedule to follow:
| Timeframe | Task |
|---|---|
| 4–6 weeks before | Finalize design, order specialty supplies, practice the recipe |
| 2 weeks before | Do a full trial run of the cake |
| 3–5 days before | Bake all cake layers, wrap tightly, freeze |
| 2 days before | Thaw layers, make frosting, apply crumb coat |
| 1 day before | Final frosting, basic decoration, refrigerate |
| Wedding morning | Add fresh flowers, final touches, transport |
💬 “Freezing your cake layers in advance is the single best thing you can do to reduce wedding-day stress. Frozen layers are actually easier to frost than fresh ones.”
Common DIY Wedding Cake Mistakes (And How to Avoid Them)
Even experienced bakers make these errors. Knowing them in advance puts you ahead of the game.
1. Skipping the crumb coat. Always apply a thin first layer of frosting to seal in crumbs, then refrigerate before the final coat.
2. Using warm frosting. If your buttercream is too soft, it won’t hold its shape. Chill it slightly if needed.
3. Not leveling the layers. Uneven layers create a leaning, unstable cake. Use a cake leveler or a serrated knife with a ruler.
4. Forgetting dowels in tiered cakes. Any cake with two or more tiers needs internal supports. Without them, the top tier will sink into the bottom.
5. Decorating too far in advance. Fresh flowers wilt, fruit oxidizes, and some decorations bleed color. Add perishable decorations as close to serving time as possible.
Flavor Pairings That Work Beautifully for Wedding Cakes
A beautiful cake also needs to taste incredible. Here are some crowd-pleasing combinations:
| Cake Flavor | Filling | Frosting |
|---|---|---|
| Classic vanilla | Raspberry jam + vanilla buttercream | Swiss meringue buttercream |
| Lemon | Lemon curd + whipped cream | Lemon buttercream |
| Chocolate | Salted caramel | Dark chocolate ganache |
| Almond | Apricot jam | Marzipan + fondant |
| Champagne | Strawberry compote | Champagne buttercream |
Pro tip: Always offer at least one allergen-friendly option if possible, such as a gluten-free or nut-free tier. Your guests will appreciate the thoughtfulness.
Conclusion: Your Dream Wedding Cake Is Closer Than You Think
These 9 easy cake designs perfect for DIY wedding bakers prove that you don’t need a professional bakery or a five-figure budget to have a stunning wedding cake. From the effortlessly rustic naked cake to the dazzling geode design, every style on this list is achievable with practice, patience, and the right tools.
Your Actionable Next Steps 🎯
- Choose your design from the 9 options above based on your skill level and wedding aesthetic.
- Gather your tools — invest in a good turntable and bench scraper as your first priority.
- Do a trial run at least two weeks before the wedding. Bake the full cake, decorate it, photograph it, and taste it.
- Build your timeline using the schedule above to avoid last-minute panic.
- Ask for help — recruit a trusted friend or family member to assist on the wedding day with transport and final decoration.
The most important ingredient in any wedding cake is love — and when you make it yourself, that comes through in every slice. 🍰
References
- Wilton. (2022). Wedding Cake Baking and Decorating Guide. Wilton Enterprises. https://www.wilton.com
- The Knot. (2023). Real Wedding Study: Wedding Cake Costs and Trends. The Knot Worldwide. https://www.theknot.com
- Cake Central. (2021). Beginner’s Guide to Tiered Wedding Cakes. Cake Central Media. https://www.cakecentral.com
- Fine Cooking. (2020). How to Make Swiss Meringue Buttercream. Taunton Press. https://www.finecooking.com
- Serious Eats. (2022). The Science of Cake: Why Freezing Layers Works. Serious Eats. https://www.seriouseats.com