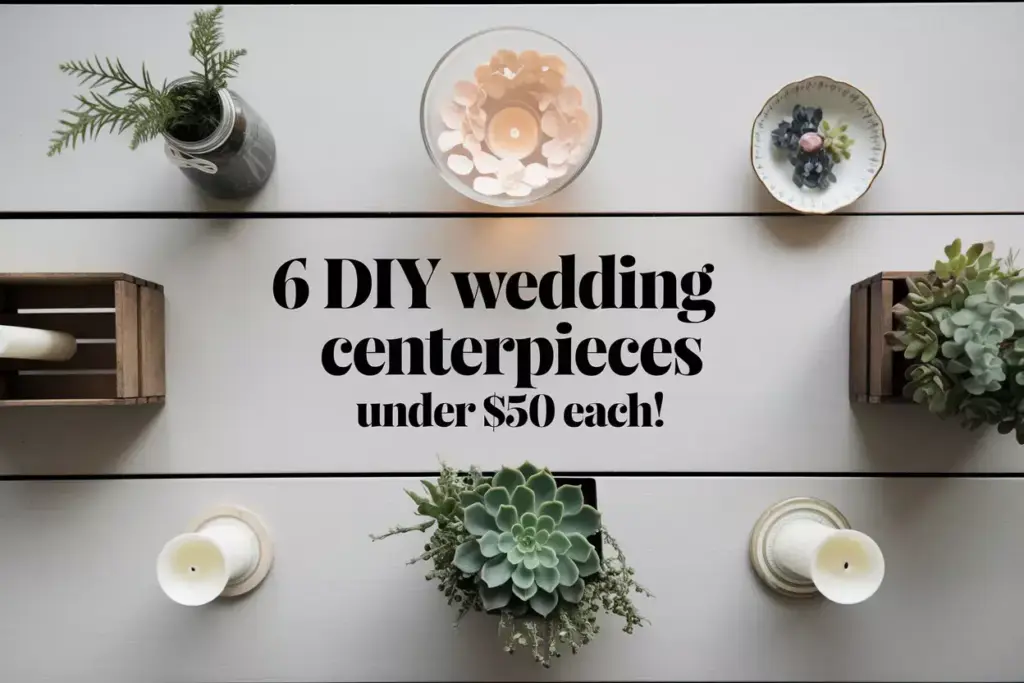
6 DIY Wedding Centerpieces on a Budget (Under $50 Each!)
Planning a wedding can feel overwhelming, especially when costs start adding up faster than RSVPs. The average wedding centerpiece can cost anywhere from $75 to $200 each, but what if you could create stunning focal points for your reception tables without breaking the bank? These 6 DIY Wedding Centerpieces on a Budget (Under $50 Each!) prove that elegance doesn’t require a hefty price tag – just creativity, planning, and a few simple materials.
Disclosure: This post contains affiliate links. As an Amazon Associate, we earn from qualifying purchases, and at no extra cost to you.
Key Takeaways
- Budget-friendly elegance: Create stunning centerpieces for under $50 each using affordable materials like mason jars, candles, and seasonal flowers
- Time-saving strategies: Most designs can be completed in 30-45 minutes per centerpiece with proper preparation
- Versatile designs: These centerpieces work for various wedding themes, from rustic barn venues to elegant ballrooms
- Cost breakdown included: Detailed pricing helps couples plan their decoration budget effectively
- Make-ahead friendly: All designs can be prepared 1-2 days before the wedding to reduce stress
Why Choose DIY Wedding Centerpieces? 💰
Creating your own wedding centerpieces offers numerous advantages beyond just saving money. DIY projects allow complete creative control, ensuring each piece perfectly matches your vision and wedding theme. Additionally, crafting centerpieces can become a fun bonding activity with bridesmaids, family members, or your partner during the wedding planning process.
Budget-conscious couples can save 60-80% compared to professional florist arrangements by choosing the DIY route [1]. This significant savings can be redirected toward other wedding priorities like photography, catering, or the honeymoon fund.
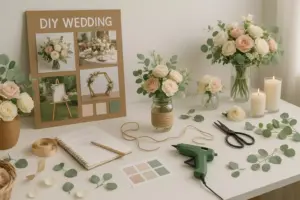
Essential Supplies for Budget-Friendly Centerpieces
Before diving into specific designs, gather these versatile materials that appear across multiple projects:
Basic Supplies:
- Glass containers (mason jars, vases, bowls)
- Candles (votives, pillar candles, tea lights)
- Floral foam or chicken wire
- Ribbon or twine
- Scissors and wire cutters
Flower Options:
- Seasonal blooms (always most affordable)
- Grocery store flowers
- Wholesale flower markets
- Greenery (eucalyptus, ivy, ferns)
1. Rustic Mason Jar Garden Centerpiece
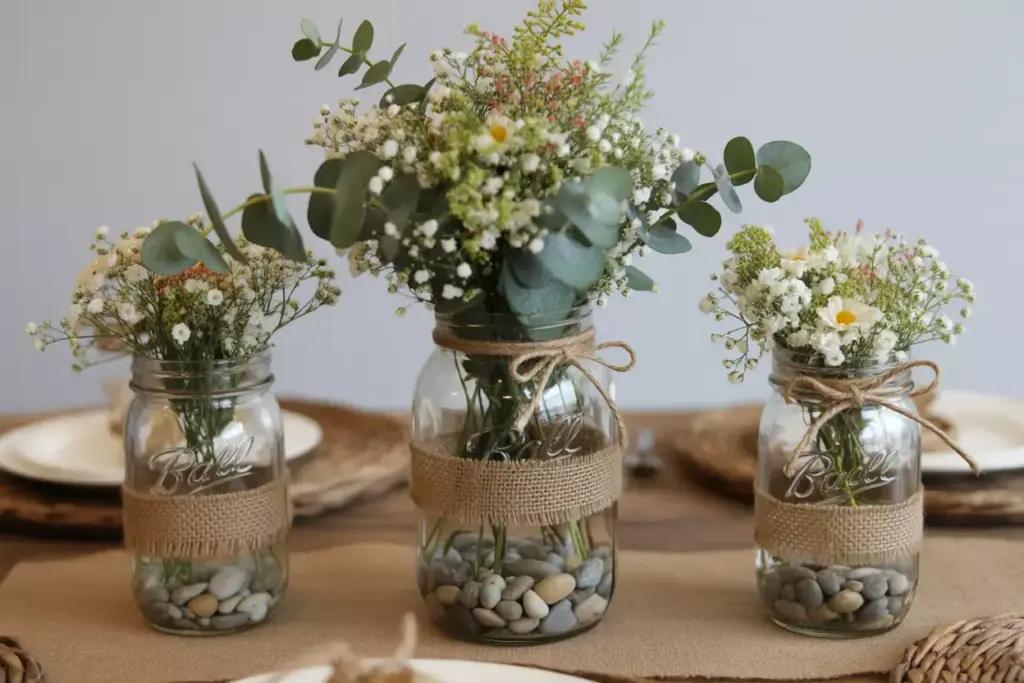
Total Cost: $35-$42 per centerpiece
This charming design combines the rustic appeal of mason jars with fresh seasonal flowers, creating a perfect centerpiece for barn weddings, outdoor ceremonies, or couples seeking farmhouse elegance.
Materials Needed:
- 3 mason jars (various sizes): $12
- Burlap ribbon: $3
- Seasonal flowers (baby’s breath, wildflowers): $18
- Eucalyptus sprigs: $5
- Twine: $2
- Small river rocks: $5
Step-by-Step Instructions:
Step 1: Clean mason jars thoroughly and remove any labels. Allow to dry completely.
Step 2: Wrap each jar with burlap ribbon, securing with hot glue or double-sided tape. Leave 2-3 inches of overlap for a natural, slightly imperfect look.
Step 3: Add a handful of river rocks to each jar for stability and drainage.
Step 4: Fill jars with fresh water, leaving 2 inches from the top.
Step 5: Create small bouquets by grouping 3-5 flower stems with eucalyptus sprigs. Vary heights for visual interest.
Step 6: Place bouquets in jars, arranging tallest in center and shorter arrangements on sides.
Step 7: Tie twine around jar necks in simple bows for finishing touch.
Pro Tip: Purchase flowers 2-3 days before the wedding and store stems in water in a cool location. Assemble centerpieces the morning of or day before your wedding for maximum freshness.
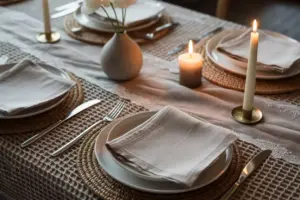
2. Elegant Floating Candle Display
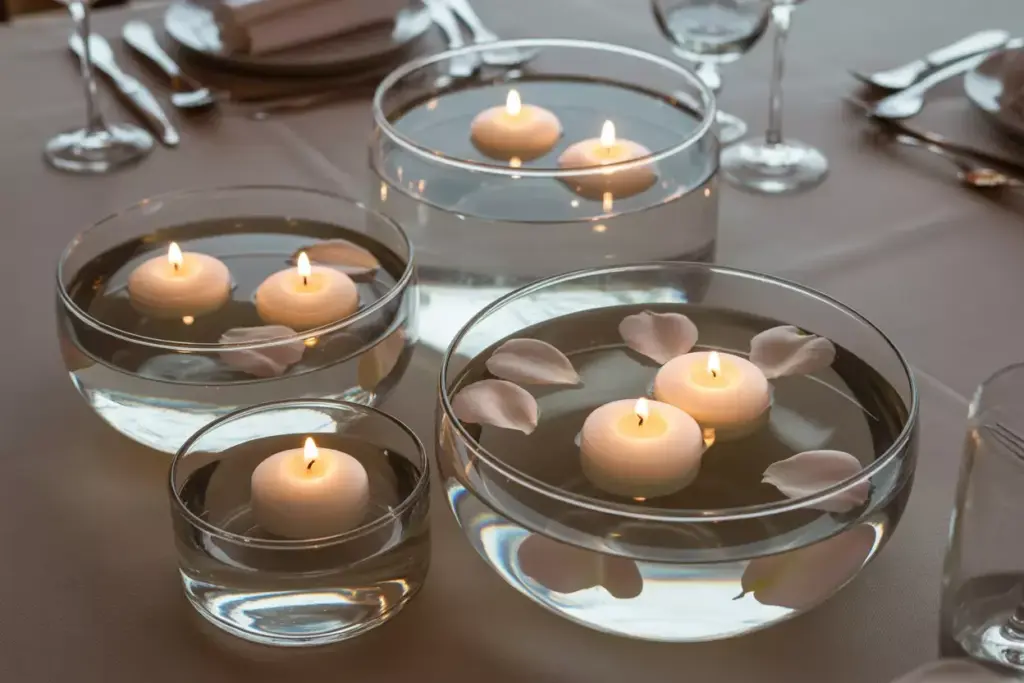
Total Cost: $28-$35 per centerpiece
This sophisticated design creates romantic ambiance through floating candles surrounded by flower petals, perfect for evening receptions and formal venues.
Materials Needed:
- 3 glass bowls (varying sizes): $15
- Floating candles (6-9 pieces): $8
- Rose or peony petals: $7
- Small LED lights (optional): $5
Assembly Process:
Step 1: Select glass bowls in complementary sizes – one large (8-10 inches), one medium (6 inches), and one small (4 inches).
Step 2: Fill bowls with clean water, leaving 1 inch from rim to prevent overflow.
Step 3: Scatter flower petals on water surface, using colors that match your wedding palette.
Step 4: Gently place floating candles on water, spacing evenly for balanced appearance.
Step 5: For added sparkle, drop battery-operated LED lights into water around candles.
Step 6: Arrange bowls in triangular formation on table, with largest bowl as focal point.
Safety Considerations:
- Never leave candles unattended
- Use dripless candles to prevent wax in water
- Have fire extinguisher accessible at venue
- Consider LED candles for outdoor venues with wind
3. Seasonal Wooden Box Arrangement

Total Cost: $38-$45 per centerpiece
Wooden boxes filled with seasonal flowers and greenery create versatile centerpieces that work year-round by simply changing flower varieties and color schemes.
Materials Required:
- Wooden box or crate: $12
- Plastic liner: $3
- Floral foam: $4
- Seasonal flowers: $20
- Greenery (ivy, ferns, eucalyptus): $8
Creation Steps:
Step 1: Line wooden box with plastic to protect wood from water damage.
Step 2: Soak floral foam in water for 10-15 minutes until fully saturated.
Step 3: Place foam in lined box, ensuring snug fit.
Step 4: Begin with greenery, creating foundation by inserting stems around foam perimeter.
Step 5: Add focal flowers (roses, peonies, or seasonal blooms) in odd numbers for natural appearance.
Step 6: Fill gaps with smaller flowers or additional greenery.
Step 7: Mist lightly with water to maintain freshness.
Seasonal Variations:
- Spring: Tulips, daffodils, cherry blossoms
- Summer: Sunflowers, zinnias, lavender
- Fall: Mums, dahlias, autumn leaves
- Winter: Evergreen branches, pinecones, white roses
Budget-Friendly Shopping Strategies for DIY Wedding Centerpieces
Where to Source Materials
Wholesale Flower Markets: Visit early morning (5-7 AM) for best selection and prices. Many markets offer 50-70% savings compared to retail florists [2].
Grocery Stores: Surprisingly affordable option, especially for basic flowers like roses, carnations, and baby’s breath. Shop midweek for freshest inventory.
Dollar Stores: Excellent source for glass containers, candles, and basic craft supplies. Quality varies, so inspect items carefully.
Thrift Stores: Unique vintage containers, vases, and decorative elements at fraction of retail cost.
Online Wholesale: Websites like FiftyFlowers.com or GlobalRose.com offer bulk flowers delivered fresh.
Timing Your Purchases
6-8 Weeks Before Wedding:
- Order non-perishable supplies (containers, candles, ribbon)
- Book wholesale flower orders
1 Week Before Wedding:
- Purchase fresh flowers
- Prepare any elements that can be made ahead
Day Before Wedding:
- Assemble centerpieces
- Store in cool location
4. Vintage Teacup Collection Display
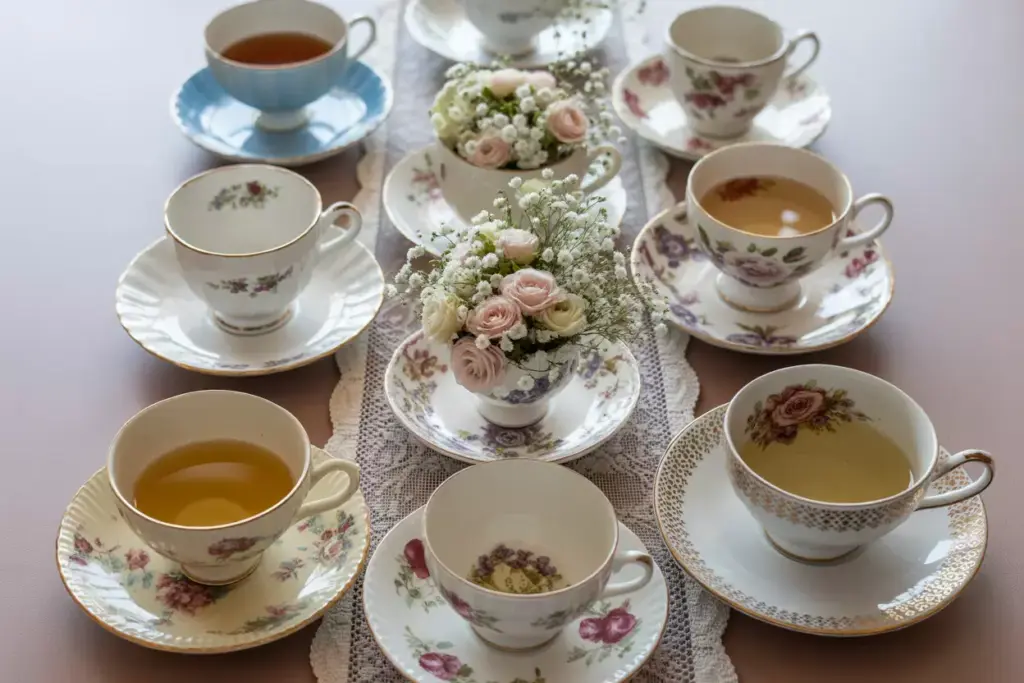
Total Cost: $32-$40 per centerpiece
This whimsical design uses mismatched vintage teacups and saucers filled with small flower arrangements, perfect for garden parties, brunch weddings, or vintage-themed celebrations.
Required Materials:
- 5-7 vintage teacups and saucers: $20
- Small flowers (spray roses, baby’s breath): $15
- Doily or lace runner: $5
Assembly Instructions:
Step 1: Collect teacups from thrift stores, estate sales, or family collections. Mismatched patterns add charm.
Step 2: Clean thoroughly and check for cracks that might leak.
Step 3: Fill cups with fresh water, leaving space for flower stems.
Step 4: Create mini bouquets with 3-5 small flower stems per cup.
Step 5: Arrange cups on doily or lace runner down table center.
Step 6: Vary heights by stacking some cups on saucers and others directly on table.
5. Modern Succulent Garden Centerpiece
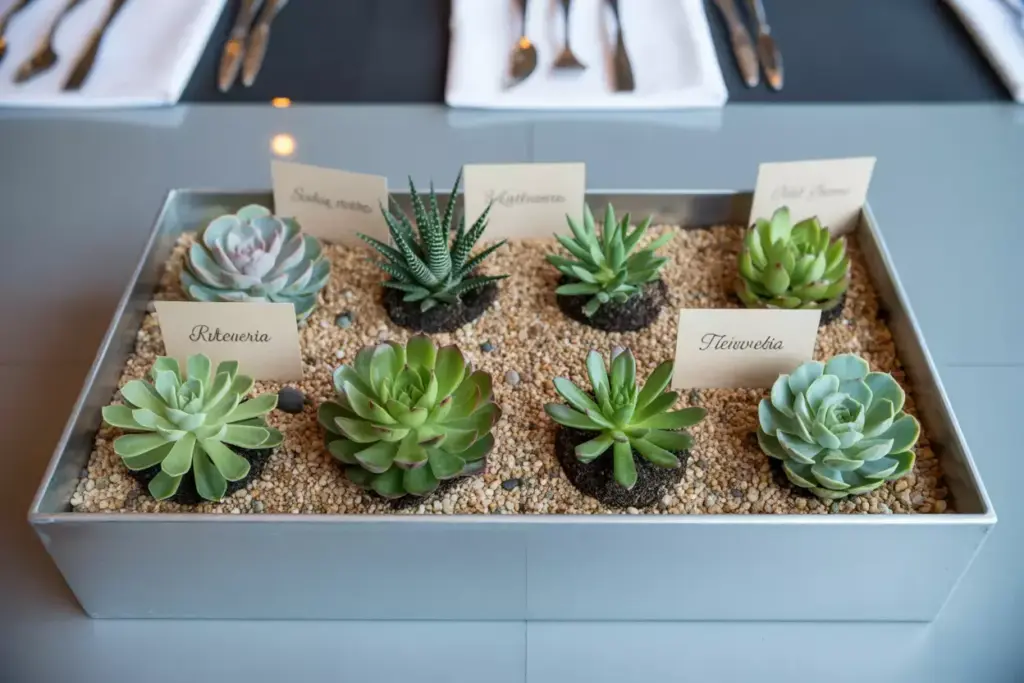
Total Cost: $35-$48 per centerpiece
Low-maintenance succulents create contemporary centerpieces that guests can take home as wedding favors, extending the celebration’s memory while staying within budget.
Materials List:
- Shallow wooden tray or metal container: $15
- 6-8 small succulents: $24
- Decorative sand or pebbles: $4
- Small cards for guest names (optional): $5
Step-by-Step Process:
Step 1: Choose container with drainage or drill small holes if needed.
Step 2: Layer bottom with decorative stones for drainage.
Step 3: Add thin layer of potting soil suitable for succulents.
Step 4: Arrange succulents in container, leaving space for growth.
Step 5: Fill gaps with decorative sand or small pebbles.
Step 6: Add small cards encouraging guests to take plants home.
Long-term Benefits:
- Zero maintenance during wedding day
- Guests receive living mementos
- Succulents last months with minimal care
- Year-round availability regardless of season
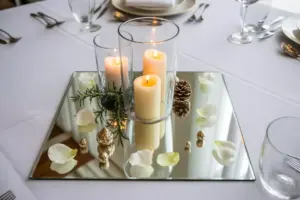
6. Romantic Candlescape with Greenery
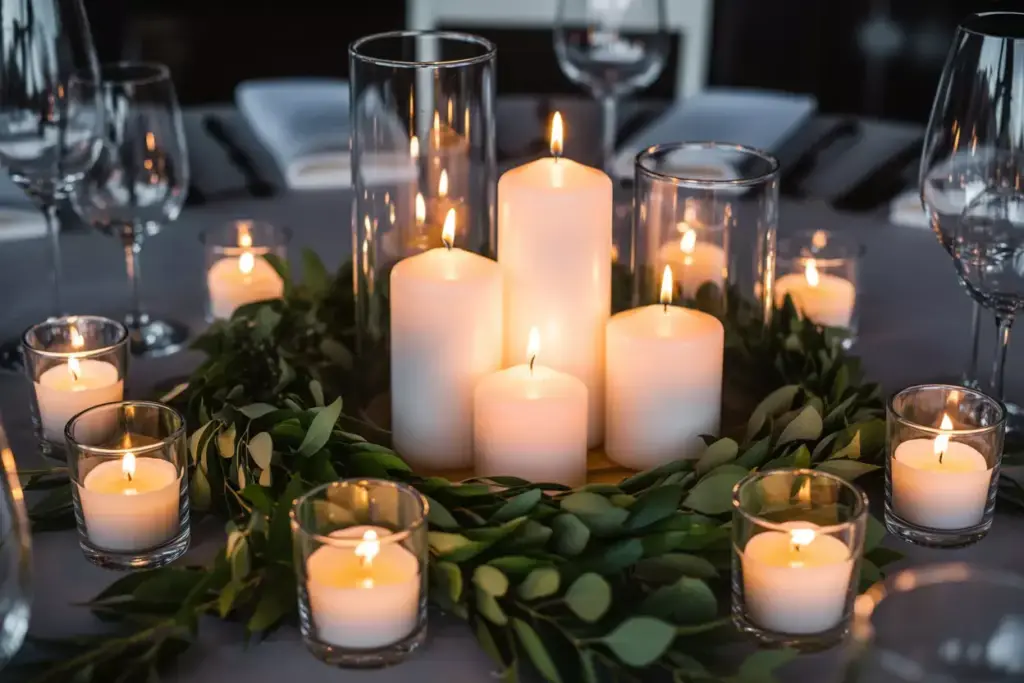
Total Cost: $25-$35 per centerpiece
This elegant design focuses on varying candle heights surrounded by lush greenery, creating dramatic ambiance perfect for evening celebrations.
Supply List:
- Pillar candles (3 different heights): $12
- Votive candles (6-8 pieces): $6
- Eucalyptus or ivy garland: $10
- Glass hurricane shades (optional): $7
Creation Method:
Step 1: Group pillar candles in center of table, varying heights for visual interest.
Step 2: Surround with votive candles in small glass holders.
Step 3: Weave greenery garland around candle bases, creating natural foundation.
Step 4: Add hurricane shades over pillar candles if outdoor venue or windy conditions expected.
Step 5: Test lighting before event to ensure proper ambiance.
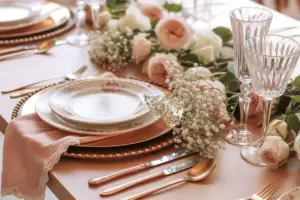
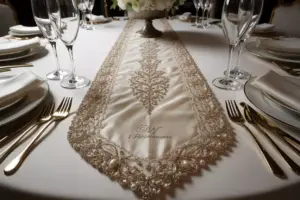
Cost Comparison: DIY vs. Professional Centerpieces
| Centerpiece Type | DIY Cost | Professional Cost | Savings |
|---|---|---|---|
| Rustic Mason Jar | $35-42 | $85-120 | $50-78 |
| Floating Candles | $28-35 | $75-110 | $47-75 |
| Wooden Box | $38-45 | $90-140 | $52-95 |
| Vintage Teacups | $32-40 | $80-125 | $48-85 |
| Succulent Garden | $35-48 | $95-150 | $60-102 |
| Candlescape | $25-35 | $70-100 | $45-75 |
Average Savings: $50-85 per centerpiece
For a wedding with 12 tables, DIY centerpieces can save $600-$1,020 compared to professional arrangements [3].
Expert Tips for Success with Budget Wedding Centerpieces
Planning and Preparation
Create a Timeline: Start planning centerpieces 2-3 months before wedding. This allows time to collect materials gradually and take advantage of sales.
Test Run: Create one complete centerpiece 4-6 weeks before wedding. This helps identify potential issues and refine techniques.
Delegate Tasks: Assign specific responsibilities to bridesmaids or family members. Many hands make light work and create bonding opportunities.
Quality Control Measures
Inspect All Materials: Check glass containers for chips, candles for even burning, and flowers for freshness before assembly.
Have Backup Supplies: Purchase 10-15% extra materials to account for breakage or last-minute changes.
Practice Assembly: Time yourself creating one centerpiece to estimate total preparation time needed.
Day-of-Wedding Logistics
Transportation: Plan how centerpieces will get from preparation location to venue. Use sturdy boxes with dividers to prevent damage.
Setup Team: Designate responsible individuals to place centerpieces and light candles before guests arrive.
Emergency Kit: Pack extra candles, matches, and basic repair supplies for last-minute touch-ups.
Making Centerpieces Guest-Interactive
Incorporating Personal Touches
Photo Displays: Add small framed photos of the couple or family members to each centerpiece design.
Message Cards: Include cards asking guests to write marriage advice or well-wishes that can be collected as keepsakes.
Favors Integration: Design centerpieces so elements can be taken home as wedding favors, extending the celebration’s impact.
Conversation Starters
Table Numbers with Meaning: Instead of simple numbers, use significant dates, locations, or shared interests as table identifiers incorporated into centerpiece design.
Question Cards: Place thought-provoking or fun questions near centerpieces to encourage guest interaction and conversation.
Troubleshooting Common DIY Centerpiece Challenges
Flower Freshness Issues
Problem: Flowers wilting before or during reception
Solution: Use floral preservative in water, keep arrangements cool until last moment, choose hardy flower varieties
Candle Safety Concerns
Problem: Venue restrictions on open flames
Solution: Switch to LED candles, use enclosed hurricane lanterns, or focus on non-flame designs
Transportation Difficulties
Problem: Centerpieces damaged during transport
Solution: Design pieces that can be assembled on-site, use sturdy containers, pack carefully with padding
Last-Minute Disasters
Problem: Broken containers or missing supplies
Solution: Maintain emergency supply kit, have backup design plans, designate problem-solving team member
Seasonal Considerations for Budget Centerpieces
Spring Weddings (March-May)
- Best Flowers: Tulips, daffodils, cherry blossoms, lilacs
- Color Palette: Soft pastels, fresh greens, whites
- Special Considerations: Weather unpredictability, pollen allergies
Summer Weddings (June-August)
- Best Flowers: Sunflowers, zinnias, dahlias, lavender
- Color Palette: Bright, bold colors or crisp whites
- Special Considerations: Heat affecting flowers, outdoor venue challenges
Fall Weddings (September-November)
- Best Flowers: Mums, dahlias, marigolds, autumn foliage
- Color Palette: Rich oranges, deep reds, golden yellows
- Special Considerations: Shorter daylight hours, temperature drops
Winter Weddings (December-February)
- Best Flowers: Evergreen branches, white roses, amaryllis
- Color Palette: Deep jewel tones, metallics, classic white
- Special Considerations: Limited flower availability, heating costs
Conclusion
Creating beautiful wedding centerpieces on a budget requires creativity, planning, and smart shopping strategies, but the results can be just as stunning as expensive professional arrangements. These 6 DIY Wedding Centerpieces on a Budget (Under $50 Each!) demonstrate that couples can achieve their dream wedding aesthetic without compromising their financial goals.
The key to success lies in starting early, choosing designs that match your skill level, and embracing the imperfect beauty that comes with handmade elements. Remember that guests will remember the love and joy of your celebration far more than whether your centerpieces cost $50 or $150.
Your Next Steps:
- Choose 2-3 designs that appeal to you and match your wedding theme
- Create a detailed shopping list with estimated costs
- Practice making one centerpiece to refine your technique
- Recruit helpers from your wedding party or family
- Set a realistic timeline for completion
By following these guidelines and embracing the DIY spirit, you’ll create memorable centerpieces that reflect your personal style while keeping your wedding budget on track. The money saved can be invested in other meaningful aspects of your special day, from upgrading your photography package to enhancing your honeymoon plans.
References
[1] Wedding Wire Industry Report 2026, “Average Wedding Decoration Costs by Category”
[2] Society of American Florists, “Wholesale vs. Retail Flower Pricing Analysis”
[3] The Knot Real Weddings Study 2026, “DIY Wedding Decoration Savings”