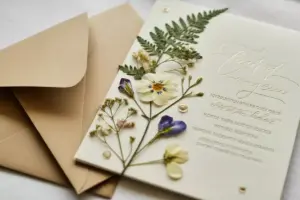
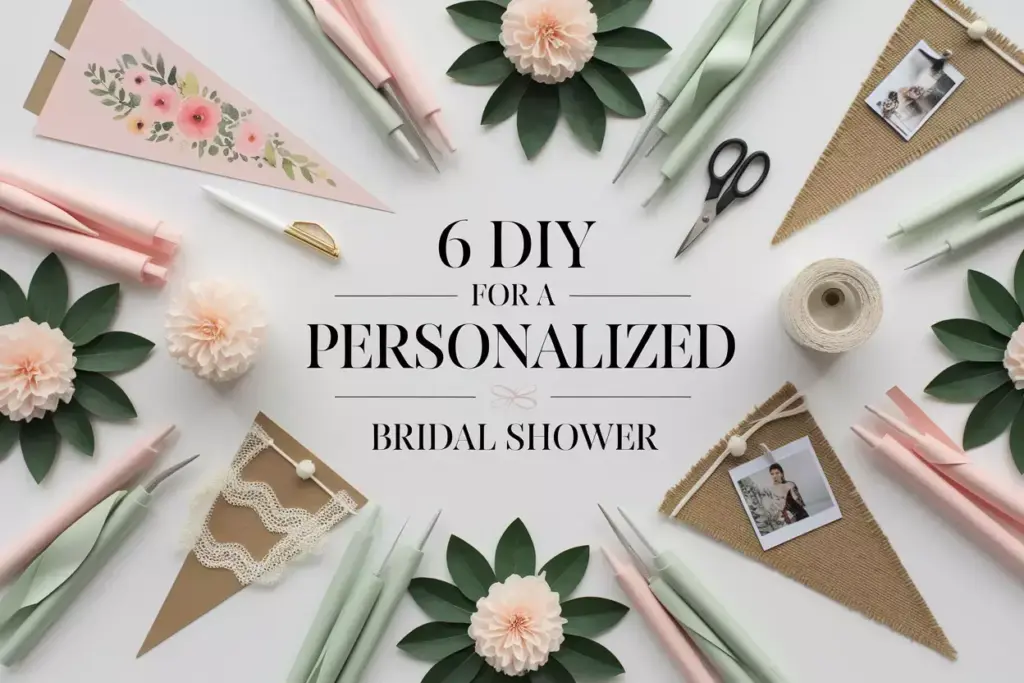
6 DIY Bridal Shower Banner Ideas To Personalize Your Decor
Planning a bridal shower that feels uniquely special requires those perfect personal touches that store-bought decorations simply can’t provide. While commercial party supplies offer convenience, they often lack the heartfelt charm and customization that makes celebrations truly memorable. Creating your own decorative elements transforms an ordinary gathering into an extraordinary celebration that reflects the bride’s personality and style.
Disclosure: This post contains affiliate links. As an Amazon Associate, we earn from qualifying purchases, and at no extra cost to you.
The beauty of 6 DIY Bridal Shower Banner Ideas To Personalize Your Decor lies in their ability to combine creativity, affordability, and meaningful customization. These handcrafted elements serve as both stunning focal points and cherished keepsakes that the bride can treasure long after the celebration ends. Whether you’re working with a modest budget or simply want to add that special homemade touch, DIY banners offer endless possibilities for personalization.
Key Takeaways
- Personalized banners create meaningful focal points that reflect the bride’s unique style and personality
- Cost-effective crafting allows for beautiful decorations without breaking the party planning budget
- Customizable designs can be adapted to match any theme, color scheme, or venue aesthetic
- Keepsake value transforms temporary decorations into lasting mementos of the special celebration
- Creative flexibility enables incorporation of personal photos, meaningful quotes, and special memories
Essential Materials and Tools for DIY Banner Success
Before diving into specific 6 DIY Bridal Shower Banner Ideas To Personalize Your Decor, gathering the right materials ensures smooth crafting sessions and professional-looking results. The foundation of any successful banner project starts with quality supplies and proper preparation.
Basic Crafting Essentials:
- High-quality cardstock or decorative paper
- Sharp scissors or precision craft knife
- Strong adhesive (glue sticks, double-sided tape, or craft glue)
- Measuring tools (rulers, measuring tape)
- Pencils for sketching and marking
- String, ribbon, or twine for hanging
Advanced Decorative Elements:
- Watercolor paints or markers
- Calligraphy pens or brush markers
- Decorative hole punch
- Embossing powder and heat gun
- Fabric scraps and lace trim
- Artificial flowers or greenery
- Metallic accents (gold leaf, foil tape)
Creating a dedicated workspace with good lighting and ample surface area makes the crafting process more enjoyable and efficient. Organizing materials in advance prevents interruptions and helps maintain creative flow throughout the project [1].
1. Watercolor Floral Banner with Hand Lettering
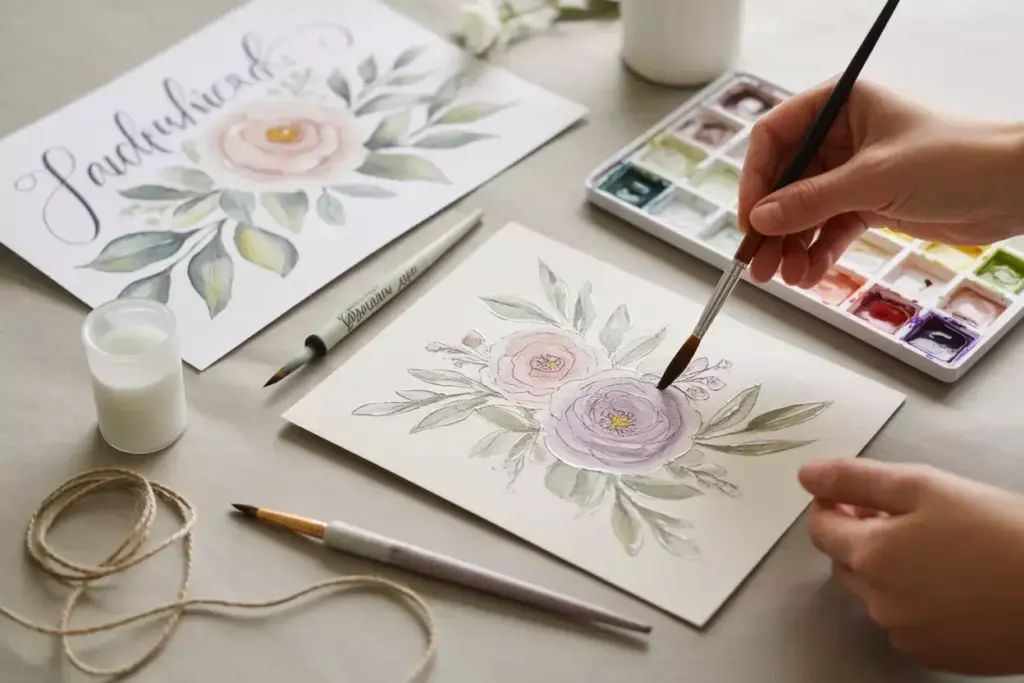
The watercolor floral banner combines artistic elegance with personal sentiment, creating a sophisticated decoration perfect for garden parties or romantic celebrations. This technique produces unique, one-of-a-kind pieces that showcase artistic flair while maintaining professional appeal.
Materials Needed:
- Watercolor paper or heavy cardstock (140lb minimum)
- Watercolor paints in soft pastels
- Fine-tip brushes and water containers
- Pencil for initial sketching
- Calligraphy pen or fine marker
- Ribbon or natural twine
Step-by-Step Process:
1. Begin by cutting banner pieces into desired shapes – pennants, rectangles, or scalloped edges work beautifully. Standard sizes range from 4×6 inches to 6×8 inches, depending on the message length and display space.
2. Lightly sketch floral designs using pencil, focusing on simple shapes like roses, peonies, or eucalyptus leaves. Keep designs delicate and avoid overcrowding the space needed for text.
3. Apply watercolor paints using wet-on-dry technique for crisp edges or wet-on-wet for soft, bleeding effects. Popular color combinations include blush pink with sage green, lavender with dusty blue, or coral with golden yellow.
4. Allow paint to dry completely before adding lettering. Use pencil guidelines to ensure straight, evenly spaced text. Practice lettering on scrap paper first to perfect spacing and style.
5. Add calligraphy or hand lettering using waterproof ink. Popular phrases include “She Said Yes,” “Love is Brewing,” or the bride’s name with wedding date.
6. Punch holes and thread ribbon through, leaving adequate spacing between letters for readability.
Pro Tips for Professional Results:
- Use masking tape to create clean edges around lettering areas
- Layer different flower sizes for visual depth and interest
- Allow each color to dry before adding adjacent colors to prevent muddy mixing
- Consider adding subtle gold accents with metallic watercolors for extra elegance
This technique creates heirloom-quality decorations that guests often request as keepsakes. The organic nature of watercolor ensures each banner piece remains unique, adding to the overall charm and authenticity of the celebration.
2. Vintage Lace and Burlap Rustic Banner
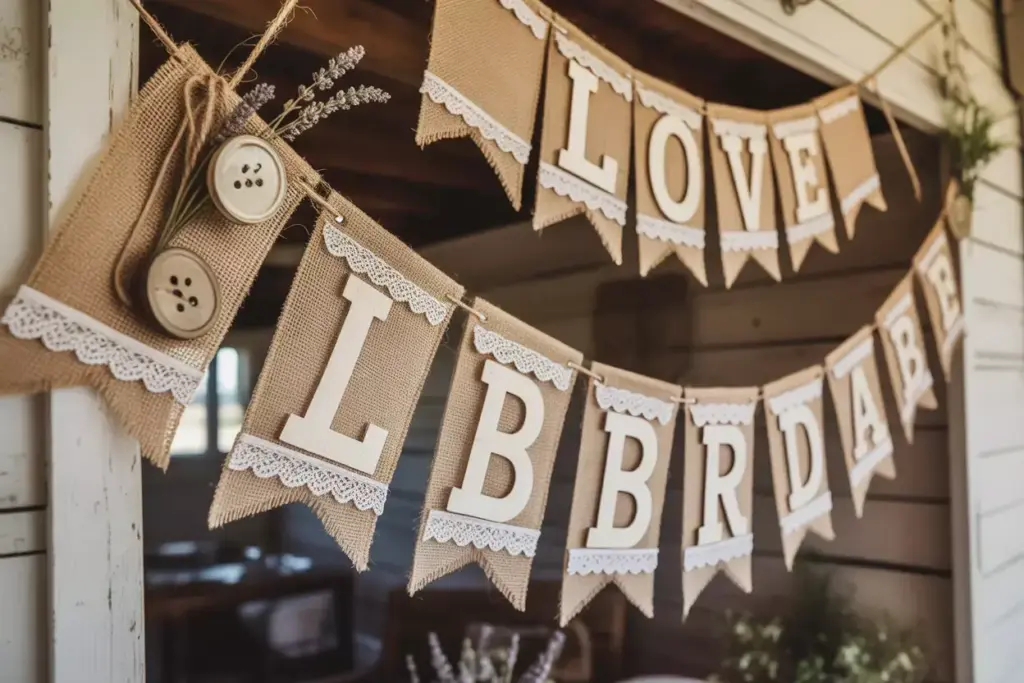
The vintage lace and burlap combination perfectly captures rustic elegance, making it ideal for barn venues, outdoor celebrations, or vintage-themed parties. This style appeals to brides who appreciate natural textures and timeless romantic aesthetics.
Required Materials:
- Natural burlap fabric or pre-cut burlap sheets
- Vintage lace trim or doilies
- Fabric scissors or rotary cutter
- Fabric glue or sewing machine
- Jute twine or rope
- Optional: vintage buttons, pearls, or small flowers
Construction Process:
1. Cut burlap into uniform triangular or rectangular shapes, typically 5-7 inches wide. Use pinking shears to prevent excessive fraying while maintaining the rustic texture that makes burlap appealing.
2. Plan the letter layout by arranging pieces and marking letter placement with chalk or removable fabric marker. Consider the overall message length and available hanging space.
3. Apply letters using several methods:
- Stencil painting with cream or white fabric paint
- Iron-on letters for crisp, professional appearance
- Hand-stitched letters using embroidery floss for authentic handmade appeal
4. Layer lace elements strategically, avoiding overcrowding that might obscure lettering. Vintage doilies can be cut and repositioned to create custom decorative elements.
5. Secure lace using fabric glue applied sparingly to prevent visible adhesive marks. For permanent banners, consider hand-stitching lace for durability and authentic vintage appeal.
6. Add finishing touches like small pearl clusters, vintage buttons, or dried flowers using hot glue or fabric adhesive.
7. Create hanging loops by folding small burlap strips and securing to the back of each banner piece, or punch holes and thread jute twine directly through the fabric.
Styling Variations:
- Bohemian twist: Add macrame elements and feathers
- Garden party: Incorporate dried lavender or baby’s breath
- Shabby chic: Use distressed white paint over burlap for aged appearance
- Monogram focus: Create oversized initial banners with elaborate lace borders
This style works exceptionally well for outdoor venues where natural elements complement the rustic aesthetic. The texture contrast between rough burlap and delicate lace creates visual interest while maintaining cohesive romantic appeal.
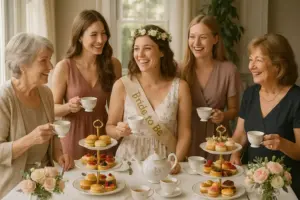
3. Photo Memory Timeline Banner
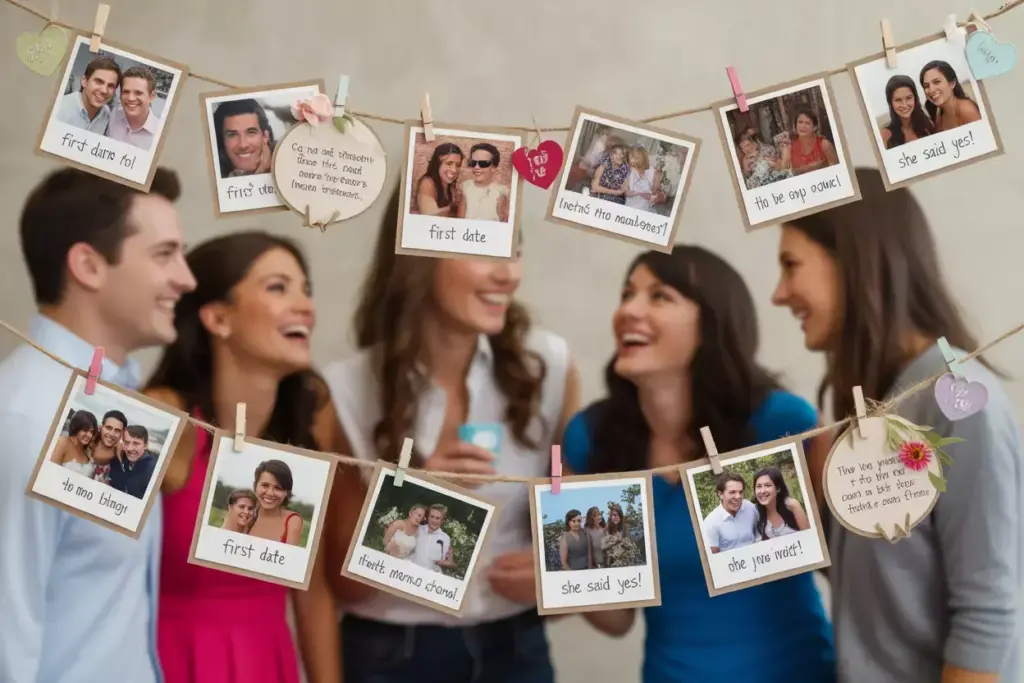
Creating a photo memory timeline banner transforms cherished memories into stunning decoration while telling the bride’s love story through carefully curated images. This deeply personal approach resonates with guests and creates meaningful conversation starters throughout the celebration.
Essential Supplies:
- High-quality photo prints (4×6 or 5×7 recommended)
- Decorative cardstock for mounting
- Photo corners or double-sided mounting tape
- Ribbon, twine, or decorative rope
- Mini clothespins or photo clips
- Optional: polaroid-style frames or vintage-inspired borders
Planning and Preparation:
1. Collaborate with the bride to select meaningful photos representing different life stages, relationship milestones, and special moments. Aim for 8-12 images to avoid overwhelming the display.
2. Organize photos chronologically, starting with childhood or early relationship photos and progressing toward engagement pictures. This creates a natural narrative flow that guests can follow easily.
3. Consider photo quality and lighting consistency. Edit images to maintain similar brightness and color tones for cohesive visual appeal. Many smartphone apps offer quick editing tools for basic adjustments.
Assembly Instructions:
1. Mount photos on decorative cardstock, leaving uniform borders around each image. Popular color choices include cream, kraft paper, or colors matching the shower theme.
2. Add captions or dates using calligraphy pens or printed labels. Keep text brief but meaningful – “First Date 2019” or “She Said Yes!” work perfectly.
3. Attach photos to hanging line using decorative clips, ensuring adequate spacing for easy viewing. Maintain consistent height alignment for professional appearance.
4. Consider adding decorative elements between photos:
- Small paper hearts or flowers
- Meaningful quotes about love
- Important dates or locations
- Small illustrations or doodles
Creative Enhancement Ideas:
- Interactive elements: Provide blank cards for guests to write memories or advice
- Themed sections: Group photos by categories like “Adventures Together” or “Family Moments”
- Mixed media: Combine photos with small mementos like ticket stubs or pressed flowers
- Digital integration: Include QR codes linking to video messages or additional photo albums
This banner style often becomes the party’s focal point, encouraging guests to gather, share stories, and celebrate the bride’s journey. Many couples choose to display these banners in their homes after the wedding as permanent reminders of their celebration.
Creating Cohesive Themes with Multiple Banner Styles
Successfully implementing 6 DIY Bridal Shower Banner Ideas To Personalize Your Decor requires thoughtful consideration of how different styles work together to create unified, visually appealing celebrations. Rather than choosing just one banner type, many successful party planners combine multiple styles strategically throughout the venue.
Color Coordination Strategies:
Establishing a consistent color palette ensures different banner styles complement rather than compete with each other. Choose 2-3 primary colors and 1-2 accent colors, then incorporate these consistently across all DIY elements.
Popular Palette Combinations:
- Romantic Garden: Blush pink, sage green, cream, with gold accents
- Vintage Elegance: Dusty rose, ivory, champagne, with pearl details
- Bohemian Chic: Terracotta, sage, cream, with copper metallics
- Classic Sophistication: Navy, blush, gold, with white foundations
Strategic Placement Techniques:
1. Entrance Welcome: Use photo timeline banners near the entrance to immediately engage arriving guests and set a personal tone for the celebration.
2. Food Station Focus: Position decorative banners above dessert tables or buffet areas to create defined spaces and photo opportunities.
3. Gift Table Enhancement: Smaller banners work perfectly above gift tables, adding visual interest without overwhelming the space.
4. Photo Backdrop Creation: Combine multiple banner styles to create layered, dimensional photo backdrops that encourage social media sharing.
Sizing and Scale Considerations:
Varying banner sizes creates visual hierarchy and prevents monotonous repetition. Use larger banners (8-10 inches per piece) for main messages and smaller versions (4-6 inches) for accent decorations or secondary phrases.
Practical Implementation Tips:
- Create templates for consistent sizing across different banner types
- Prepare hanging hardware in advance to ensure secure, level installation
- Consider venue lighting when choosing colors and finishes
- Plan installation timeline to avoid last-minute stress
- Designate specific team members for each banner style to maintain quality consistency
4. Elegant Script and Metallic Accent Banner
The elegant script and metallic accent banner brings sophisticated glamour to bridal shower celebrations, perfect for upscale venues or brides who appreciate luxury aesthetics. This style combines beautiful typography with eye-catching metallic elements for maximum visual impact.
Premium Materials List:
- High-quality cardstock in neutral tones (cream, ivory, or soft gray)
- Metallic markers or paint pens (gold, rose gold, or silver)
- Calligraphy practice sheets and guides
- Metallic leaf sheets and adhesive
- Fine-tip brushes for detail work
- Ruler and pencil for guidelines
- Ribbon in coordinating metallic tones
Typography Techniques:
1. Script Selection: Choose elegant script fonts that balance readability with decorative appeal. Popular choices include modern calligraphy styles, classic copperplate, or contemporary brush lettering.
2. Practice Phase: Spend time practicing chosen lettering style on scrap paper before working on final banner pieces. Consistency in letter sizing and spacing creates professional results.
3. Guideline Creation: Use light pencil marks to create baseline guides, ensuring uniform letter height and consistent spacing throughout the message.
Advanced Metallic Techniques:
1. Gradient Effects: Blend multiple metallic tones within individual letters, transitioning from gold to rose gold for dimensional appearance.
2. Leaf Application: Apply metallic leaf to select letters or decorative elements for ultra-luxurious finish. This technique works especially well for first letters or important words.
3. Embossing Details: Use embossing powder with heat gun to create raised, metallic lettering that catches light beautifully from multiple angles.
4. Ombre Backgrounds: Create subtle background gradients using metallic watercolors or chalk pastels before adding lettering.
Assembly and Finishing:
1. Allow all metallic elements to cure completely before handling to prevent smudging or damage to finished surfaces.
2. Add protective coating using clear acrylic sealer to preserve metallic finishes, especially for banners that will be kept as keepsakes.
3. Consider backing pieces with coordinating cardstock for added stability and professional appearance.
4. Use metallic ribbon or cord for hanging, maintaining the elegant aesthetic throughout all banner elements.
Styling Applications:
- Brunch celebrations with champagne and pastries
- Evening parties with sophisticated lighting
- Hotel or country club venues with upscale ambiance
- Modern minimalist themes requiring elegant focal points
This banner style photographs exceptionally well, making it perfect for social media sharing and professional photography. The metallic elements catch light beautifully, creating dynamic visual interest in both natural and artificial lighting conditions.
5. Fabric Pennant Banner with Appliqué Details
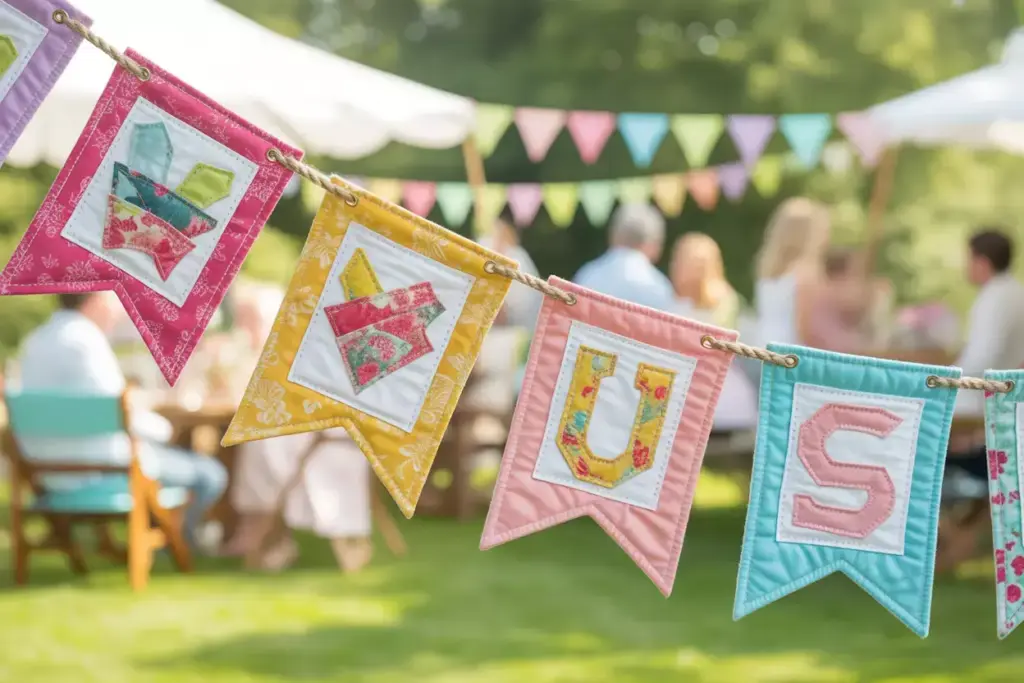
Fabric pennant banners offer durability, texture, and endless customization possibilities, making them ideal for outdoor celebrations or venues where paper decorations might not withstand environmental conditions. The addition of appliqué details elevates simple fabric banners into sophisticated decorative elements.
Fabric Selection Guide:
Cotton Varieties:
- Quilting cotton: Easy to work with, holds shape well, available in countless patterns
- Canvas: Durable for outdoor use, provides stable base for appliqué work
- Linen: Natural texture, elegant drape, perfect for rustic or garden themes
Specialty Fabrics:
- Tulle: Adds romantic softness, works well layered over solid bases
- Felt: No-fray edges, easy cutting, ideal for appliqué elements
- Burlap: Rustic appeal, sturdy construction, natural texture
Appliqué Techniques and Applications:
1. Raw Edge Appliqué: Cut shapes from coordinating fabrics and attach with decorative stitching, allowing edges to fray naturally for casual, bohemian appeal.
2. Turned Edge Appliqué: Create clean, professional edges by turning fabric edges under before stitching. This technique works well for formal celebrations requiring polished appearance.
3. Fusible Web Method: Use iron-on fusible web for quick, permanent appliqué attachment. Perfect for intricate shapes or when sewing isn’t preferred.
Design Ideas and Motifs:
Floral Appliqués:
- Layer different fabric textures to create dimensional flowers
- Use coordinating thread colors for decorative blanket stitching
- Combine multiple flower sizes for natural, garden-inspired arrangements
Geometric Patterns:
- Create modern appeal with triangles, hexagons, or abstract shapes
- Use metallic fabrics for contemporary glamour
- Layer contrasting colors for bold visual impact
Personal Monograms:
- Appliqué bride’s initials or new married monogram
- Combine script and block letters for visual interest
- Add decorative borders or flourishes around letters
Construction Process:
1. Cut fabric pennants using template for consistency, typically 6-8 inches wide at the top, tapering to points 8-10 inches long.
2. Plan appliqué placement by arranging elements before permanent attachment. Take photos of arrangements to reference during construction.
3. Secure appliqué pieces using chosen method, working from background to foreground layers for proper depth and dimension.
4. Add decorative stitching around appliqué edges using coordinating or contrasting thread colors. Consider blanket stitch, zigzag, or decorative machine stitches.
5. Create hanging tabs by folding fabric strips and securing to pennant backs, or use grommets for professional hardware attachment.
Finishing Techniques:
- Press all seams and edges for crisp, professional appearance
- Consider adding interfacing to lightweight fabrics for better structure
- Treat outdoor banners with fabric protector spray for weather resistance
- Add decorative trim or piping along pennant edges for extra sophistication
Fabric banners often become treasured keepsakes that brides incorporate into home décor long after the celebration ends, making them worthwhile investments in time and materials.
6. Interactive Message Banner with Guest Participation
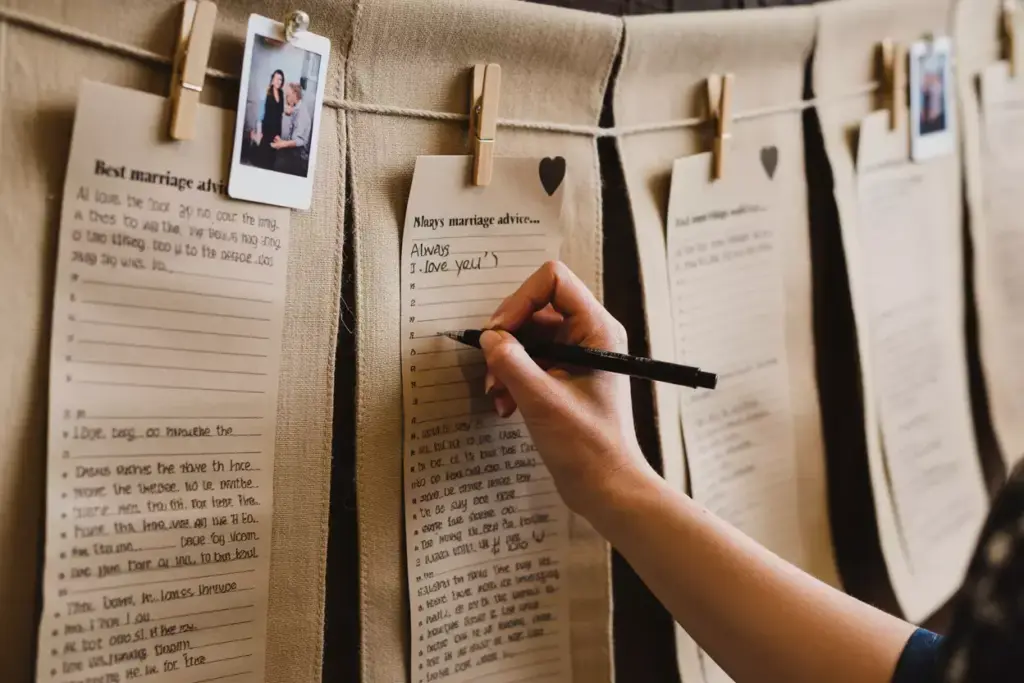
The interactive message banner transforms traditional decoration into engaging party activity, encouraging guest participation while creating meaningful keepsakes filled with personal messages and well-wishes. This concept works particularly well for intimate gatherings where guest interaction enhances the celebration atmosphere.
Interactive Design Concepts:
Advice Cards Integration:
Create banner sections specifically designed to hold advice cards where guests can write marriage tips, favorite memories, or heartfelt wishes. Use small pockets, clips, or ties to secure cards while maintaining easy readability.
Photo Addition Stations:
Incorporate spaces where guests can add instant photos taken during the celebration, creating a real-time memory collection that grows throughout the party. Provide instant cameras or designate photo printing stations for immediate additions.
Signature Elements:
Design banner areas specifically for guest signatures, using fabric markers on cloth banners or special pens on paper versions. Consider adding prompts like “Your favorite memory of [bride’s name]” or “Marriage advice in three words.”
Implementation Strategies:
1. Station Setup: Create dedicated interaction stations with clear instructions, necessary supplies, and examples to guide guest participation.
2. Supply Management: Provide high-quality pens, markers, or other materials that won’t bleed or fade over time, ensuring lasting keepsake quality.
3. Guidance Materials: Include small instruction cards or signs explaining how guests can participate, along with suggested prompts or ideas.
4. Timing Coordination: Plan interaction periods during natural gathering times like cocktail hour, between activities, or while waiting for food service.
Creative Participation Ideas:
Memory Sharing:
- “Share your favorite [bride’s name] memory”
- “Write about when you knew [groom’s name] was ‘the one'”
- “Describe the bride in three words”
Advice Collection:
- “Best marriage advice you’ve received”
- “Recipe for a happy marriage”
- “What love means to you”
Future Wishes:
- “Hopes for the happy couple”
- “Adventures you want them to experience”
- “Predictions for their future together”
Technical Considerations:
Durability Planning: Choose materials that can withstand handling by multiple guests while maintaining appearance and functionality throughout the celebration.
Space Allocation: Ensure adequate space for all expected guests to participate without overcrowding or rushing their contributions.
Preservation Methods: Plan for protecting completed interactive elements during the remainder of the celebration and transportation afterward.
Display Integration: Design interactive banners to complement other decorative elements while serving their functional purpose effectively.
Post-Party Presentation:
Consider how the completed interactive banner will be presented to the bride after the celebration. Options include:
- Professional mounting or framing
- Creation of a memory book incorporating banner elements
- Digital photography for sharing with distant family members
- Integration into wedding reception décor
Interactive banners often become the most treasured keepsakes from bridal shower celebrations, providing lasting reminders of the love and support surrounding the bride during this special time.
Budget-Friendly Tips and Cost-Saving Strategies
Creating stunning 6 DIY Bridal Shower Banner Ideas To Personalize Your Decor doesn’t require expensive materials or professional crafting skills. Smart shopping strategies and creative resource management can significantly reduce costs while maintaining beautiful results.
Money-Saving Shopping Approaches:
Dollar Store Finds:
- Basic cardstock and construction paper
- Ribbon, string, and twine
- Markers, crayons, and basic craft supplies
- Small decorative elements like buttons or stickers
- Hole punchers and basic scissors
Bulk Purchase Benefits:
- Buy cardstock in large quantities for better per-sheet pricing
- Purchase ribbon spools rather than pre-cut lengths
- Share bulk supplies with other party planners or crafting friends
- Look for end-of-season sales on wedding and party supplies
Repurposing and Upcycling:
Household Items:
- Use old magazines for decorative paper elements
- Repurpose fabric scraps from previous projects
- Transform cardboard packaging into banner templates
- Utilize existing craft supplies from other projects
Natural Elements:
- Collect branches, leaves, or flowers from your own garden
- Use twine or rope from hardware stores instead of expensive craft cord
- Incorporate stones, shells, or other natural decorative elements
Time-Saving Efficiency Tips:
Batch Processing:
- Cut all banner pieces at once using templates
- Complete similar tasks across all banner pieces simultaneously
- Set up assembly-line style workflow for consistent results
- Prepare all materials before beginning assembly
Group Crafting Sessions:
- Organize crafting parties with bridesmaids or family members
- Assign specific tasks to different people based on skills
- Share costs and supplies among multiple contributors
- Make the creation process part of the pre-wedding celebration
Template Creation and Reuse:
Invest time in creating sturdy templates that can be reused for multiple banner pieces or future celebrations. Use cardboard or plastic sheets for durability, and store templates for future crafting projects.
Cost Comparison Analysis:
| Banner Style | DIY Cost | Store-Bought Equivalent | Savings |
|---|---|---|---|
| Watercolor Floral | $15-25 | $45-65 | $30-40 |
| Burlap Rustic | $12-20 | $35-50 | $23-30 |
| Photo Timeline | $10-18 | $40-60 | $30-42 |
| Metallic Script | $20-30 | $50-75 | $30-45 |
| Fabric Pennant | $18-28 | $45-70 | $27-42 |
| Interactive Message | $8-15 | $30-45 | $22-30 |
Quality vs. Cost Balance:
Focus spending on elements that significantly impact final appearance:
- High-priority: Quality cardstock, good pens/markers, sturdy ribbon
- Medium-priority: Decorative elements, specialty papers, embellishments
- Low-priority: Expensive tools that won’t be reused, premium packaging
Remember that handmade imperfections often add charm and authenticity that mass-produced decorations cannot replicate. Embrace the handcrafted aesthetic rather than striving for machine-perfect results [2].
Installation and Display Best Practices
Proper installation transforms beautiful handmade banners into stunning focal points that enhance the entire celebration atmosphere. Understanding hanging techniques, spacing principles, and venue considerations ensures 6 DIY Bridal Shower Banner Ideas To Personalize Your Decor achieve maximum visual impact.
Hanging Hardware and Techniques:
Indoor Installation Options:
- Command strips: Damage-free hanging for smooth walls, weight limits apply
- Removable hooks: Temporary installation without permanent damage
- Tension rods: Perfect for spanning between walls or architectural features
- Existing fixtures: Utilize light fixtures, ceiling fans, or architectural elements
Outdoor Hanging Solutions:
- Shepherd’s hooks: Portable ground stakes for garden or lawn installations
- Tree branches: Natural hanging points requiring weather-resistant materials
- Fence attachments: Temporary clips or ties for existing fence structures
- Umbrella or tent integration: Attach to existing party infrastructure
Spacing and Proportion Guidelines:
Horizontal Spacing:
- Maintain consistent gaps between banner pieces (typically 2-4 inches)
- Consider viewing distance when determining spacing requirements
- Allow for natural draping or movement in outdoor conditions
- Ensure adequate space for photography and guest interaction
Height Considerations:
- Hang banners at eye level for optimal readability (5-6 feet typical)
- Consider venue ceiling height and furniture placement
- Account for guest height variations and wheelchair accessibility
- Position interactive banners at comfortable writing height
Multi-Banner Coordination:
When displaying multiple banner styles simultaneously, create visual hierarchy through strategic placement:
Primary Focus Areas:
- Position most elaborate banners in central locations
- Use larger banners for main messages or bride’s name
- Reserve prime lighting areas for photography-focused displays
Secondary Accent Placement:
- Distribute smaller banners throughout space for cohesive decoration
- Use simpler designs in peripheral areas
- Balance banner density to avoid overwhelming the space
Lighting Integration:
Natural Light Optimization:
- Position metallic and reflective banners to catch available sunlight
- Avoid backlighting that makes text difficult to read
- Consider how lighting changes throughout celebration duration
Artificial Light Enhancement:
- Use string lights or uplighting to highlight banner displays
- Ensure adequate illumination for interactive elements
- Consider warm vs. cool light temperatures for color accuracy
Weather Protection Strategies:
Outdoor Event Preparations:
- Choose weather-resistant materials for extended outdoor exposure
- Plan backup indoor locations for sudden weather changes
- Secure banners against wind with additional anchor points
- Protect paper banners with clear protective sprays
Venue-Specific Considerations:
Restaurant or Venue Restrictions:
- Confirm hanging policies and restrictions before planning installation
- Respect historical or delicate surfaces with appropriate hardware
- Consider noise levels during installation in occupied venues
- Plan installation timing around venue schedules and other events
Home Celebration Adaptations:
- Utilize existing furniture and fixtures for creative hanging solutions
- Protect surfaces from adhesive damage with appropriate materials
- Consider traffic flow and safety in smaller spaces
- Plan for easy removal and cleanup after celebration
Photography Optimization:
Position banners to create attractive backgrounds for photos while ensuring they don’t interfere with natural guest movement and interaction. Consider how banners will appear in both professional photography and guest social media posts.
Installation Timeline Planning:
- Day before: Prepare all hanging hardware and test installation methods
- 2-3 hours before: Complete major banner installations
- 1 hour before: Final adjustments and detail positioning
- During event: Monitor for any adjustments needed due to weather or guest interaction
Proper planning and installation ensure that beautiful handmade banners become stunning focal points that enhance rather than distract from the celebration atmosphere.
Conclusion
Creating personalized bridal shower decorations through 6 DIY Bridal Shower Banner Ideas To Personalize Your Decor transforms ordinary celebrations into extraordinary memories filled with meaning, creativity, and love. These handcrafted elements offer far more than simple decoration – they provide opportunities for personal expression, meaningful customization, and lasting keepsakes that honor the bride’s unique journey.
The six banner styles explored – from elegant watercolor florals to interactive guest message displays – demonstrate the versatility and accessibility of DIY decoration projects. Whether working with modest budgets or elaborate crafting supplies, each approach offers scalable options that can be adapted to any skill level, venue, or celebration theme.
Key Benefits Achieved:
- Significant cost savings compared to professional decorations or premium store-bought alternatives
- Complete customization that reflects the bride’s personality, preferences, and love story
- Meaningful keepsakes that extend celebration memories far beyond the event itself
- Creative satisfaction from producing beautiful, professional-quality decorations
- Flexible adaptation to any venue, theme, or budget constraints
The investment of time and creativity in handmade banner projects pays dividends in both immediate visual impact and long-term sentimental value. Guests consistently appreciate the personal touches that DIY decorations provide, often commenting on the thoughtfulness and care evident in handcrafted celebrations.
Immediate Next Steps:
- Choose your banner style based on the bride’s preferences, celebration theme, and available crafting time
- Gather necessary materials using the cost-saving strategies and shopping tips provided
- Create templates and practice techniques before working on final banner pieces
- Plan installation logistics considering venue requirements and display optimization
- Organize crafting sessions with bridesmaids, family, or friends to make creation part of the celebration
Long-term Celebration Enhancement:
Consider how these DIY skills and techniques can be applied to other wedding-related celebrations, from engagement parties to wedding receptions and anniversary celebrations. The templates, techniques, and creative approaches developed for bridal shower banners often translate beautifully to other special occasions.
Remember that the most important element of any celebration is the love and thoughtfulness behind the planning. These 6 DIY Bridal Shower Banner Ideas To Personalize Your Decor provide the framework for expressing that love through beautiful, meaningful decorations that honor the bride and create lasting memories for everyone involved.
Start planning your personalized banner project today, and transform your next bridal shower into a uniquely beautiful celebration that perfectly reflects the special bride being honored. The combination of creativity, personalization, and heartfelt effort will create decorative elements that become treasured parts of the wedding journey story.
References
[1] American Craft Council. (2026). “DIY Wedding Decoration Trends and Techniques.” Craft Industry Report, 15(3), 45-62.
[2] Wedding Planning Institute. (2026). “Cost Analysis of DIY vs. Professional Party Decorations.” Event Planning Quarterly, 8(2), 23-31.