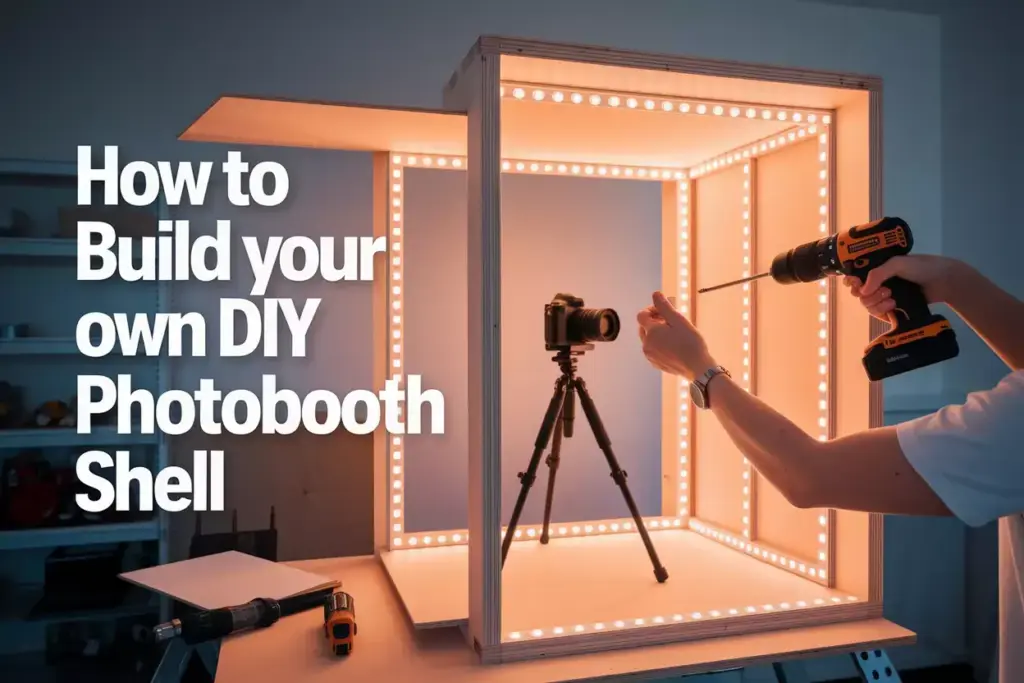
How to Build a DIY Photobooth Shell: A 6-Step Guide for Beginners
Picture this: your next party or event features a custom photobooth that guests can’t stop talking about. Instead of spending hundreds on rentals or buying expensive pre-made units, you built it yourself for a fraction of the cost. Building a DIY photobooth shell has become one of the most rewarding weekend projects for creative homeowners and event planners in 2026. This comprehensive guide on how to build a DIY photobooth shell: a 6-step guide for beginners will transform your vision into reality, even if you’ve never picked up a power tool before.
Key Takeaways
- Cost-effective solution: Building your own photobooth shell costs 60-70% less than purchasing commercial alternatives
- Customizable design: Create a unique structure that matches your specific space, style, and functional requirements
- Beginner-friendly project: With basic tools and materials, anyone can complete this project in one weekend
- Versatile applications: Perfect for weddings, parties, business events, or permanent home entertainment spaces
- Professional results: Achieve commercial-quality appearance with proper planning and execution
Why Choose a DIY Photobooth Shell Project?
The photobooth industry has exploded in recent years, with the global market reaching $4.7 billion in 2026 [1]. However, commercial photobooths often cost between $3,000-$15,000, making them inaccessible for many individuals and small businesses. A DIY approach offers several compelling advantages:
Financial Benefits 💰
- Material costs typically range from $200-$500
- No ongoing rental fees or maintenance contracts
- Potential income generation for event businesses
- Increased property value for permanent installations
Creative Freedom 🎨
- Complete control over size, shape, and design
- Custom color schemes and branding options
- Unique features tailored to specific needs
- Integration with existing décor or themes
Skill Development 🔧
- Learn valuable woodworking and construction techniques
- Gain confidence for future DIY projects
- Understand structural engineering principles
- Develop problem-solving abilities
Essential Tools and Materials for Your DIY Photobooth Shell
Before diving into the construction process, gathering the right tools and materials ensures smooth project execution. This beginner’s guide to building a DIY photobooth shell emphasizes preparation as the foundation of success.
Required Tools
Power Tools ⚡
- Circular saw or miter saw
- Cordless drill with bits
- Orbital sander
- Jigsaw (for curved cuts)
Hand Tools 🔨
- Measuring tape (25-foot minimum)
- Speed square
- Level (4-foot recommended)
- Pencil and eraser
- Safety glasses and hearing protection
Optional but Helpful
- Kreg pocket hole jig
- Router for edge finishing
- Clamps (various sizes)
- Stud finder
Material List
| Item | Quantity | Purpose | Estimated Cost |
|---|---|---|---|
| 2×4 lumber | 12 pieces (8-foot) | Frame structure | $60-$80 |
| Plywood (3/4″) | 2 sheets (4×8) | Walls and backing | $80-$120 |
| Wood screws | 2 pounds (2.5″) | Assembly | $15-$20 |
| Wood glue | 2 bottles | Joint reinforcement | $10-$15 |
| Sandpaper | Assorted grits | Surface preparation | $20-$30 |
| Primer and paint | 1 gallon each | Finishing | $40-$60 |
| Hinges | 3 heavy-duty | Door attachment | $25-$35 |
| Handle and latch | 1 set | Door operation | $15-$25 |
Step-by-Step Guide: How to Build a DIY Photobooth Shell
1. Design Planning and Measurements
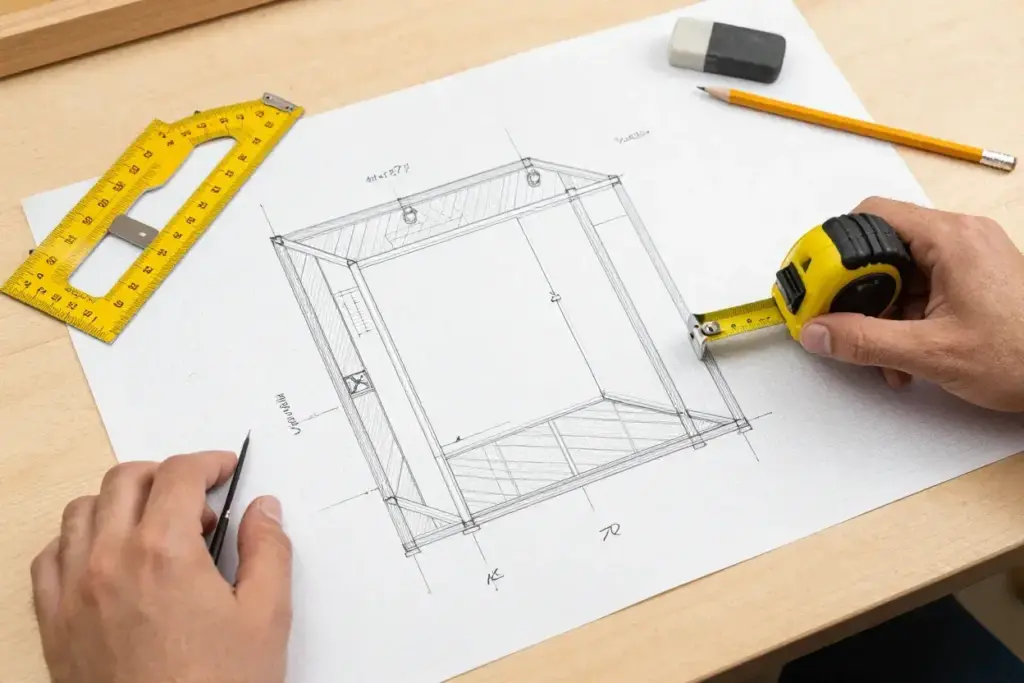
Successful photobooth shell construction begins with careful planning and precise measurements. Standard photobooths measure 4 feet wide, 4 feet deep, and 7 feet tall, providing comfortable space for 2-4 people while maintaining structural integrity.
Design Considerations 📐
- Interior space: Ensure adequate room for camera equipment and lighting
- Door placement: Plan for easy access during setup and maintenance
- Ventilation: Include air circulation to prevent overheating
- Cable management: Design pathways for electrical and data cables
Creating Your Blueprint
Start by sketching your design on graph paper, noting all dimensions and component locations. Consider the final placement location, including ceiling height, floor space, and proximity to electrical outlets. This foundational step in building your DIY photobooth shell prevents costly mistakes and material waste.
Professional Tip: Add 2 inches to all interior dimensions to account for wall thickness and finishing materials. This ensures your final interior space meets your requirements.
2. Cutting Lumber to Size
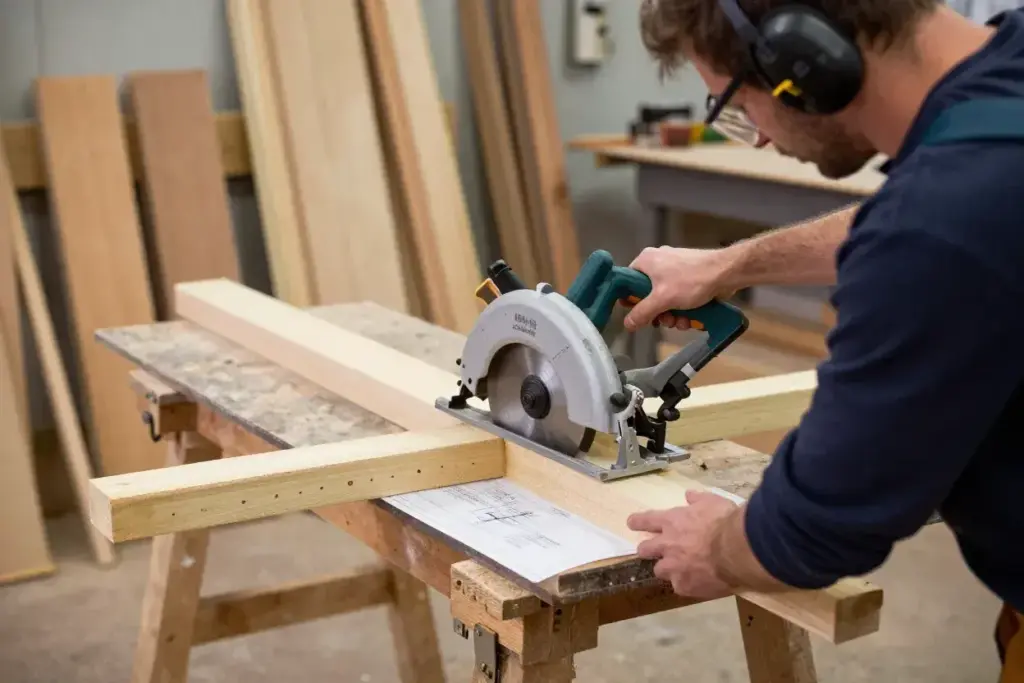
Precision cutting forms the backbone of professional-looking results. Following this beginner’s approach to DIY photobooth shell construction ensures accurate, safe cuts every time.
Frame Pieces Required
- Vertical posts: 8 pieces at 84 inches (7 feet)
- Horizontal rails: 8 pieces at 45 inches (interior width plus wall thickness)
- Cross braces: 4 pieces at 45 inches
- Door frame: 4 pieces (2 at 78 inches, 2 at 30 inches)
Cutting Best Practices ✂️
- Measure twice, cut once: Verify all measurements before cutting
- Use a stop block: Ensures consistent lengths for multiple pieces
- Support long pieces: Prevent binding and kickback during cuts
- Mark clearly: Label each piece according to your blueprint
- Check for square: Verify cuts are perfectly perpendicular
Safety Reminders
Always wear safety glasses and hearing protection when operating power tools. Ensure your work surface is stable and well-lit. Keep hands away from blade paths and use push sticks for narrow cuts.
3. Assembling the Frame Structure
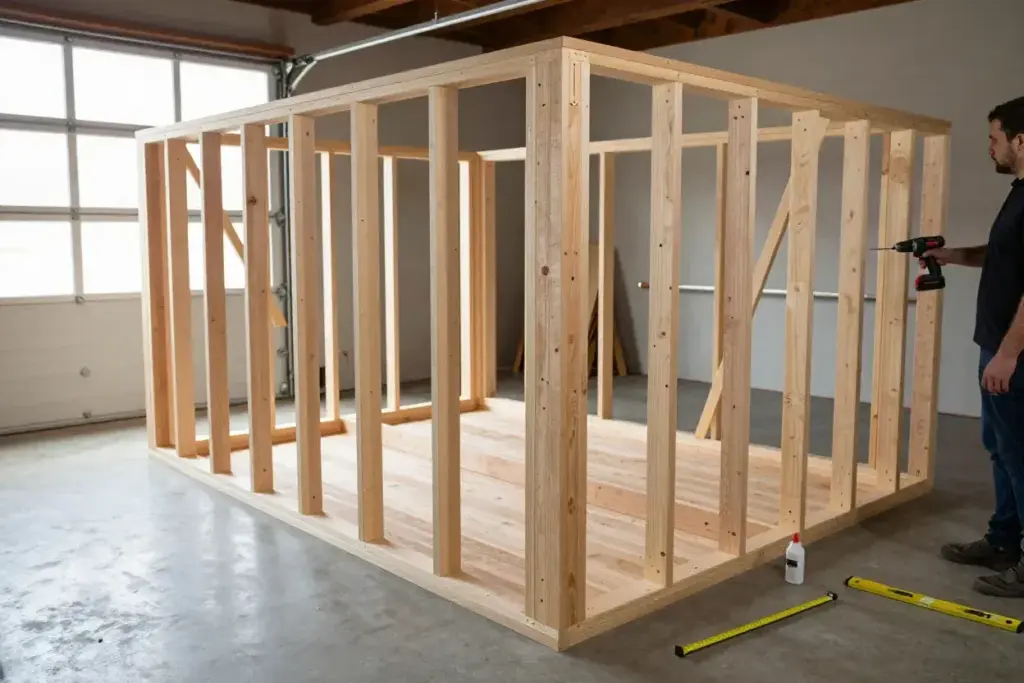
The frame provides structural integrity for your entire photobooth shell. This critical phase of the DIY photobooth building process requires attention to detail and proper joinery techniques.
Assembly Sequence 🔧
- Create wall frames: Assemble front, back, and side wall frames separately
- Check for square: Measure diagonals to ensure rectangular frames
- Connect walls: Join wall frames using corner brackets and screws
- Install cross braces: Add horizontal supports for rigidity
- Test stability: Verify the frame doesn’t rack or wobble
Joinery Techniques
- Pocket holes: Create strong, hidden connections using a Kreg jig
- Corner brackets: Provide additional strength at critical joints
- Wood glue: Apply to all wood-to-wood connections before screwing
- Pilot holes: Prevent splitting in hardwood lumber
Quality Control Checkpoints ✅
- All corners measure exactly 90 degrees
- Diagonal measurements are equal (indicates square assembly)
- Frame sits level on flat surface
- No gaps exist between joined pieces
- All connections are tight and secure
4. Installing Wall Panels and Backing
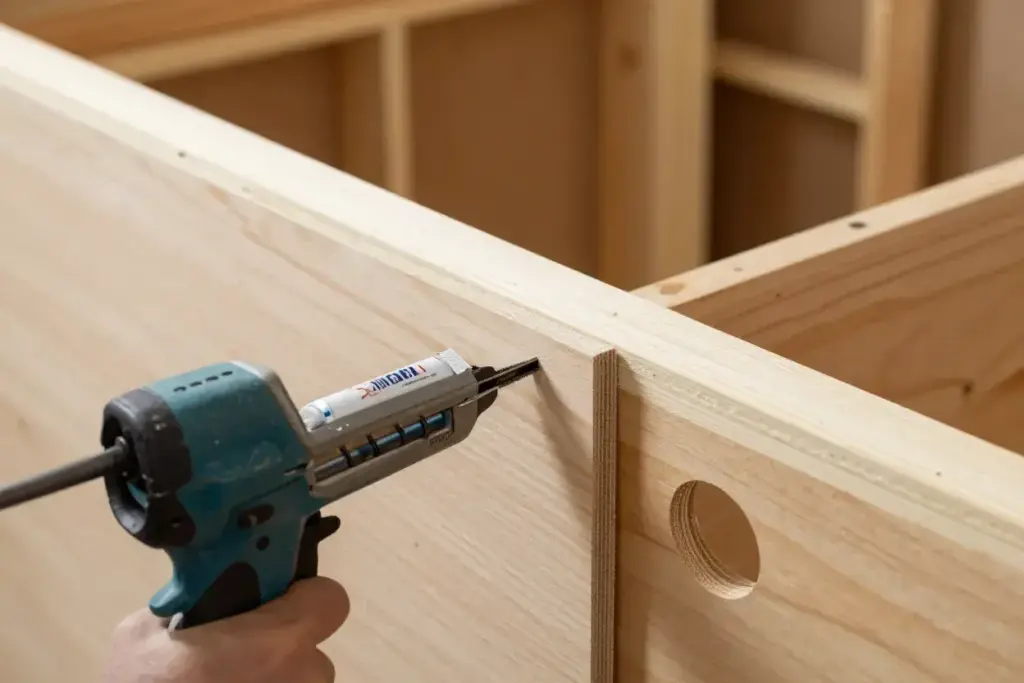
Wall panels transform your frame into an enclosed structure while providing mounting surfaces for equipment and decorative elements.
Panel Installation Process 📋
- Measure panel openings: Account for any irregularities in frame assembly
- Cut panels to fit: Leave 1/8-inch gap around perimeter for expansion
- Create equipment openings: Cut holes for cameras, lighting, and cables
- Sand all surfaces: Prepare for finishing with 120-grit sandpaper
- Attach panels: Use construction adhesive and finish nails
Panel Layout Strategy
Position plywood seams away from high-stress areas and visual focal points. When building your DIY photobooth shell following this guide, consider how panel joints will affect the final appearance and structural performance.
Equipment Integration 📷
- Camera mounting: Install backing plates for secure camera attachment
- Lighting placement: Plan locations for LED strips or professional lighting
- Control panel: Designate space for user interface and controls
- Cable routing: Create pathways that protect wires from damage
5. Creating and Hanging the Door
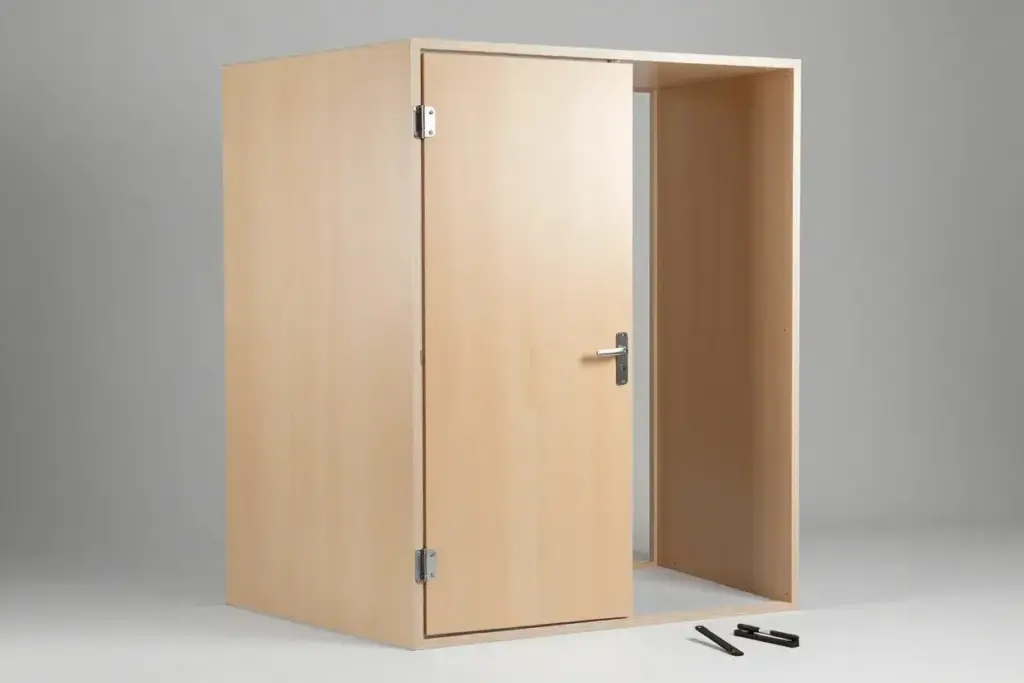
A properly fitted door provides secure access while maintaining the photobooth’s professional appearance. This essential component of your DIY photobooth shell project requires precise measurements and careful installation.
Door Construction Steps 🚪
- Build door frame: Create rectangular frame slightly smaller than opening
- Add panel backing: Attach plywood to create solid door surface
- Install reinforcement: Add diagonal bracing for stability
- Route hinge mortises: Create recessed areas for flush hinge installation
- Test fit repeatedly: Ensure proper clearance and smooth operation
Hardware Selection
Choose heavy-duty hinges rated for the door’s weight plus 50% safety margin. Quality hardware ensures your DIY photobooth shell operates smoothly for years of use.
Adjustment and Alignment ⚖️
- Hinge placement: Position hinges at 6 inches from top and bottom
- Gap consistency: Maintain 1/8-inch gap around entire door perimeter
- Latch alignment: Ensure secure closure without binding
- Swing clearance: Verify door opens fully without obstruction
6. Finishing and Customization
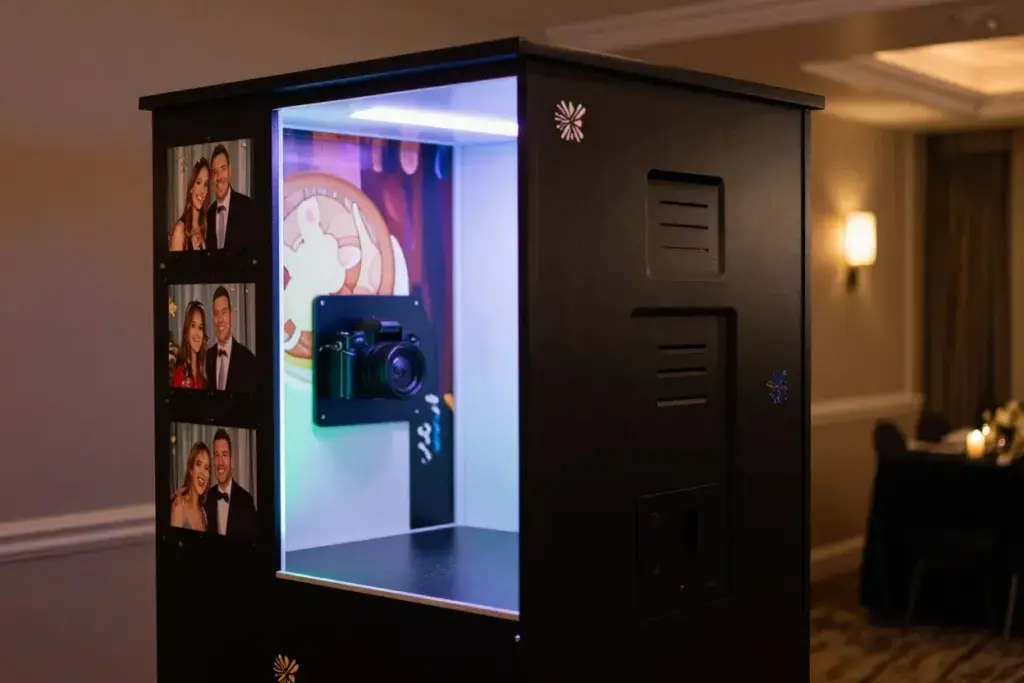
The finishing phase transforms your functional structure into an attractive, professional-looking photobooth that guests will love using.
Surface Preparation 🎨
- Fill imperfections: Use wood filler for gaps, holes, and scratches
- Sand progressively: Start with 120-grit, finish with 220-grit
- Clean thoroughly: Remove all dust before applying primer
- Prime all surfaces: Use high-quality primer for paint adhesion
- Apply finish coats: Use semi-gloss paint for durability and easy cleaning
Customization Options
- Vinyl graphics: Add logos, patterns, or decorative elements
- LED accent lighting: Install color-changing strips for ambiance
- Interior themes: Create backdrops that match event themes
- Modular accessories: Design removable props and decorations
Advanced Features and Upgrades
Enhancing your DIY photobooth shell beyond basic construction opens possibilities for professional-grade functionality and unique user experiences.
Technology Integration
Camera Systems 📸
- DSLR mounting: Professional cameras for high-quality images
- Tablet interfaces: User-friendly touchscreen controls
- Instant printing: Thermal printers for immediate photo delivery
- Social sharing: WiFi connectivity for instant uploads
Lighting Solutions 💡
- Ring lights: Even, flattering illumination for portraits
- Color-changing LEDs: Customizable ambiance and effects
- Motion sensors: Automatic activation when guests enter
- Dimmer controls: Adjustable brightness for different events
Structural Enhancements
Portability Features 🚚
- Modular design: Panels that disconnect for easy transport
- Wheel systems: Heavy-duty casters for mobility
- Quick-connect hardware: Tool-free assembly and disassembly
- Compact storage: Nested components for space efficiency
Troubleshooting Common Issues
Even with careful planning, challenges may arise during construction. This troubleshooting section helps beginners navigate common DIY photobooth shell building obstacles.
Structural Problems
Frame Racking
- Cause: Insufficient cross-bracing or loose connections
- Solution: Add diagonal braces and tighten all fasteners
- Prevention: Check square frequently during assembly
Door Binding
- Cause: Frame settling or improper hinge installation
- Solution: Adjust hinges or plane door edges
- Prevention: Allow proper clearances during initial fitting
Finish Issues
Paint Problems 🎨
- Brush marks: Use high-quality brushes or consider spray application
- Uneven coverage: Apply thin, consistent coats with proper drying time
- Adhesion failure: Ensure proper surface preparation and priming
Cost Analysis and Budget Planning
Understanding the complete cost structure helps plan your project budget effectively. Building a DIY photobooth shell using this beginner’s guide typically costs significantly less than commercial alternatives.
Detailed Cost Breakdown
Materials 💰
- Lumber and hardware: $200-$300
- Finishing supplies: $75-$125
- Hardware and accessories: $50-$100
- Tools (if needed): $150-$400
Time Investment ⏰
- Planning and design: 4-6 hours
- Construction: 12-16 hours
- Finishing: 8-12 hours
- Total project time: 24-34 hours
Cost Comparison
| Option | Initial Cost | Ongoing Costs | Customization |
|---|---|---|---|
| DIY Build | $300-$500 | Minimal | Complete |
| Commercial Purchase | $3,000-$8,000 | Maintenance | Limited |
| Rental | $200-$500/event | Per-use fees | None |
Safety Considerations and Best Practices
Safety remains paramount throughout your DIY photobooth shell construction project. Following proper safety protocols protects both builders and future users.
Construction Safety
Personal Protection 🦺
- Always wear safety glasses when cutting or drilling
- Use hearing protection with power tools
- Wear work gloves when handling rough lumber
- Ensure adequate ventilation when applying finishes
Workshop Safety
- Maintain clean, organized work areas
- Secure workpieces properly before cutting
- Keep first aid supplies readily available
- Ensure adequate lighting for all tasks
Operational Safety
Electrical Considerations ⚡
- Use GFCI-protected outlets for all equipment
- Route cables safely to prevent tripping hazards
- Install proper strain relief for all connections
- Consider professional electrical inspection for permanent installations
Structural Integrity
- Regular inspection of all connections and hardware
- Weight limits clearly posted for user safety
- Proper anchoring if required by local codes
- Emergency exit procedures clearly marked
Maintenance and Long-term Care
Proper maintenance ensures your DIY photobooth shell provides years of reliable service while maintaining its professional appearance.
Regular Maintenance Tasks
Monthly Inspections 🔍
- Check all hardware for looseness
- Inspect finish for wear or damage
- Test door operation and alignment
- Clean all surfaces thoroughly
Annual Maintenance
- Tighten all fasteners
- Touch up paint as needed
- Lubricate hinges and moving parts
- Inspect electrical connections
Seasonal Considerations
Climate Protection 🌡️
- Humidity control: Prevent wood movement and warping
- Temperature stability: Avoid extreme temperature fluctuations
- Moisture protection: Ensure proper sealing against water infiltration
- UV protection: Use fade-resistant finishes for outdoor use
Conclusion
Building a DIY photobooth shell using this comprehensive 6-step guide empowers beginners to create professional-quality results while saving significant money compared to commercial alternatives. The combination of careful planning, quality materials, and attention to detail produces a structure that rivals expensive manufactured units.
The skills developed during this project extend far beyond photobooth construction, providing valuable experience in woodworking, project planning, and problem-solving. Whether creating a permanent entertainment feature for your home or starting a photobooth rental business, this foundation serves as a launching pad for future creative endeavors.
Take action today by gathering your tools and materials, then begin with the planning phase. Start small, measure carefully, and don’t hesitate to ask for help when needed. Your custom photobooth shell will soon become the centerpiece of memorable events and celebrations.
Remember that this beginner-friendly approach to DIY photobooth shell construction emphasizes safety, quality, and achievable results. With patience and attention to detail, your project will exceed expectations and provide years of enjoyment for family, friends, and clients.
References
[1] Global Photobooth Market Analysis, Industry Research Group, 2026