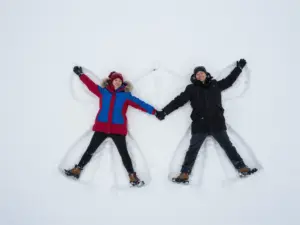
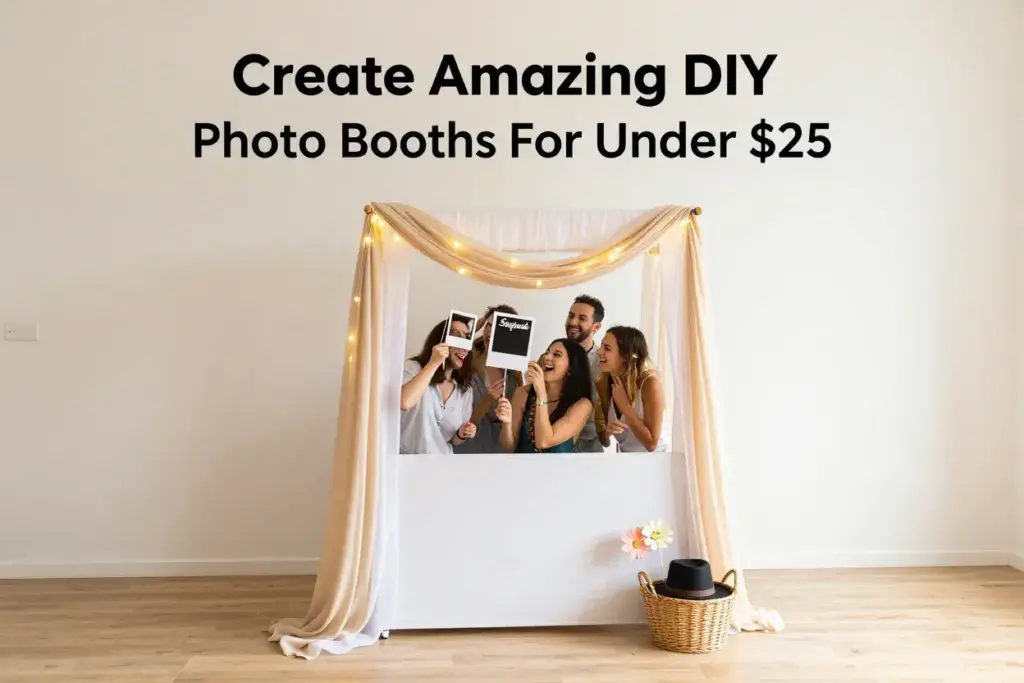
7 Brilliant Homemade Photo Booths That Cost Almost Nothing
Picture this: guests at a party huddled together, laughing hysterically as they pose with oversized mustaches and silly signs, creating memories that will last a lifetime. The magic happens not because of an expensive professional setup, but thanks to a creative homemade photo booth that cost less than a dinner for two. In 2026, as event costs continue to rise, savvy hosts are discovering that 7 brilliant homemade photo booths that cost almost nothing can transform any gathering into an unforgettable experience without breaking the bank.
Disclosure: This post contains affiliate links. As an Amazon Associate, we earn from qualifying purchases, and at no extra cost to you.
Key Takeaways
- Budget-friendly creativity beats expensive equipment – most DIY photo booths cost under $20 to create
- Simple materials like cardboard, fabric, and string lights can produce professional-looking results
- Customization options are endless, allowing perfect matching to any party theme or occasion
- Setup time ranges from 15 minutes to 2 hours, making them perfect for last-minute events
- Reusable components mean one investment can serve multiple future celebrations
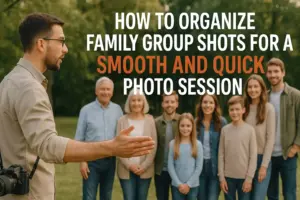
Why Choose DIY Photo Booths Over Professional Rentals?
The average professional photo booth rental costs between $400-$800 for a single event [1]. Meanwhile, creating homemade alternatives delivers the same entertainment value at a fraction of the cost. DIY photo booths offer complete creative control, allowing hosts to match their exact vision and theme.
Beyond cost savings, homemade setups provide flexibility that rental companies cannot match. Need to adjust the backdrop height? Simply move a few props. Want to change the theme halfway through the party? Swap out decorations in minutes.
“The best photo booths aren’t about expensive equipment – they’re about creating an environment where people feel comfortable being silly and spontaneous.” – Event Planning Expert
Essential Materials for Budget Photo Booth Success
Before diving into specific designs, understanding the basic materials makes building any of these 7 brilliant homemade photo booths that cost almost nothing much easier:
Core Structural Elements
- Cardboard boxes (free from appliance stores)
- PVC pipes ($5-10 for basic frame)
- Tension rods ($3-8 each)
- Command strips ($5-12 per pack)
Backdrop Materials
- Fabric remnants ($2-15 per yard)
- Plastic tablecloths ($1-3 each)
- Streamers ($1-2 per pack)
- Balloons ($3-8 per bag)
Lighting Options
- String lights ($5-15)
- LED strips ($8-20)
- Desk lamps (repurpose existing)
- Phone flashlights (free!)
Props and Accessories
- Poster board ($1-2 per sheet)
- Markers and paint ($5-15 total)
- Wooden dowels ($3-6 for prop sticks)
- Printed signs ($2-5 for ink/paper)
1. The Classic Balloon Wall Backdrop
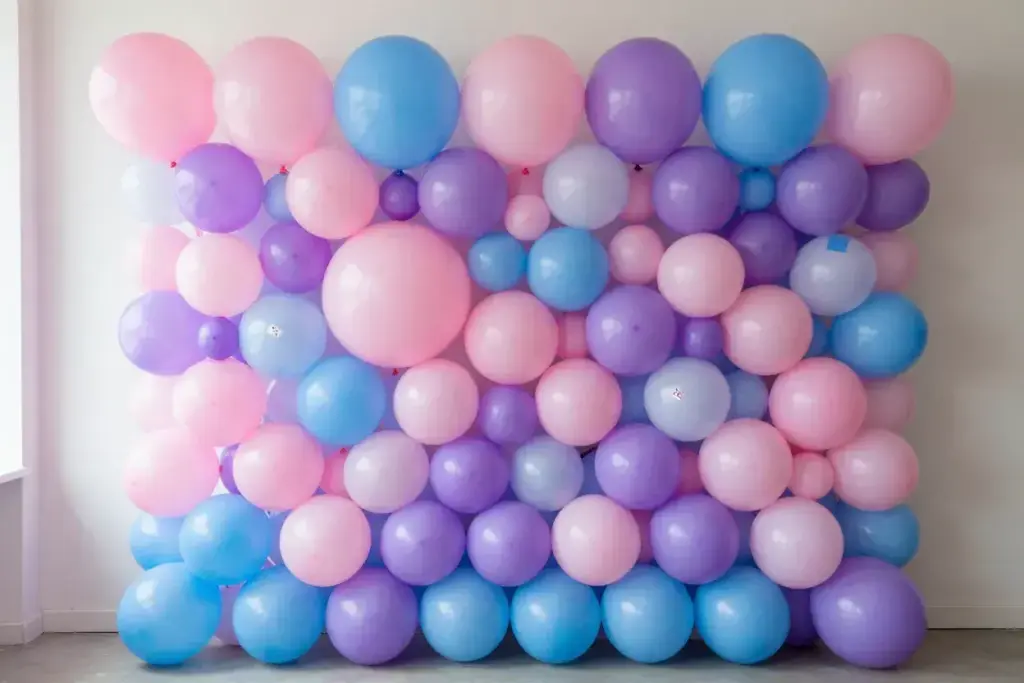
Cost: $8-15 | Setup Time: 30 minutes | Difficulty: Beginner
Transform any wall into a vibrant photo opportunity using nothing but balloons and tape. This design works exceptionally well for birthday parties, graduations, and celebrations where bright colors enhance the festive atmosphere.
Materials Needed:
- 50-100 balloons in coordinating colors
- Double-sided tape or balloon dots
- Balloon pump (optional but recommended)
Step-by-Step Instructions:
- Choose the location – Select a wall with good lighting, preferably near a window or lamp
- Plan the pattern – Sketch a simple design on paper first (clusters, gradients, or geometric shapes work well)
- Inflate balloons – Mix sizes for visual interest (standard 11-inch and 5-inch balloons)
- Start from the center – Work outward to ensure even coverage
- Layer strategically – Place larger balloons in back, smaller ones in front for depth
Pro Tips:
- Use balloon sizing tools (or glasses/bowls) to ensure consistent sizes
- Create color gradients by slowly transitioning between shades
- Leave small gaps between balloons for visual texture
- Take test photos during setup to check lighting and composition
This balloon wall approach exemplifies how homemade photo booths that cost almost nothing can rival professional setups through creative material use.
2. Rustic Fabric and String Light Frame
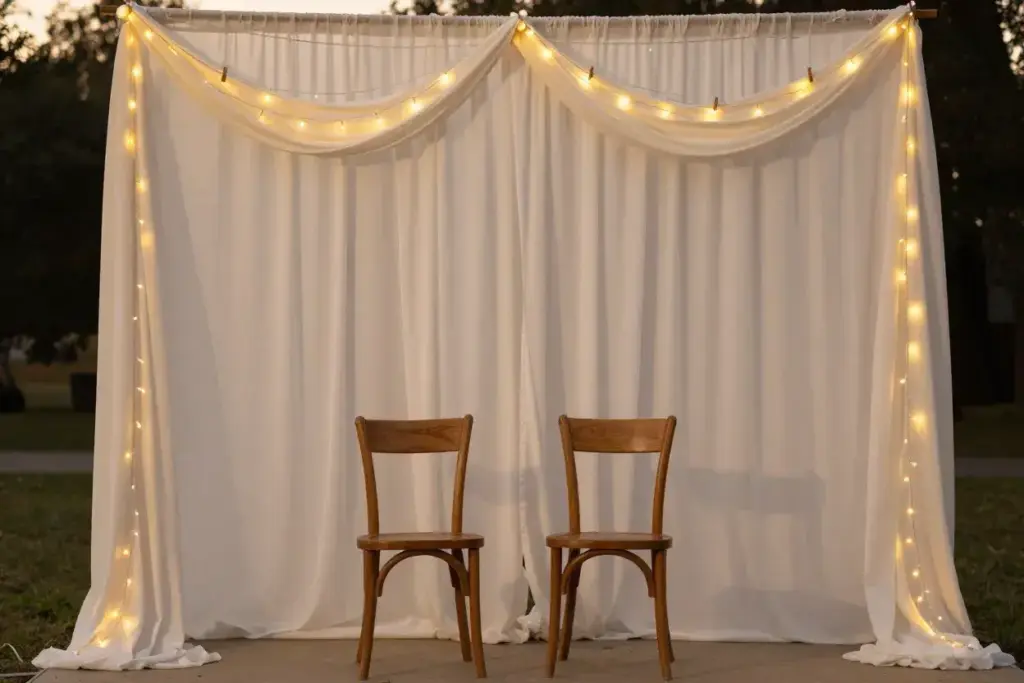
Cost: $12-25 | Setup Time: 45 minutes | Difficulty: Intermediate
Perfect for weddings, baby showers, or any event requiring elegant ambiance, this design combines flowing fabric with warm lighting to create magazine-worthy photos.
Materials Needed:
- 2 tension rods or PVC pipes
- 3-5 yards of lightweight fabric (chiffon, tulle, or cotton work well)
- 2-3 strings of warm white LED lights
- Clothespins or fabric clips
- 2 chairs or stands for support
Assembly Process:
- Create the frame – Position chairs 6-8 feet apart, place tension rods between them
- Hang the fabric – Drape fabric over the rod, creating gentle curves and folds
- Add lighting – Weave string lights through fabric folds, securing with clothespins
- Test and adjust – Take sample photos, adjusting fabric placement for optimal lighting
- Secure everything – Ensure all elements are stable for guest use
Customization Ideas:
- Seasonal themes – Use autumn leaves, winter snowflakes, or spring flowers as accents
- Color coordination – Match fabric colors to wedding or party themes
- Texture mixing – Combine different fabric types for visual depth
- Height variation – Create multiple hanging levels for dynamic composition
The soft lighting and flowing fabric demonstrate how brilliant homemade photo booths can achieve professional aesthetics through thoughtful material selection.
3. Cardboard Frame Photo Portal
Cost: $5-12 | Setup Time: 60 minutes | Difficulty: Beginner-Intermediate
Large cardboard boxes transform into impressive photo frames that guests can pose within. This design works particularly well for themed parties where the frame itself becomes part of the decoration.
Required Supplies:
- 1-2 large cardboard boxes (refrigerator or washing machine boxes work perfectly)
- Box cutter or craft knife
- Duct tape or packing tape
- Paint, markers, or decorative paper
- Ruler and pencil for measuring
Construction Steps:
- Plan the opening – Mark a rectangle or fun shape on the cardboard (leave 6-8 inches on all sides)
- Cut carefully – Use a sharp blade, cutting from the inside to avoid visible marks
- Reinforce edges – Apply tape to all cut edges to prevent tearing
- Decorate the frame – Paint, cover with paper, or add themed decorations
- Create stability – Add cardboard feet or lean against a wall securely
Theme Variations:
- Vintage TV – Paint to look like an old television set
- Picture frame – Add ornate decorative elements around the border
- Holiday themes – Christmas present, Halloween pumpkin, Easter egg
- Movie themes – Create frames that match party themes (superhero logos, movie posters)
Stability Tips:
- Weight the bottom with books or sandbags if freestanding
- Create angled supports from extra cardboard pieces
- Position against walls when possible for additional support
- Test with actual people before the event begins
4. Streamer Curtain Backdrop
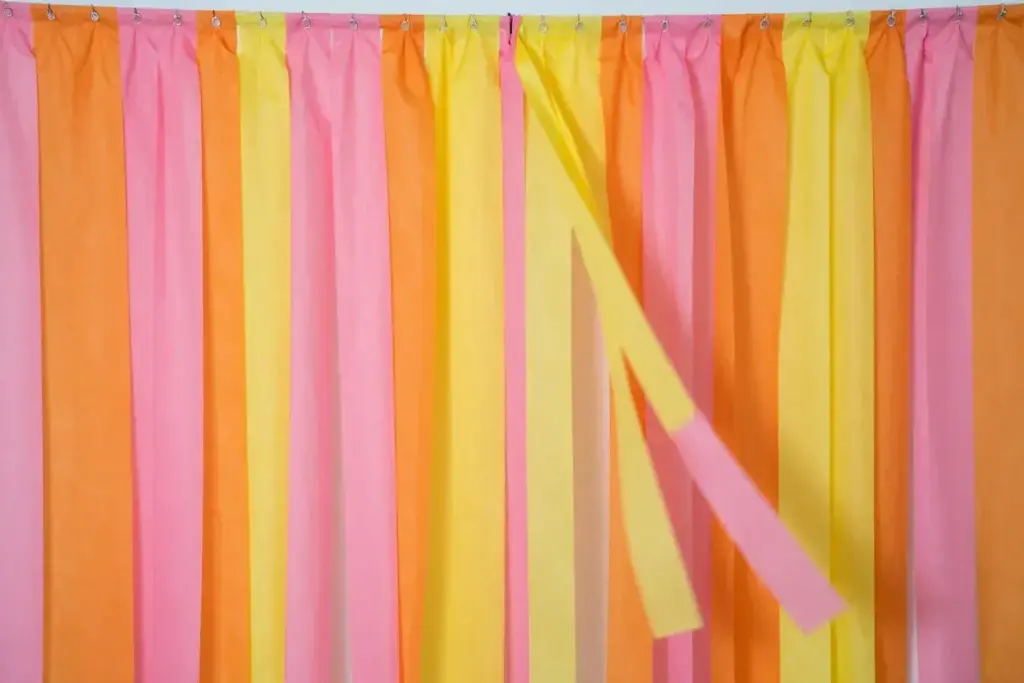
Cost: $3-8 | Setup Time: 20 minutes | Difficulty: Beginner
Sometimes the simplest solutions prove most effective. Streamers create dynamic, colorful backgrounds that photograph beautifully and require minimal setup time.
Shopping List:
- 6-10 rolls of streamers in coordinating colors
- Tape or thumbtacks
- Scissors
- Measuring tape
Quick Setup Guide:
- Measure the space – Determine backdrop width and desired height
- Plan color placement – Alternate colors or create gradients for visual interest
- Attach at the top – Secure streamers to wall, ceiling, or frame structure
- Vary the lengths – Cut streamers to different lengths for layered effect
- Test movement – Ensure streamers move naturally without tangling
Creative Enhancements:
- Metallic accents – Mix in gold or silver streamers for elegance
- Texture variety – Combine crepe paper, tissue paper, and plastic streamers
- Interactive elements – Create streamers guests can move or part for dramatic photos
- Lighting effects – Position lights behind streamers for silhouette effects
This approach showcases how 7 brilliant homemade photo booths that cost almost nothing can achieve maximum impact through strategic color and texture use.
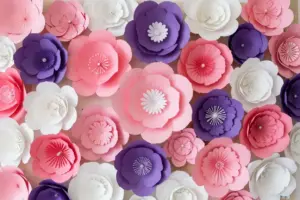
5. Flower Wall Using Paper Blooms
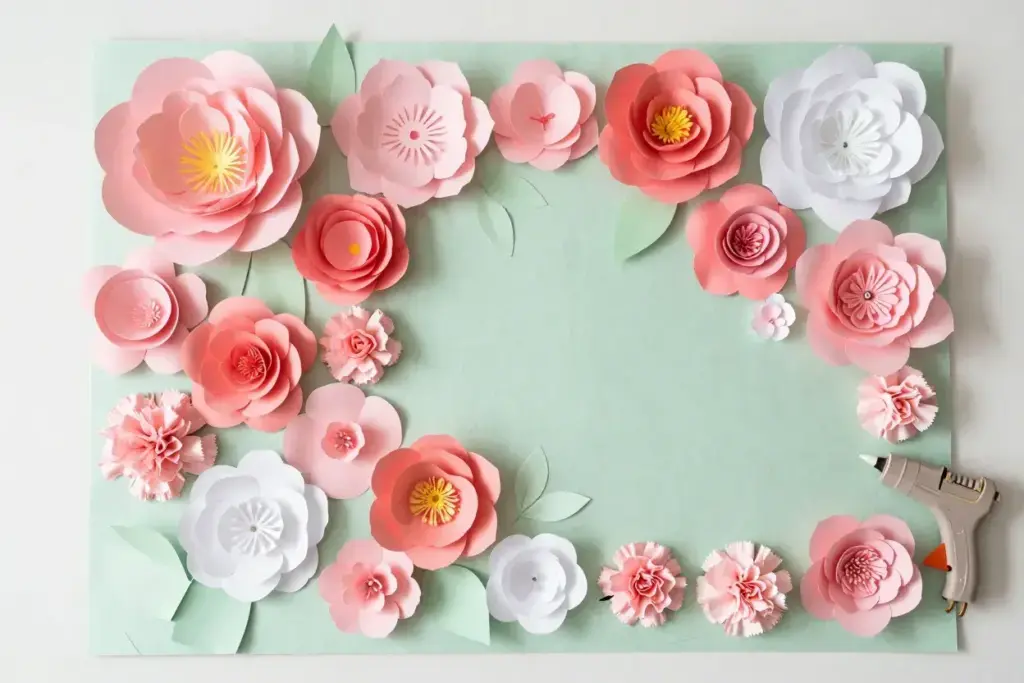
Cost: $10-20 | Setup Time: 90 minutes | Difficulty: Intermediate
Paper flowers create stunning backdrops that rival expensive fresh flower walls. This option works beautifully for weddings, bridal showers, and spring celebrations.
Materials Required:
- Colored tissue paper or crepe paper
- Scissors
- Wire or pipe cleaners
- Large poster board or foam board
- Hot glue gun and glue sticks
- Pencil for marking placement
Flower Creation Process:
- Make paper flowers – Create 15-25 flowers in various sizes using tissue paper folding techniques
- Prepare the base – Cover poster board with coordinating paper or paint
- Plan arrangement – Lay flowers on the board before gluing to test composition
- Attach flowers – Use hot glue to secure flowers, overlapping for fullness
- Add finishing touches – Fill gaps with leaves or smaller accent flowers
Flower-Making Techniques:
- Peonies – Stack 6-8 tissue paper circles, fold accordion-style, tie center, fluff layers
- Roses – Cut spiral from tissue paper circle, roll from outside in, secure with wire
- Carnations – Layer multiple tissue paper circles, scrunch center, secure with pipe cleaner
- Daisies – Cut petal shapes around tissue paper circles, layer 2-3 for fullness
Size and Color Strategy:
- Create flowers in three sizes: large (8-10 inches), medium (5-6 inches), small (3-4 inches)
- Use odd numbers of each color for natural-looking arrangements
- Include neutral colors (white, cream, light green) to balance bright hues
- Position larger flowers as focal points, smaller ones as fillers
6. Polaroid-Style Props and Frames
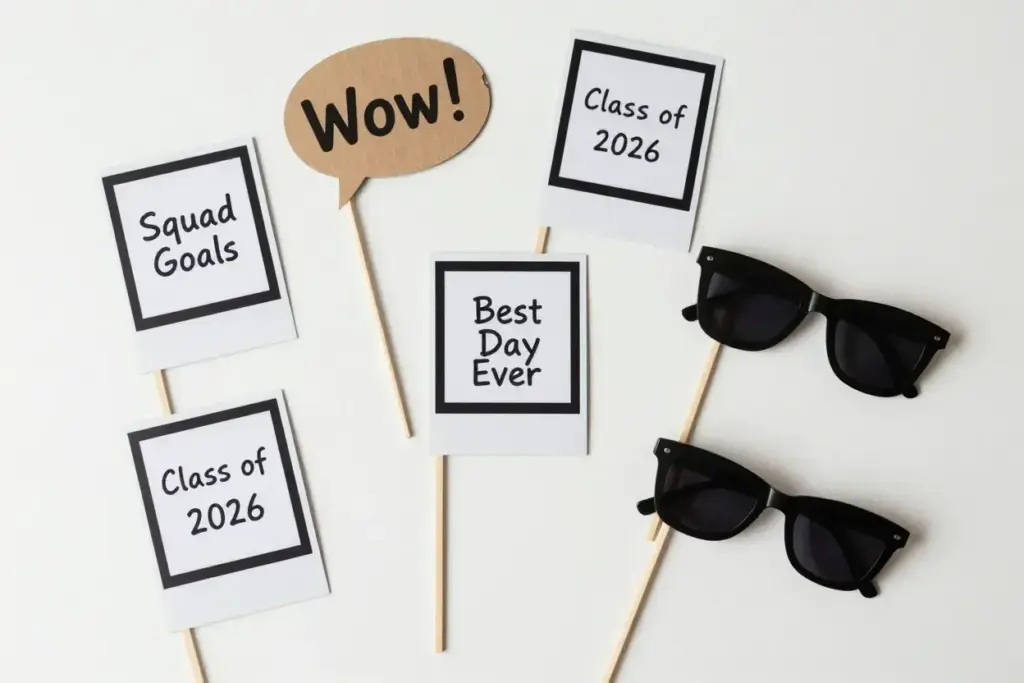
Cost: $6-15 | Setup Time: 45 minutes | Difficulty: Beginner
Instead of creating a traditional backdrop, this approach focuses on handheld props that guests can use with any background, making it one of the most versatile homemade photo booth solutions.
Supply List:
- White poster board or cardboard
- Black markers or paint
- Wooden dowels or paint stirring sticks
- Glue or tape
- Ruler and pencil
- Laminator or clear contact paper (optional)
Prop Creation Steps:
- Design polaroid frames – Draw rectangles with white borders on poster board
- Add fun messages – Write sayings, dates, or themed phrases in the white space
- Cut out carefully – Leave the center empty for faces to show through
- Attach handles – Glue dowels to the back for easy holding
- Protect if needed – Laminate or cover with contact paper for durability
Message Ideas:
- Event-specific – “Sarah’s Sweet 16,” “Class of 2026,” “Mr. & Mrs. Johnson”
- Fun phrases – “Squad Goals,” “Best Day Ever,” “Making Memories”
- Interactive – “I’m feeling…” with multiple emotion options
- Seasonal – “Summer Vibes,” “Holiday Magic,” “Spring Celebration”
Additional Prop Suggestions:
- Speech bubbles with funny sayings or blank spaces for customization
- Oversized glasses cut from cardboard and decorated
- Mustaches and lips on sticks for classic photo booth fun
- Themed accessories matching party themes (superhero masks, princess crowns)
This prop-focused approach demonstrates how brilliant homemade photo booths can work in any space without requiring dedicated backdrop areas.
7. Vintage Sheet and Fairy Light Canopy
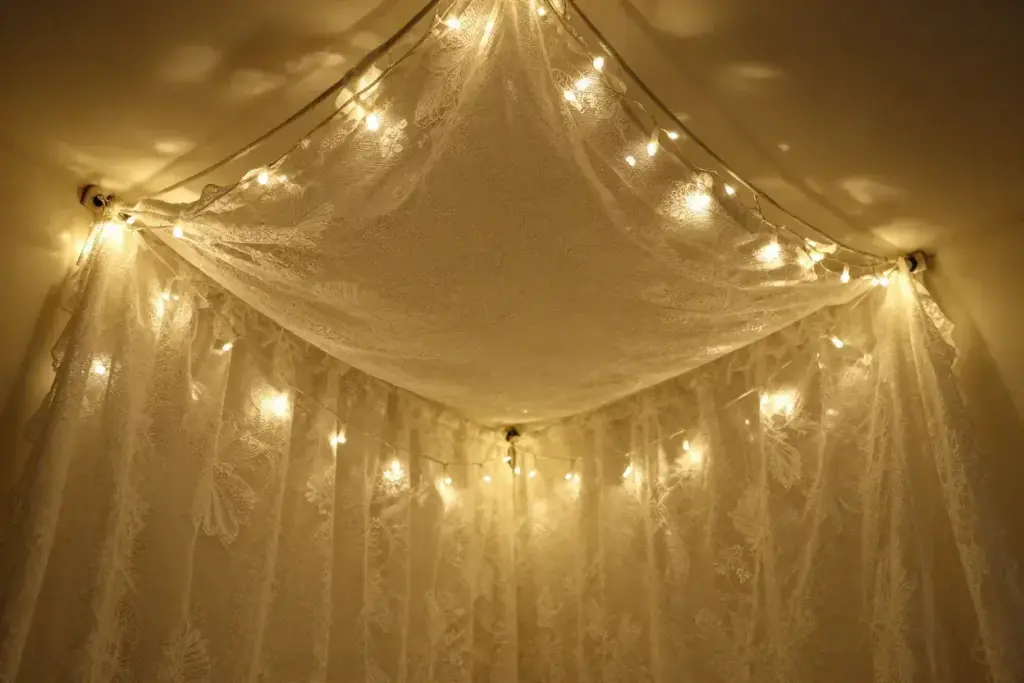
Cost: $8-18 | Setup Time: 40 minutes | Difficulty: Intermediate
Transform vintage sheets or tablecloths into an enchanting overhead canopy that creates magical lighting for photos underneath.
Materials Needed:
- 1-2 vintage sheets or large fabric pieces
- 3-4 strings of warm white fairy lights
- 4 tension rods or rope
- Clothespins or clips
- Extension cord if needed
- Ladder or step stool for setup
Installation Process:
- Plan the canopy area – Choose a corner or create a freestanding frame
- Install support structure – Set up tension rods or tie rope between anchor points
- Hang the fabric – Drape sheets to create gentle curves and pockets
- Weave in lights – Thread fairy lights through fabric folds and along edges
- Test lighting – Adjust placement for even, flattering illumination
- Secure everything – Ensure all elements are stable and safe
Lighting Placement Tips:
- Position lights to avoid harsh shadows on faces
- Create depth by placing some lights behind fabric, others in front
- Use warm white LEDs for the most flattering skin tones
- Avoid overloading electrical circuits with too many light strings
- Consider battery-operated lights for easier placement
Fabric Selection Guidelines:
- Lace creates beautiful shadow patterns when backlit
- Sheer materials diffuse light softly for flattering photos
- Textured fabrics add visual interest and depth
- Light colors reflect light better than dark materials
Safety Considerations:
- Ensure all electrical connections are secure and dry
- Keep lights away from flammable decorations
- Test the complete setup before guests arrive
- Have someone monitor the area during use
This canopy design exemplifies how 7 brilliant homemade photo booths that cost almost nothing can create professional-quality lighting through creative material use.
Lighting Tips for Professional-Looking Photos
Regardless of which design is chosen from these 7 brilliant homemade photo booths that cost almost nothing, proper lighting makes the difference between amateur snapshots and professional-quality photos.
Natural Light Optimization
- Golden hour timing – Set up near windows during late afternoon for warm, soft light
- Diffusion techniques – Hang sheer curtains to soften harsh sunlight
- Reflector use – Position white poster boards to bounce light onto subjects’ faces
- Direction matters – Avoid backlighting that creates silhouettes
Artificial Lighting Solutions
- Multiple sources – Use 2-3 light sources to eliminate harsh shadows
- Warm vs. cool – Stick to one color temperature for consistent results
- Height placement – Position lights slightly above eye level for flattering angles
- Distance adjustment – Move lights closer for brighter illumination, farther for softer effects
Common Lighting Mistakes to Avoid
- Overhead-only lighting creates unflattering shadows under eyes and noses
- Too-bright lighting washes out colors and creates harsh contrasts
- Inconsistent color temperatures mixing warm and cool lights creates color casts
- Insufficient lighting results in grainy, low-quality photos
Props and Accessories That Make the Difference
The most successful homemade photo booths combine great backdrops with engaging props that encourage creativity and interaction.
Essential Prop Categories
Classic Photo Booth Props:
- Oversized glasses and sunglasses
- Mustaches, beards, and lips on sticks
- Hats (fedoras, top hats, baseball caps, crowns)
- Signs with funny sayings or event-specific messages
Themed Accessories:
- Decade themes – 80s neon accessories, 70s disco props, 50s diner elements
- Holiday props – Santa hats, Easter bunny ears, Halloween masks
- Professional themes – Graduation caps, business ties, chef hats
- Fantasy elements – Fairy wings, superhero masks, princess tiaras
Interactive Elements:
- Chalkboards for guests to write their own messages
- Fill-in-the-blank signs like “I’m feeling ” or “My favorite thing about [event] is “
- Question prompts that encourage group participation
- Timeline elements for milestone celebrations
DIY Prop Creation Tips
Cost-Effective Materials:
- Dollar store finds – Sunglasses, plastic jewelry, small toys
- Cardboard construction – Cut shapes from boxes and paint or cover with paper
- Printable downloads – Find free templates online for classic designs
- Repurposed items – Old costume pieces, theatrical props, vintage accessories
Durability Considerations:
- Laminate paper props to prevent tearing during enthusiastic use
- Reinforce handles with extra tape or glue for heavy use
- Create multiples of popular items in case of damage
- Store properly between uses to extend prop lifespan
Setup and Positioning Strategies
Strategic placement transforms good homemade photo booth ideas into great party experiences that guests naturally gravitate toward.
Location Selection Criteria
Traffic Flow Considerations:
- Position near but not blocking main party areas
- Ensure easy access without creating bottlenecks
- Allow space for small groups to gather and wait turns
- Consider proximity to restrooms and refreshment areas
Technical Requirements:
- Electrical access for lighting and potentially music
- Stable surfaces for props and potentially cameras/phones
- Wall space or anchor points for backdrop attachment
- Good natural light if relying on window illumination
Space Planning Guidelines
Minimum Space Requirements:
- 6×8 feet for basic backdrop and posing area
- Additional 4 feet in front for photographers and waiting guests
- Side space for prop storage and organization
- Ceiling height of at least 8 feet for most backdrop designs
Traffic Management:
- Clear sight lines so guests can see when the area is available
- Defined boundaries using rope, decorations, or furniture placement
- Prop organization with designated areas for storage and return
- Queue management for popular setups at large events
Troubleshooting Common DIY Photo Booth Problems
Even the most carefully planned brilliant homemade photo booths can encounter issues during events. Preparing solutions in advance prevents minor problems from becoming major disruptions.
Structural Issues
Backdrop Falling or Shifting:
- Immediate fix – Use additional tape, clips, or weights
- Prevention – Test all connections before guests arrive
- Backup plan – Keep extra securing materials easily accessible
Lighting Problems:
- Bulbs burning out – Have replacement bulbs or backup light sources ready
- Electrical issues – Use battery-operated alternatives when possible
- Insufficient illumination – Position additional lamps or reflective surfaces
Guest Experience Challenges
Long Wait Times:
- Multiple stations – Create 2-3 smaller setups instead of one large one
- Time limits – Gently encourage groups to allow others turns
- Entertainment – Provide activities for waiting guests
Prop Management:
- Organization systems – Use baskets or designated areas for prop storage
- Damage control – Repair or replace popular items as needed
- Hygiene concerns – Provide sanitizing wipes for shared props
Cost Breakdown and Budget Planning
Understanding the true costs helps hosts choose the best options from these 7 brilliant homemade photo booths that cost almost nothing based on their specific budget constraints.
Budget Tier Comparison
| Budget Level | Cost Range | Best Options | Expected Results |
|---|---|---|---|
| Ultra-Budget | $0-$10 | Streamer backdrop, cardboard frame | Fun, colorful photos |
| Low Budget | $10-$25 | Balloon wall, fabric backdrop | Professional-looking results |
| Moderate Budget | $25-$50 | Multiple setups, premium materials | Event-quality experience |
Cost-Saving Strategies
Free and Low-Cost Materials:
- Community resources – Ask local businesses for cardboard boxes
- Borrowing items – Use friends’ fabric, lights, or tools
- Repurposing decorations – Incorporate existing party supplies
- Group purchases – Split costs with other hosts for future events
Investment Pieces:
- Quality string lights can be reused for multiple events
- Basic tools like hot glue guns serve many DIY projects
- Neutral backdrops work for various party themes
- Prop storage containers protect investments between uses
Customization Ideas for Different Events
The versatility of homemade photo booths that cost almost nothing shines when adapting designs to specific celebrations and themes.
Wedding and Anniversary Celebrations
Romantic Elements:
- Soft color palettes using blush, cream, and gold tones
- Floral accents with paper or silk flowers
- Elegant lighting with warm white string lights or candles
- Personalized props featuring the couple’s names or wedding date
Sophisticated Touches:
- Fabric choices like chiffon, lace, or silk for refined appearances
- Metallic accents using gold or silver spray paint on props
- Vintage elements incorporating antique frames or classic accessories
- Guest book integration with polaroid cameras and scrapbook stations
Children’s Birthday Parties
Age-Appropriate Designs:
- Bright, bold colors that photograph well and excite children
- Sturdy construction to withstand enthusiastic young guests
- Safe materials avoiding small parts or sharp edges
- Interactive elements that engage different age groups
Popular Themes:
- Superhero setups with cityscape backdrops and cape props
- Princess parties featuring castle backgrounds and crown accessories
- Animal themes with jungle, farm, or zoo-inspired decorations
- Sports celebrations incorporating team colors and equipment props
Holiday and Seasonal Events
Seasonal Adaptations:
- Spring celebrations with pastel colors and flower themes
- Summer parties featuring bright colors and beach-inspired props
- Fall gatherings using autumn leaves, pumpkins, and warm tones
- Winter events with snowflake decorations and cozy lighting
Holiday Specifics:
- Christmas setups with red, green, and gold color schemes
- Halloween designs featuring spooky but fun decorative elements
- New Year celebrations with metallic accents and countdown themes
- Valentine’s Day using pink, red, and heart-shaped decorations
Maintenance and Storage Solutions
Protecting investments in brilliant homemade photo booth materials ensures they can serve multiple future events successfully.
Proper Storage Techniques
Fabric and Backdrop Materials:
- Clean before storing to prevent stains from setting
- Fold carefully or roll around tubes to prevent wrinkles
- Use breathable storage like cotton bags instead of plastic
- Label clearly for easy identification during future setups
Props and Accessories:
- Organize by category in labeled boxes or containers
- Protect delicate items with tissue paper or bubble wrap
- Store in dry locations to prevent mold and deterioration
- Create inventory lists to track what’s available for future events
Reusability Planning
Versatile Design Choices:
- Neutral color schemes work for multiple event types
- Modular components that can be recombined in different ways
- Quality materials that withstand repeated use
- Adaptable themes easily customized with small changes
Upgrade Strategies:
- Start simple and add complexity over time
- Invest gradually in higher-quality materials as budgets allow
- Learn from experience about which elements work best
- Build collections of props and materials for future variety
Conclusion
Creating memorable photo experiences doesn’t require expensive equipment or professional services. These 7 brilliant homemade photo booths that cost almost nothing prove that creativity and resourcefulness can deliver results that rival costly alternatives. From simple balloon walls to elegant fabric canopies, each design offers unique advantages while maintaining budget-friendly accessibility.
The key to success lies in understanding that great photo booths combine three essential elements: attractive backdrops, proper lighting, and engaging props. By focusing on these fundamentals rather than expensive equipment, hosts can create experiences that guests remember long after the party ends.
Take Action Today:
- Choose your favorite design from the seven options based on your event type and budget
- Gather materials using the detailed shopping lists provided
- Plan your setup considering space, lighting, and guest flow
- Test everything before your event to ensure smooth operation
- Document the results to improve future photo booth creations
Remember that the most successful homemade photo booths prioritize guest experience over perfection. Embrace the DIY spirit, encourage creativity, and watch as your budget-friendly creation becomes the highlight of your celebration. With these proven designs and strategies, anyone can transform ordinary gatherings into extraordinary memory-making experiences.
References
[1] EventPlanning.com – “Photo Booth Rental Costs and Market Analysis 2026”